How to Vectorize an Image in Illustrator
How to Vectorize an Image in Illustrator?
The use of illustrators is one of the essential tools for anyone going into digital creativity. It is one of the platforms that allow individuals to create amazing designs with limitless qualities.
Vectorize image is one of the fantastic tools in illustration designs. This tool solves the problem of resizing images.
What are Vector Images?
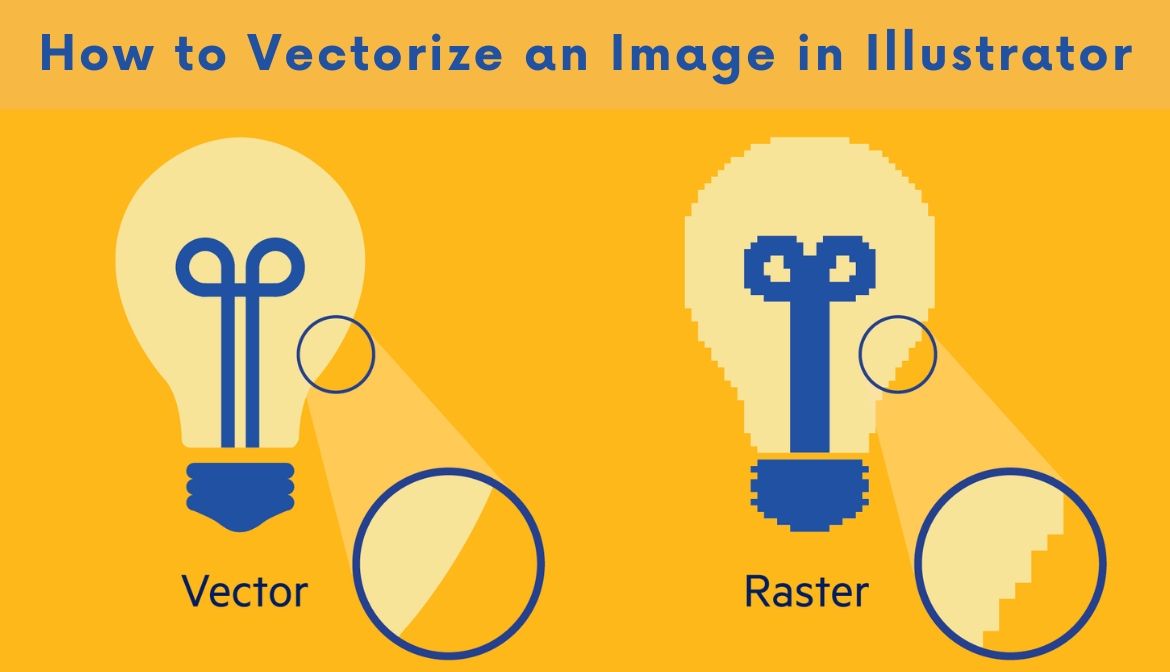
Vector images are scalable, and they are made of values instead of pixels. They are scalable because they make use of mathematical equations with definite points. The mathematical equations consist of points, lines, and curves against the traditional solid color square pixel.
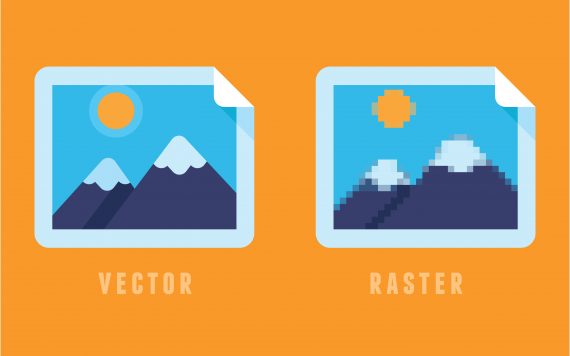
Regardless of the extent you zoom the images, the curves, points, and lines of the image will retain its smoothness. It will not go blurry; neither will you have those serrated lines at the edges of your image.
Although vector images are usually less detailed, you can use them in any size you want without losing any bit of its quality. Vector images are entirely independent of resolution.
You can find amazing design bundles across the internet.
Steps to Vectorize Image in Illustrator
The steps involved in vectorizing images in illustrators are quite easy. All you need to do is to figure out what you intend to create and follow the easy steps below.
STEP 1: Select the Image: Once you identify your intended image, the next thing is to open your illustrator and select the model. The size of the template you intend to use wouldn’t be a problem here. However, the larger the image you use, the longer the time you need to edit it.
Some images are also easier to edit and work better than others on adobe illustrators. Landscape images can prove tighter to edit than single-subject images. Also, a model with transparent or white background and lower resolution should be easier to edit.
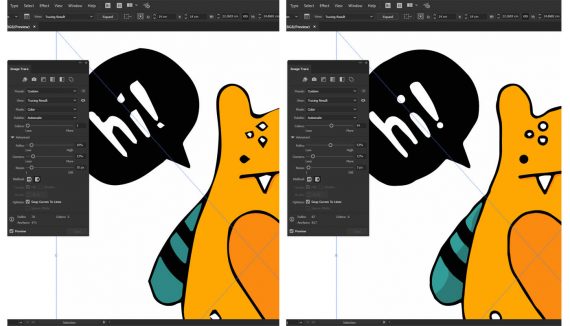
STEP 2: Choose Any of The Image Trace Tools: Image trace tools are one of the vital tools that permit the creation of vector images. It is essential in the vectorizing process because it does the bulk of work automatically. However, it is preferable to use a preset trace that is closest to the nature of the image you are editing.
There are five essential trace preset options for your images. You should learn about these options and choose the one that best suits your work. These options include;
- 3, 6, and 16 shades: They create an image output of three, six, and sixteen colors. It is an excellent choice for logo designs or any artwork with multiple colors.
- White and Black Logo: This option presents your image in two natural colors; white and black.
- High and Low Fidelity Photo: The high fidelity produces a very detailed image against the low fidelity photo that provides a relatively lower detailed model. It is an excellent choice for elaborate images or artwork.
- Shades of Grey: You should use this option if you want your output to be a grayscale image.
- Line Art, Technical Drawing, Sketched Art, and Silhouettes: They are great options for images if you intend to produce drawings whose basis are lines. The output also comes out in white and black.
STEP 3: Use the Image Trace Tool to Vectorize Your Model: This is an automatic process. With a click on the button, you can expect an electronic trace on the image. Therefore, what you should expect is a close-up version of your initial model.
However, you should expect some details to be stripped off the initial image. While zoomed out, you will notice the image to be very similar. However, a closer zoom will help you spot the pixilation difference.
STEP 4: Perfect Your Traced Model: You have to use the image trace board tool to perfect your image. Open the image trace tool panel and click on mode. This selection will allow you to alternate colors.
Dragging the colors to the left will make your vector outcome simple. While pulling it to the right will add more details. If you want to save the preset for another time, click on the manage preset button and save as a fresh preset.
STEP 5: Ungrouping The Colors: This step aims at separating the color groups on your initial image. To do this, all you need to do is right-click on the image. It will give a drop-down option with “ungroup” as part of the options. After this, you would notice that the color shapes will separate into distinct parts.
STEP 6: Editing The Vector Image: You might have to do some creative work here. You can proceed by deleting any of the color sets you wish to eliminate. If you want to delete a color group, select the color by clicking “Select” then the same > color fill.
It will highlight all sets with similar colors. Hitting your backspace button will help you delete them. You can also carry out the reverse process to fill some spaces with a tinge of your choice.
STEP 7: Save The Image: This is as easy as saving any other item on your PC. Once you are through with your modification, keep the image in vector setup to keep its quality.
To save the image, locate the “File” option then select Export. Then, select Export As, before choosing the format you want to use. There are different useful formats. These formats include SVG, PDF, EPS, and AI.
Conclusion
The use of vector image illustrators proves one thing which is; you can easily vectorize your design instead of compromising it. It allows you to create a design that is not dependent on resolution.
If you’ve never used an illustrator before, you can consider doing so to improve your design. The use is simple, and it exposes you to a world of limitless opportunities of design.
Learn more about illustrations!!
Leave a Reply