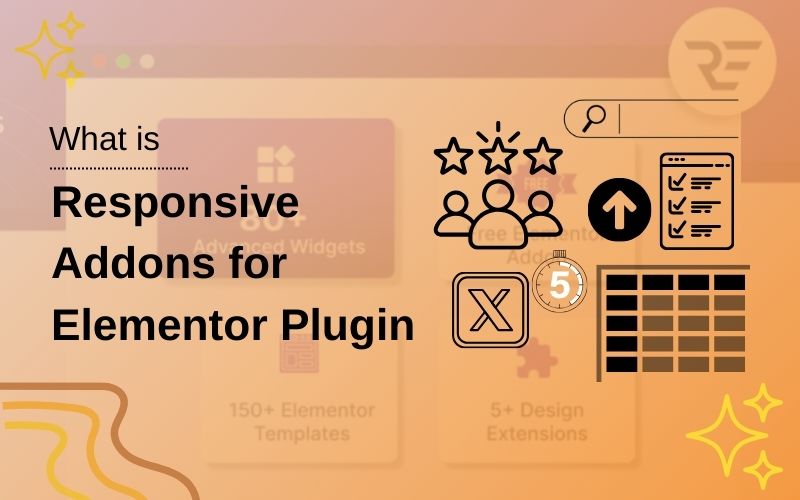
What is Responsive Addons for Elementor Plugin by Cyberchimps
Are you curious to learn what the Responsive Addons for Elementor plugin is and how it can enhance your website?
Within the WordPress environment, the development of Elementor page builders has significantly eased the website-building process.
Undoubtedly, Elementor Addons significantly add up to enhance the features and functionalities to create your website.
Responsive Addons for Elementor by CyberChimps is among the most powerful Elementor Addons plugins that extend Elementor’s functionality with innovative widgets, templates, and customization options.
This article will detail the top features and benefits of Responsive Add-Ons for Elementor and why they are a must for Elementor users.
So let’s get started!
Responsive Addons for Elementor is the Best Elementor Addons plugin – Get it for free!
What is Elementor?

Well, before we dive deeper, it is first essential for us to understand the basics of Elementor.
To understand it in simple terms, Elementor can be called a simple visual page builder that helps users easily create a website using a drag-and-drop interface. So, if you do not know much about coding, it helps you create a website simply by adding the necessary features and functionalities.
It also provides additional plugins and extensions and a library of widgets.
Key Features and Benefits of Elementor
While the primary purpose of Elementor is to simplify website building, it also offers various other features, such as: simple to use, Elementor boasts a variety of features, including;
- Intuitive drag-and-drop editor allows users to add, move, and style elements on their web pages.
- It offers a live editing screen, which allows you to see your design changes in real time.
- Elementor ensures your website looks responsive on all devices
- It offers a vast library of professionally designed templates that allow you.
- It also offers seamless WooCommerce integration to build e-commerce sites.
- Global editor to edit your entire website from one place.
- Third-Party Add-ons integration to enhance your website with various third-party add-ons and widgets.
What is Responsive Addons for Elementor Plugin

📢 My Real-World Test Results:
- Number of widgets: 80+
- GTmetrix Performance Score: 100%
- Includes Cross-site Copy-paste feature
- 5+ Extensions like Scroll animations, Sticky Section, Page Duplicator, & more.
- Save design time with 100+ Premium-grade Starter templates
Responsive Addons for Elementor (RAE) is a free and versatile plugin developed by CyberChimps to extend the functionality of the Elementor page builder.
It offers extensive widgets, templates, and customization options, allowing users to create dynamic, interactive, visually appealing websites.
Features of Responsive Addons for Elementor Plugin
The RAE plugin boasts many features, including:
- Extensive Widget Collection: With over 80 custom widgets, the plugin allows you to add interactive and functional elements to your website.
- Pre-Designed Templates: Access over 150 ready-to-use templates covering various niches, enabling you to quickly set up your website and tailor it to your needs.
- Advanced Theme Builder: You can customize every aspect of your website, including headers, footers, single post templates, and archive pages, to create a cohesive and professional design.
- Extensions and Utilities: RAE includes powerful extensions that boost designer productivity and site functionality:
- Cross-Site Copy-Paste: Allows you to quickly copy and paste any widget, section, or column from one WordPress website to another.
- Particles Background: Adds dynamic, animated backgrounds to sections.
- Sticky section: With the Sticky Section extension, you can pin important elements so they stay in view while scrolling.
- Duplicator: You can copy any page type with one click using RAE Duplicator.
- Seamless Integration: The plugin is compatible with all popular themes, ensuring a smooth and cohesive design experience.
- Responsive Design: It ensures your website looks great on all devices, from desktops to smartphones, with built-in responsive design features.
- WooCommerce Compatibility: Easily integrate with WooCommerce to create fully functional e-commerce websites.
Why Use Responsive Addons for Elementor Plugin
The extensive list of advanced features might have already given you a clear picture of why you must use the plugin. However, to give you a quick summary, here are some clear reasons that it must be in your website-building toolkit:
- First, its advanced features help you add functionality without additional plugins or custom coding for free
- Second, pre-designed templates and widgets allow you to build and customize your website quickly.
- Its easy-to-use interface allows users of all skill levels to design and customize their websites.
- You can fully utilize the tools offered by the plugin with detailed documentation, video tutorials, and dedicated email support
Moreover, to give you a clear picture of what the toolkit offers in its list of widgets, here’s a broadly classified category of tables you can expect with the plugin for free:
| Category | Widget Names |
|---|---|
| Content Widgets | Advanced Tabs, Audio Player, Author Box, Back to Top, Banner, Breadcrumbs, Business Hours, Button, Call to Action, Contact Form Styler, Content Switcher, Content Ticker, Countdown, Data Table, Divider, Dual Color Header, FAQ, Fancy Text, Feature List, Featured Image, Flip Box, Google Map, Gravity Form Styler, Icon Box, Image Gallery, Image Hotspot, Logo Carousel, Login / Register Form, Lottie, MailChimp Styler, Menu Cart, Multi Button, Media Carousel, Modal Popup, Nav Menu, Off-Canvas, One Page Navigation, Portfolio, Posts, Post Carousel, Pricing Table, Price Box, Price List, Progress Bar, Reviews, Search Form Styler, Site Logo, Slider, Sticky Video, Table of Contents, Team Member, Testimonial Slider, Timeline, Twitter Feed, Video |
| WooCommerce Widgets | WC Checkout, WC Products, WC Breadcrumbs, WP Form Styler |
| Theme Builder Widgets | Archive Posts, Archive Description, Archive Products, Archive Title, Post Comments, Post Content, Post Excerpt, Post Info, Post Navigation, Post Title, Product Additional Information, Product Carousel, Product Category Grid, Product Content, Product Data Tabs, Product Images |
| Extension Modules | Cross-Site Copy Paste, Particles Background, Sticky Section |
| Theme Builder Tool | Available |
Performance Test Of RAE
Performance Test Result of Responsive Addons for Elementor
For the Responsive Addons performance test, I have installed only the RAE plugin on a vanilla website. After that, I added a countdown widget and conducted the performance test using GTmetrix.

Overall, the GTmetrix results highlight that Responsive Addons for Elementor is a performance-friendly plugin, making it a solid choice for speed-focused websites.
Competitor Comparison: Responsive Addons for Elementor vs Others
| Feature | Responsive Addons for Elementor | Plus Addons for Elementor | ElementsKit | Exclusive Addons |
|---|---|---|---|---|
| Widget Count | 80+ (Free) | 120+ (Free + Pro) | 90+(Free + Pro) | 100+(Free + Pro) |
| Template Library | 250+ ready templates | 100+ templates | Moderate | Moderate–High |
| Theme Builder | ✅ Free | ❌ Pro only | ✅ Yes | ⚠️ Limited |
| Customization Options | High | High (Pro unlocks more) | High | High |
| Performance | Lightweight, optimized | Moderate | Moderate | Optimized (on-demand loading) |
| Ease of Use | Beginner-friendly | Beginner to advanced | Intermediate | Intermediate |
| Pricing | Completely Free | Free + Paid plans | Free + Paid plans | Free + Paid plans |
| Best For | Beginners, performance-focused sites | Advanced designs & widgets | Full site building | Designers & agencies |
Benefits of Using Responsive Addons for Elementor Plugin
- Save Time and Effort: With pre-designed templates and customizable widgets, you can create stunning websites in less time.
- Enhance Website Design: Responsive Addons offers many design options to help you create a unique and visually appealing website.
- Improve User Experience: Improve user experience with features like sticky elements, parallax scrolling, and smooth animations.
- Boost Engagement: Use eye-catching elements and interactive features to engage your visitors and encourage them to stay on your website longer.
- Expand Website Functionality: Add new features and capabilities to your website with an extensive collection of widgets and templates.
How to Install and Activate Responsive Addons for Elementor Plugin
Now, let us understand how to install and use the Responsive Addons for Elementor (RAE) plugin.
Responsive Addons for Elementor can be installed and used as any standard WordPress plugin using the following steps:
Navigate through your WordPress Admin dashboard and go to Plugins > Add New Plugin.
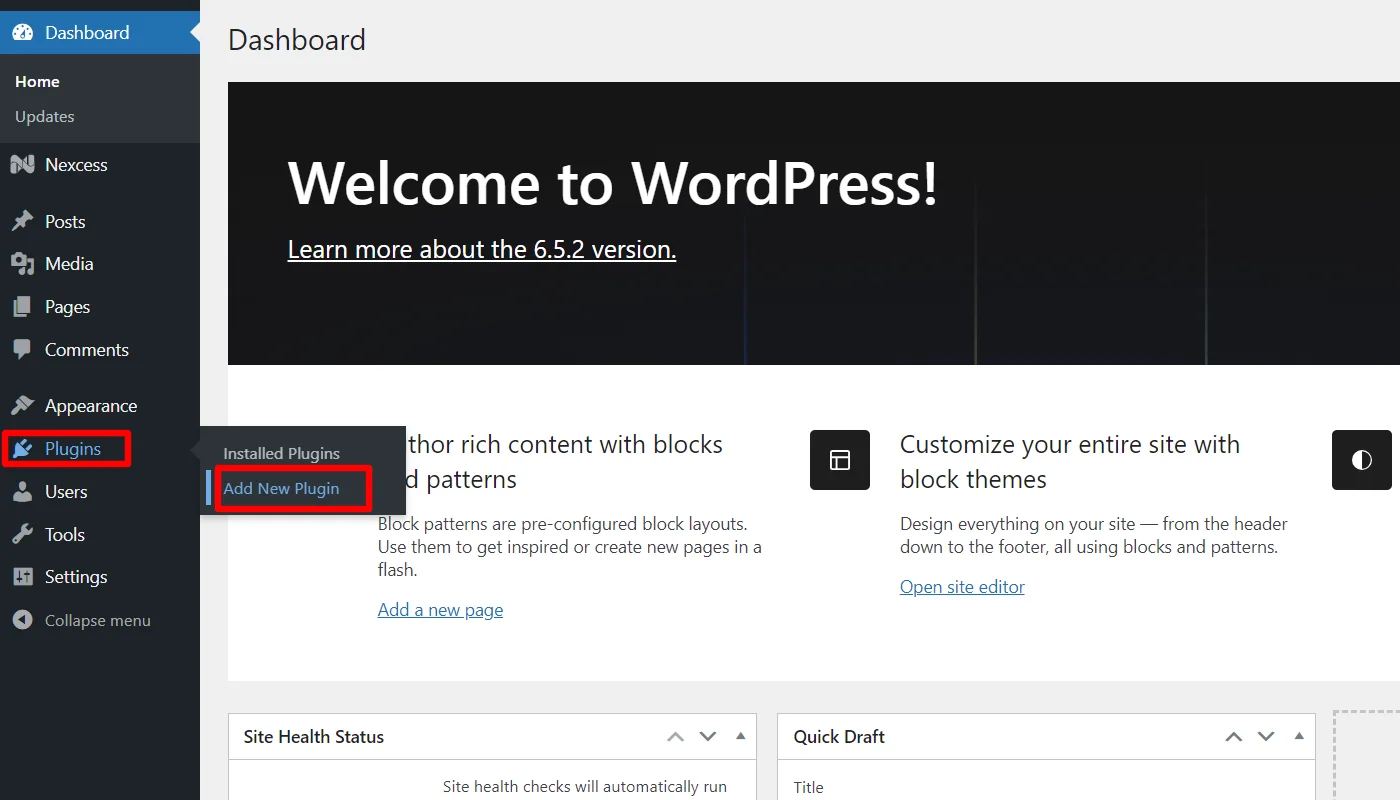
Go to the search bar above and search for responsive addons for elementor, and click Install Now and Activate it.

Once the plugin is activated, you will be asked to install and activate the Elementor Plugin if it has not already been installed.
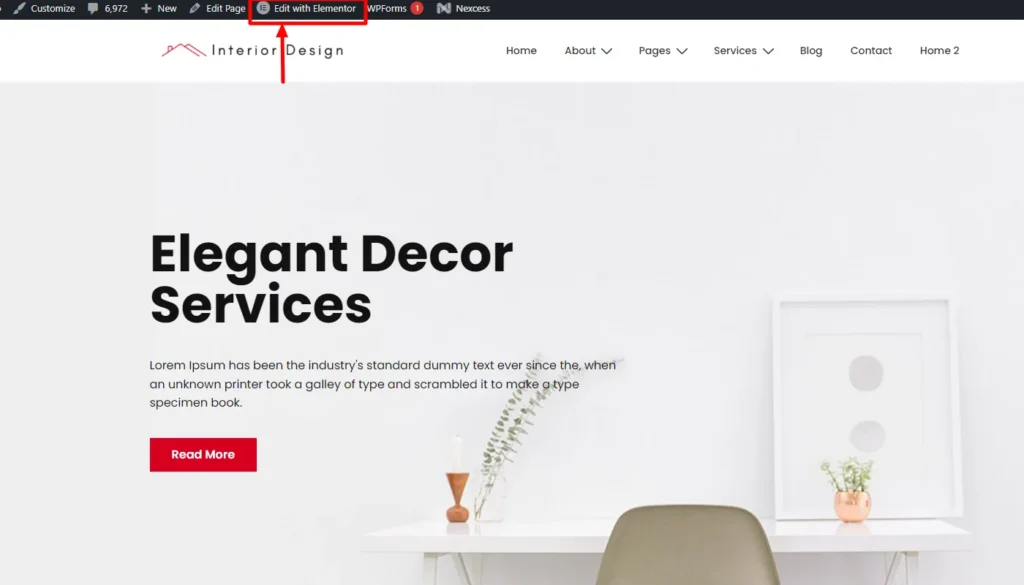
Customizing Responsive Addons for Elementor Widgets
Click on Edit With Elementor on the page you want to edit.
Next, on the left sidebar in the search widget tab, search for the RAE Data Table.
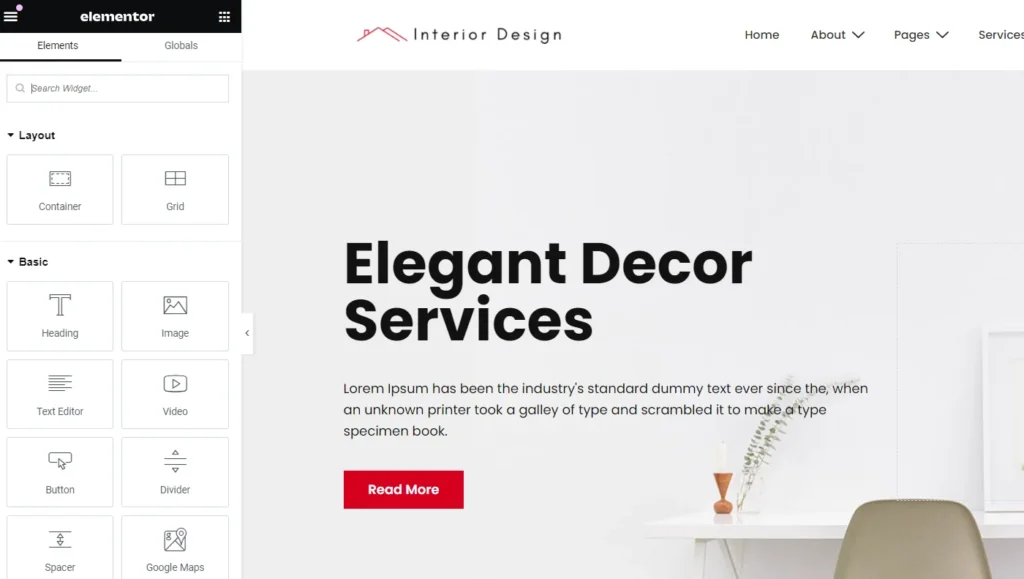
Drag and drop the RAE Data Table Widget in the section where you want to add the flip box.

With this, you have successfully added the data table widget; now, let’s understand how to customize it.
The RAE Data Table allows you to customize various options, including:
Editing The Header
Click the Header tab to edit the heading of the data table.
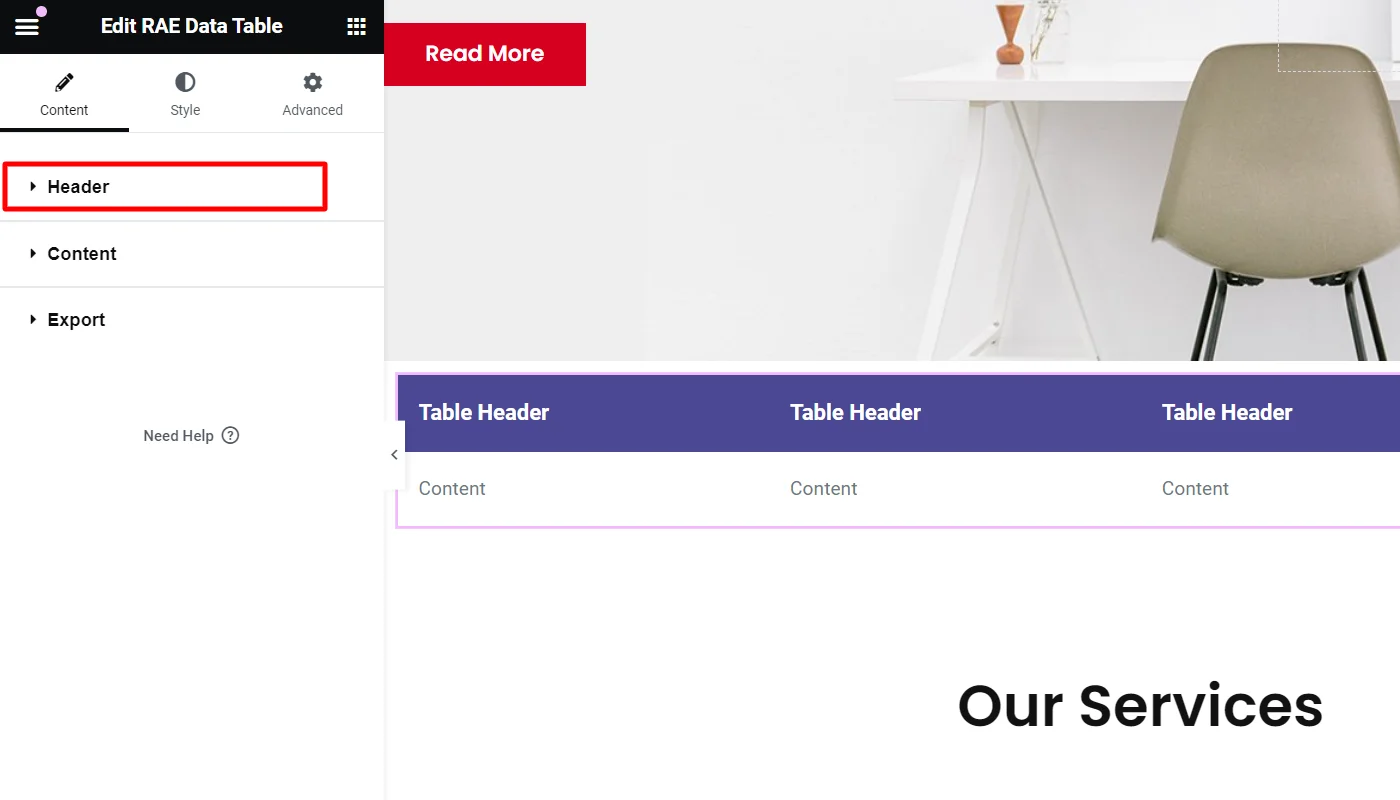
Next, click on the specific Table Header you want to edit.
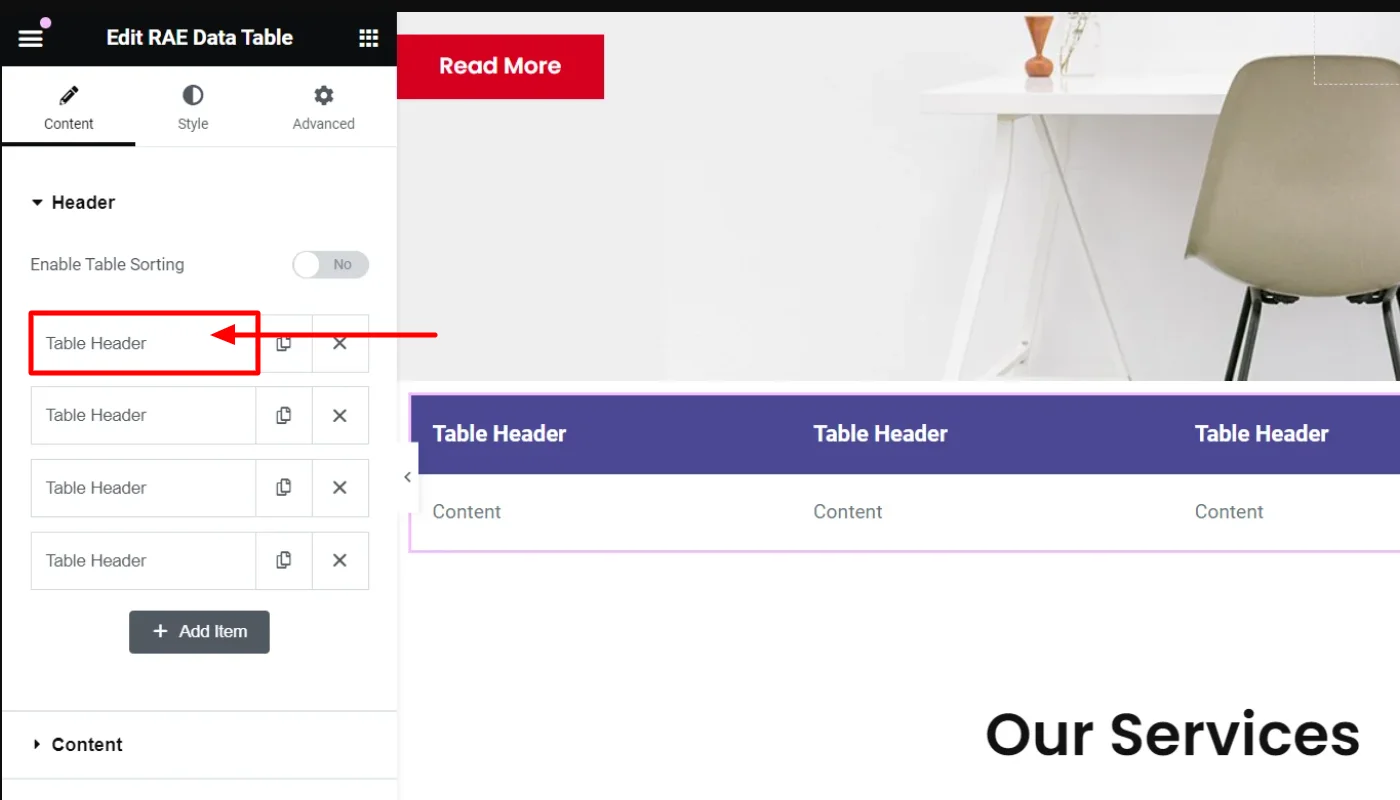
You can sort the data table by enabling the Table Sorting Button.
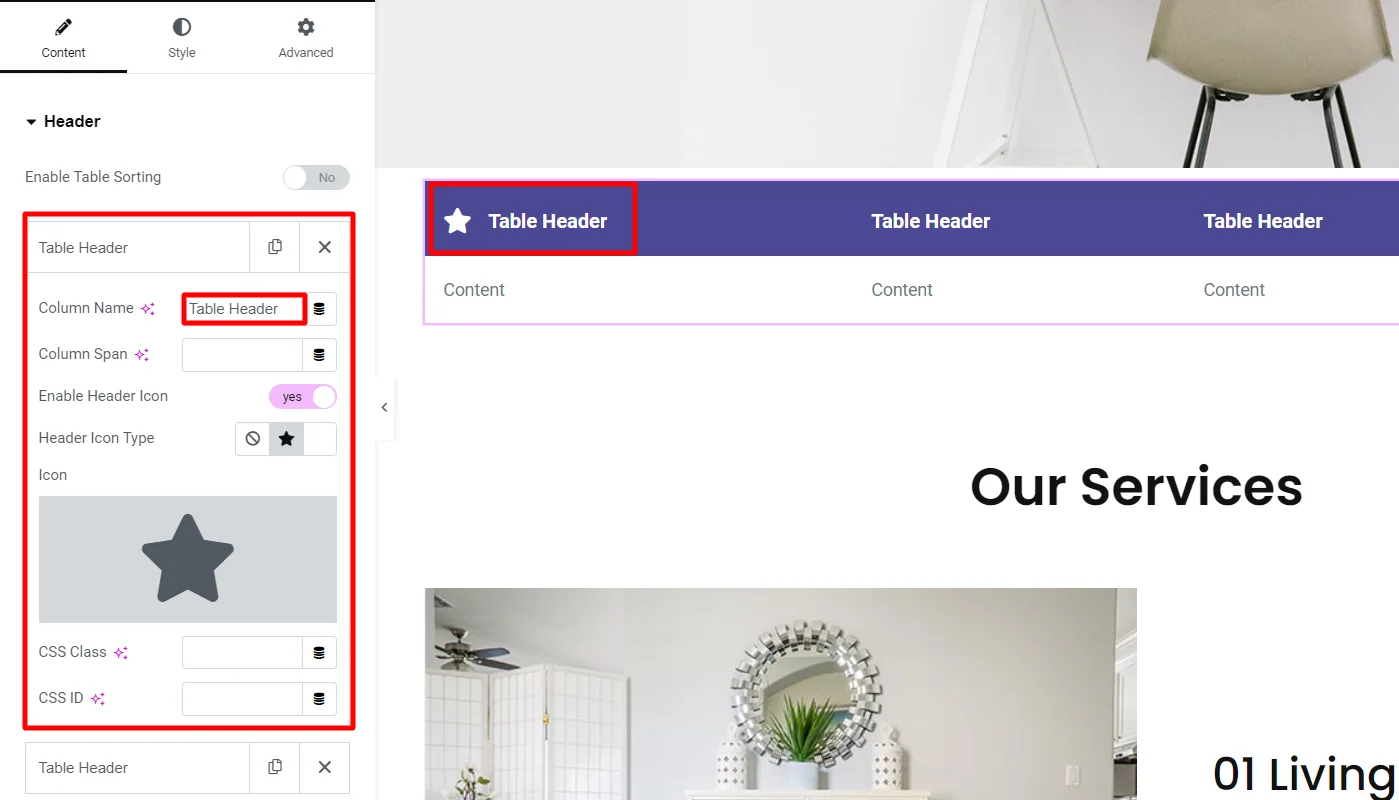
Further, each header item has the following controls for configuration, which you can edit:
- Column Name – You can add a header item name to the table’s column.
- Column Span – You can add the number of columns the header item should span.
- Enable Header Icon – You can show or hide icons to be displayed with the header items.
- Header Icon Type – Choose the icon type. Available options are None, Icon, and Image.
- Icon – You can add an icon for the header item. This control is only available if the Header Icon Type is set to Icon.
- Image – Add the image for the header item. This control is only available if the Header Icon Type is set to Image.
- Image Size(px) – You can also set the image size for the header item’s image. This control is only available if the Header Icon Type is set to Image.
- CSS Class – This option allows you to add a CSS class if required.
- CSS ID – This allows you to add a CSS ID if required.
Similar to the customization of this heading, you can customize all the headings.
Editing The Content
Click the Content tab to add the content under each heading.
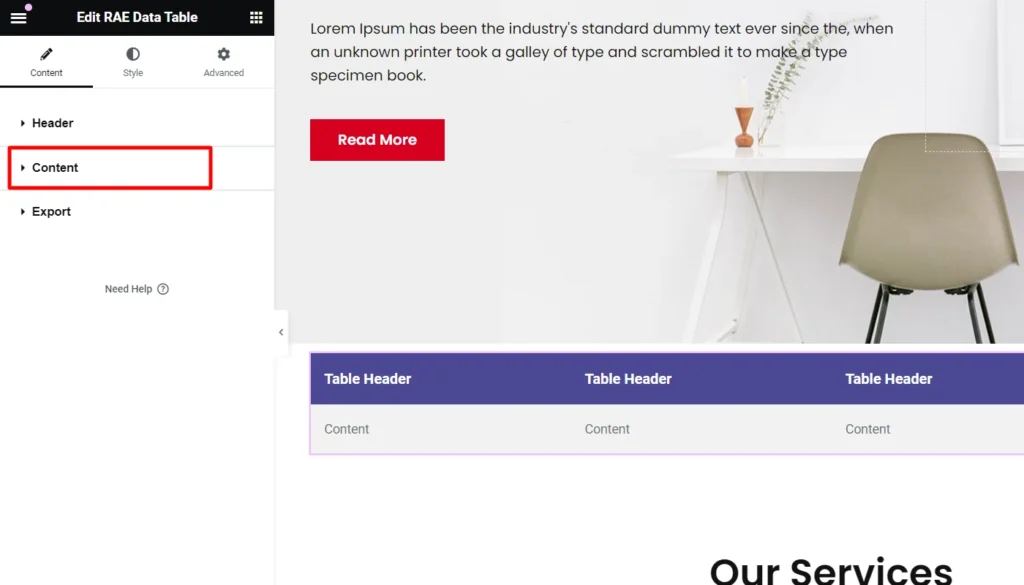
Next, click on the specific row: Content you want to edit.
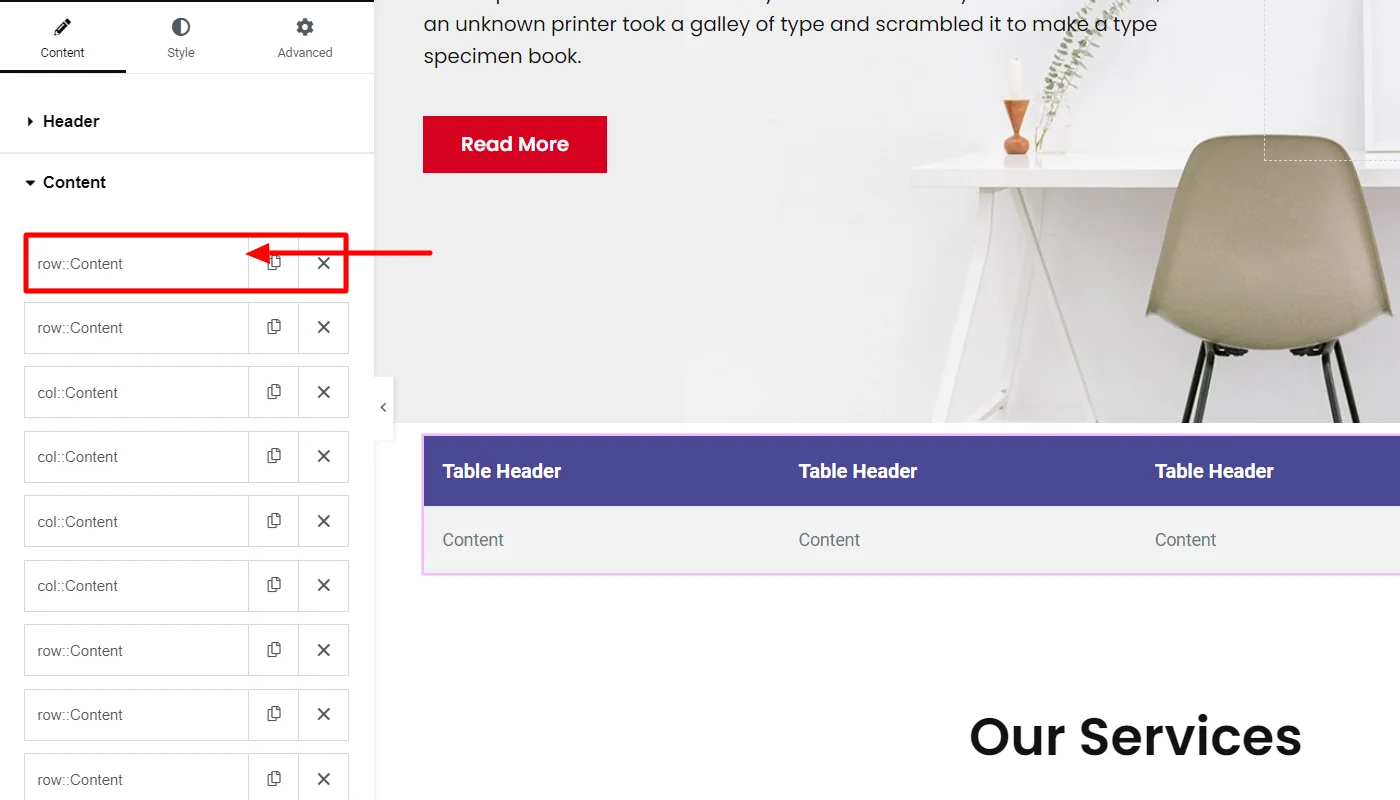
If Row is selected from the option, then you edit the content row-wise, which lets you add new rows.
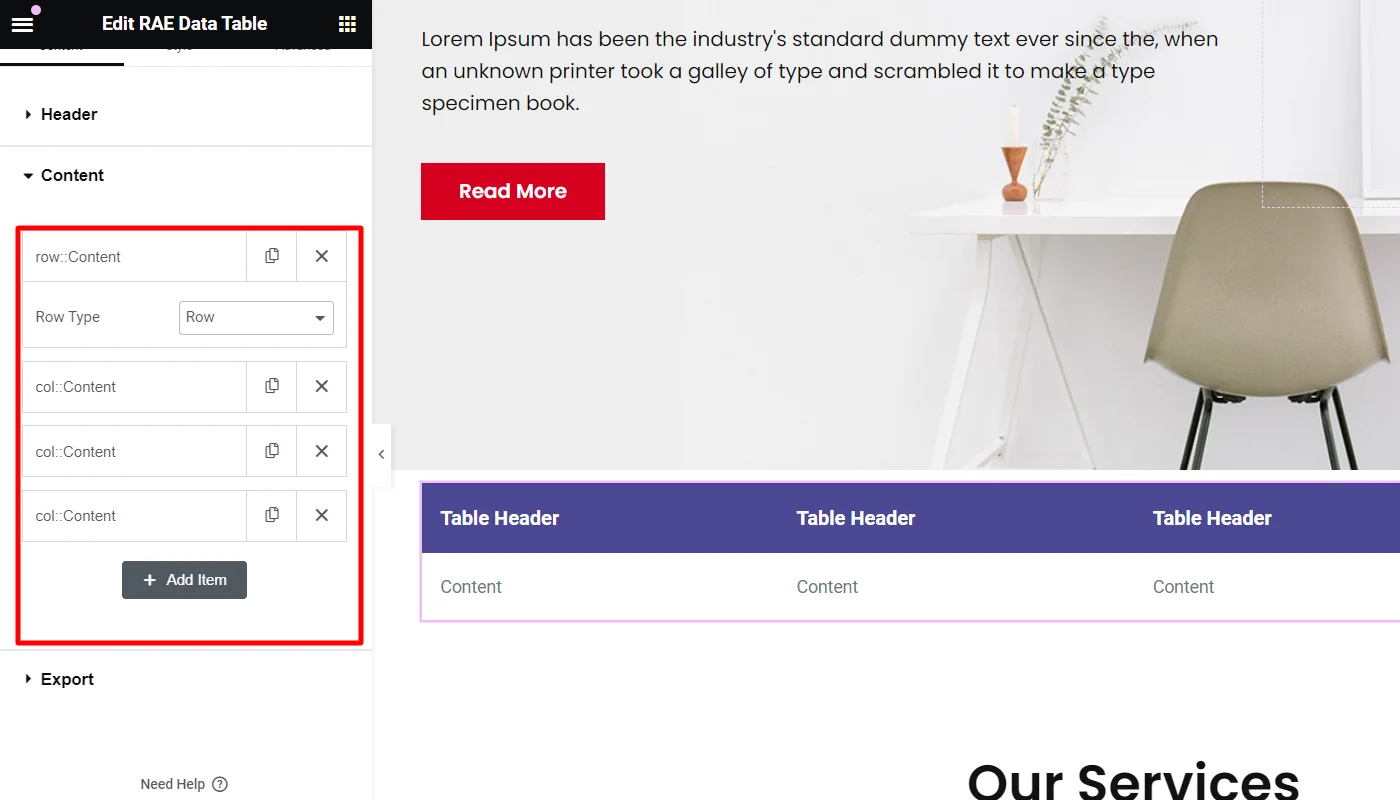
If Column is selected, then the following controls for the column content will be available:
- Col Span – You can use this to set the column span for that particular item. Default: 1.
- Content Type – Choose the content type for the column. Available options: Icon, Text area, Editor, and Templates. Default: Text area.
- Row Span – Set the row span for that particular item. Default: 1.
- Cell Text – Add the text content for the column content item. This control is a Text area if the Content-Type is set to Text area or a text editor if the Content-Type is set to Editor.
- Icon – Add the icon for the column content item. This control is available only if the Content-Type is set to Icon.
- Choose Template – Select a template from which the column content data should be fetched.
- Link – Add a link for the column content item.
- CSS Class – This allows you to add a CSS class if required.
- CSS ID – This enables you to add a CSS ID if required.
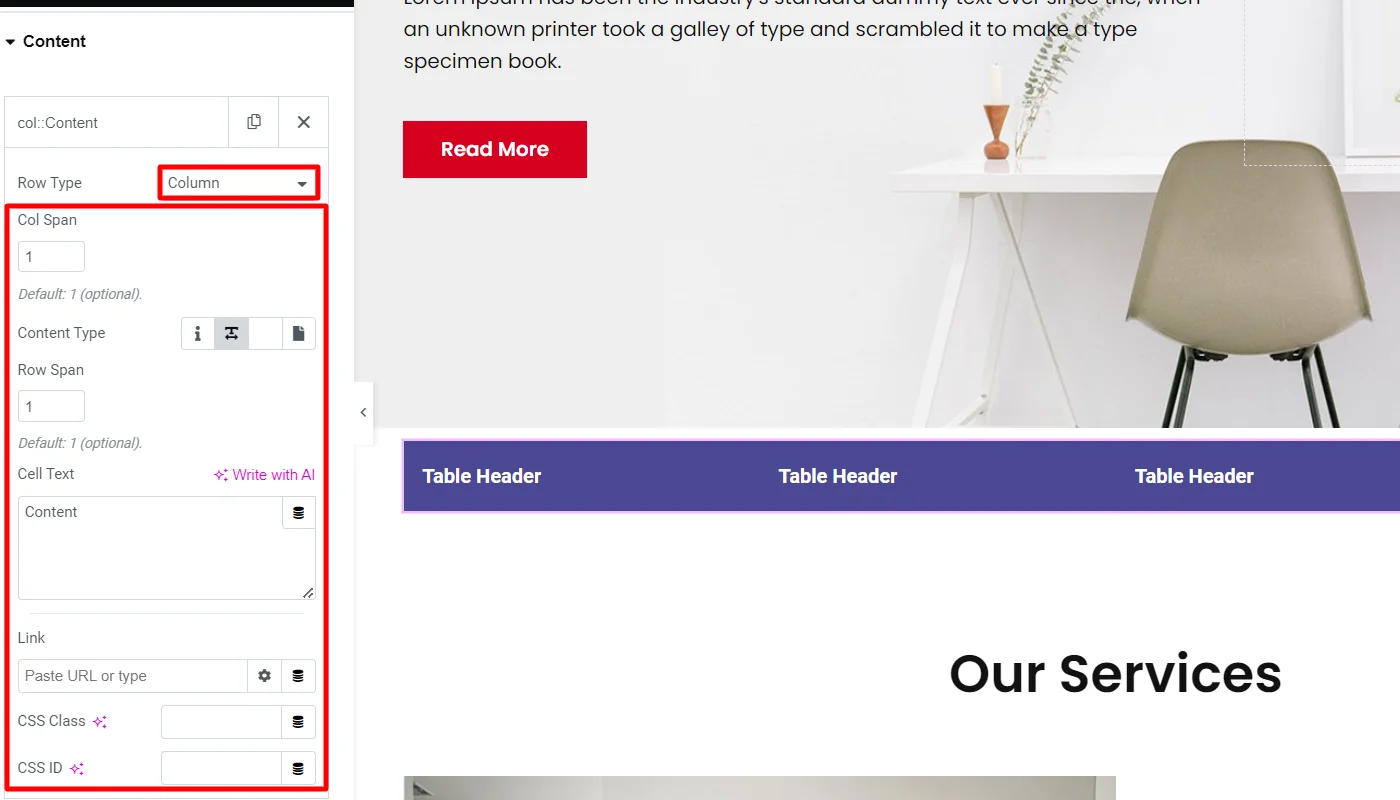
Similarly, you can edit each row or column content in the data table.
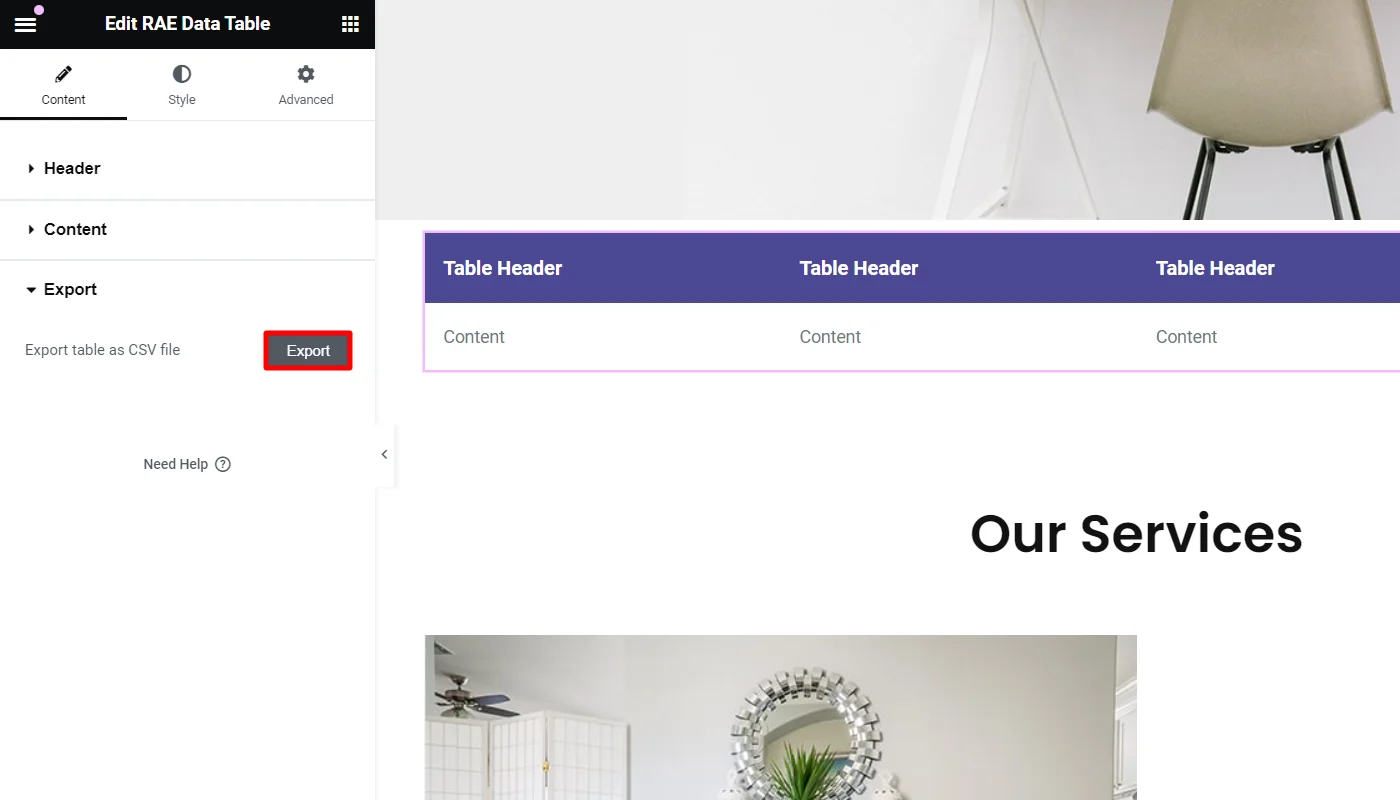
Exporting Data Table
To export the Data Table, click on the Export tab.

Next, click on the Export button. This allows you to export the table data as a CSV file.
Styling the Elementor Data Table Widget
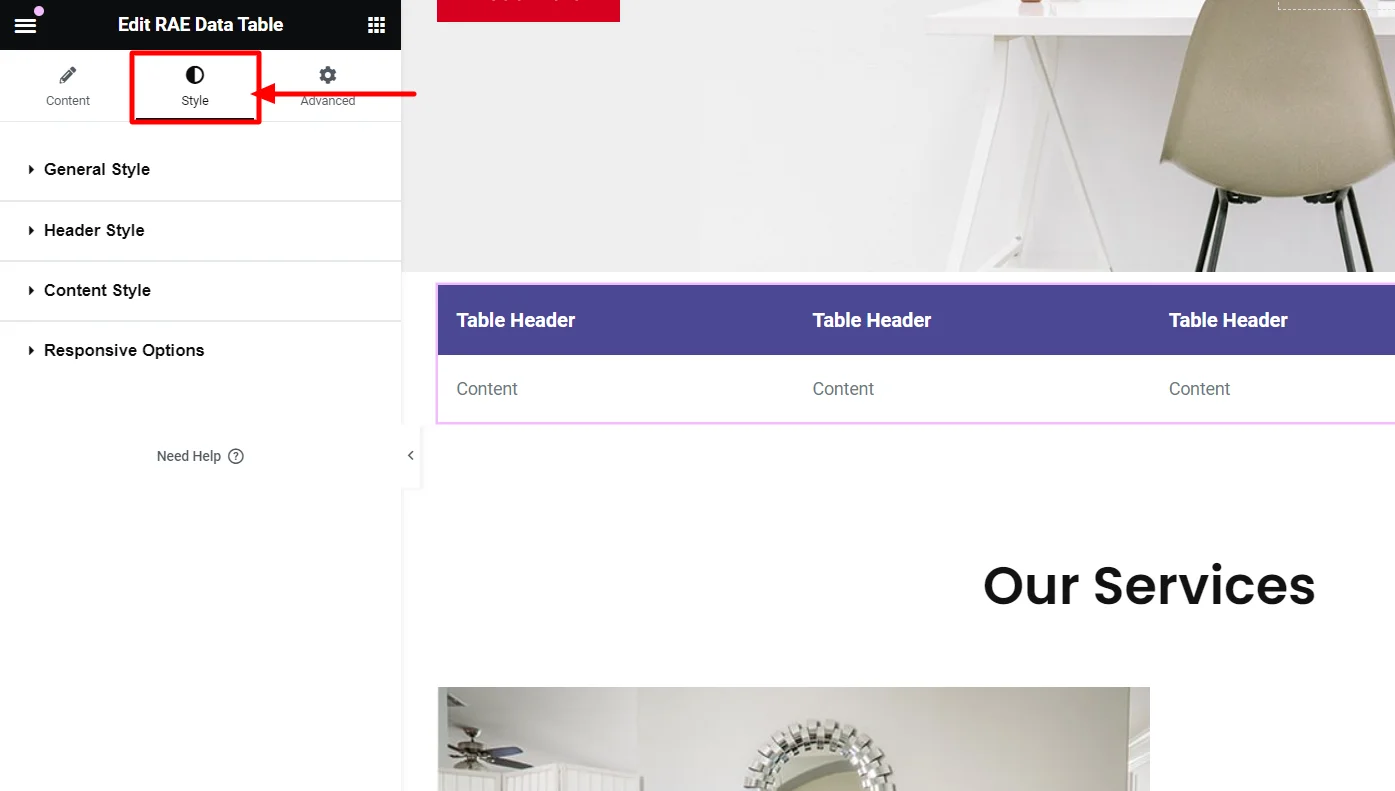
To style the Data table, click on the Style tab in the sidebar.
The Elementor data table widget provides you with various styling options. These include:
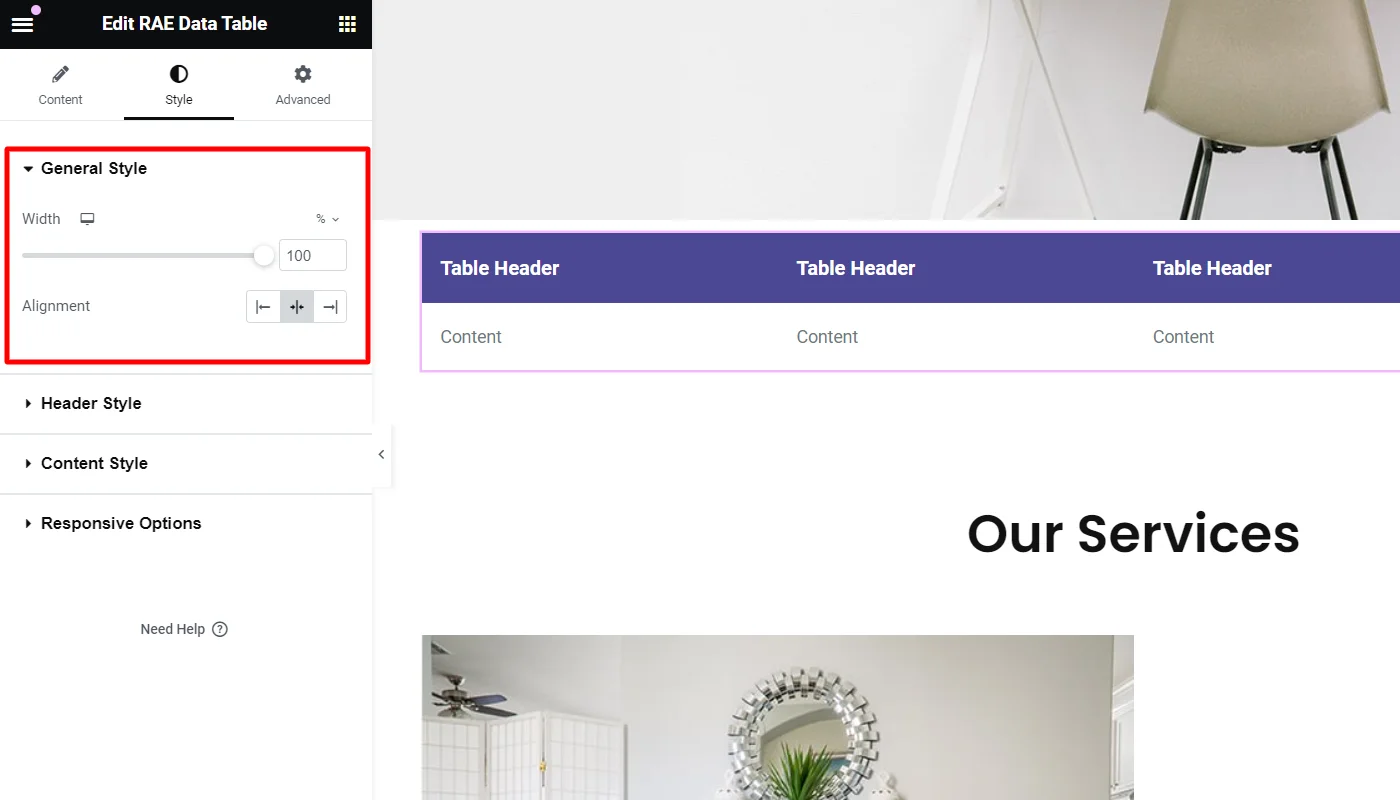
General Style
To edit the general style, click on the General Style tab.
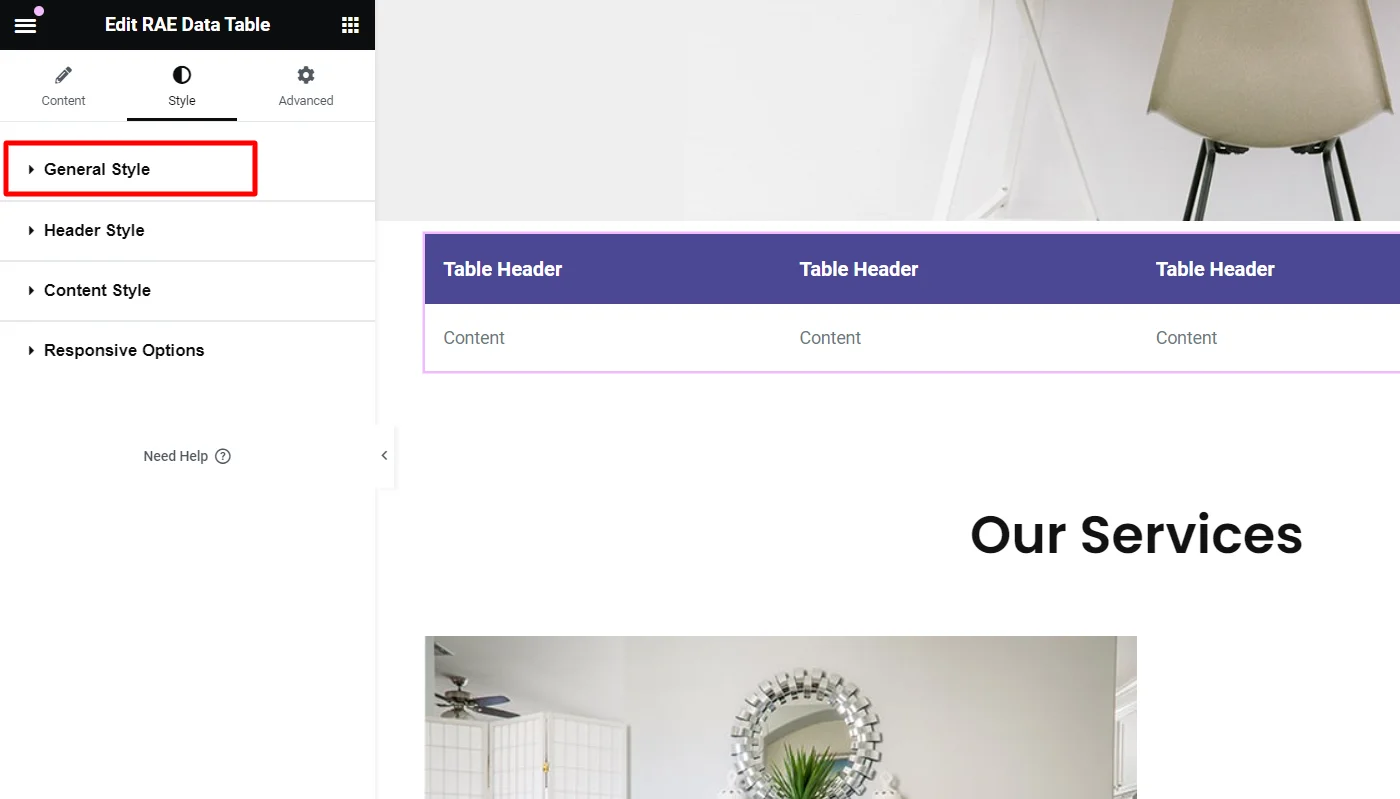
This allows you to edit:
- Width – Set the width of the table.
- Alignment – Choose the table’s alignment.
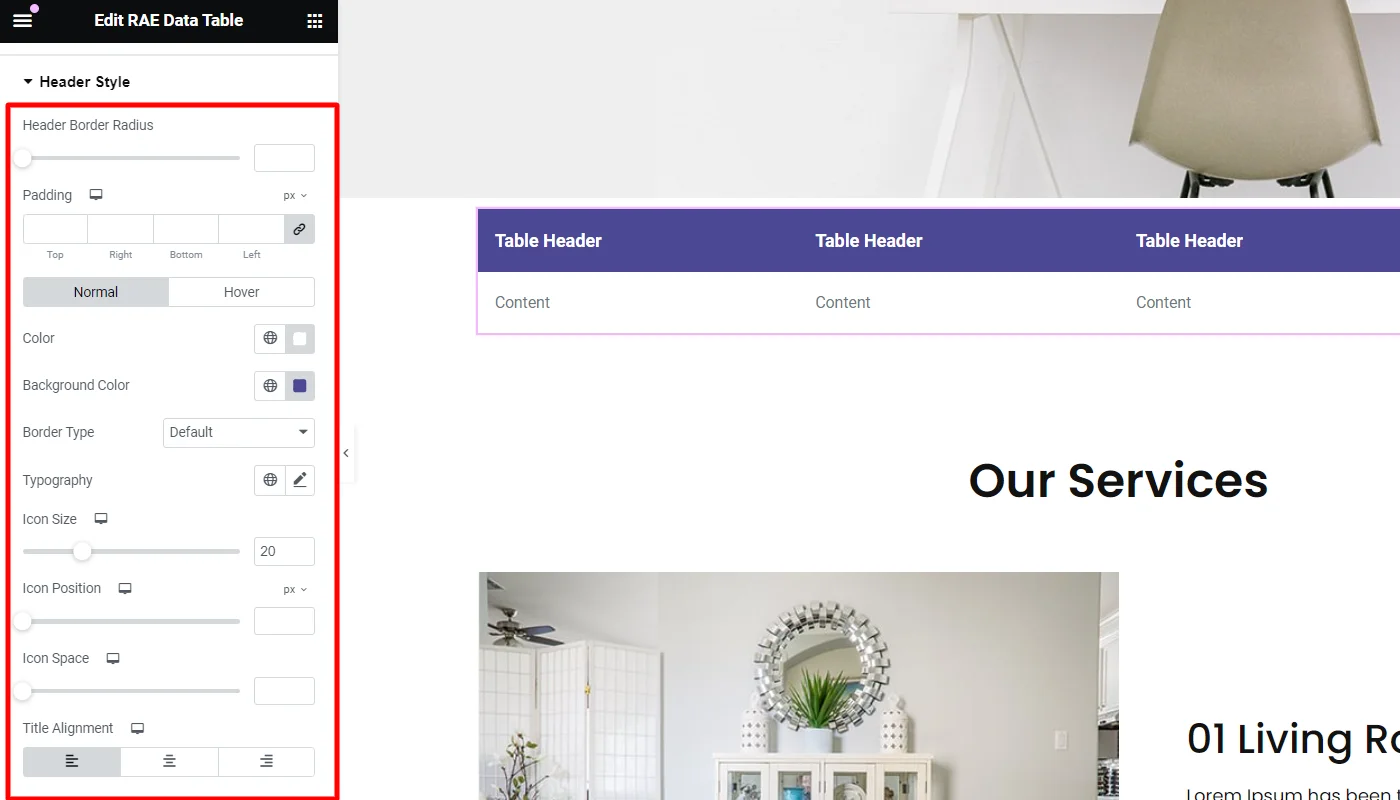
Header Style
To edit the style of the header, click on the Header Style tab.
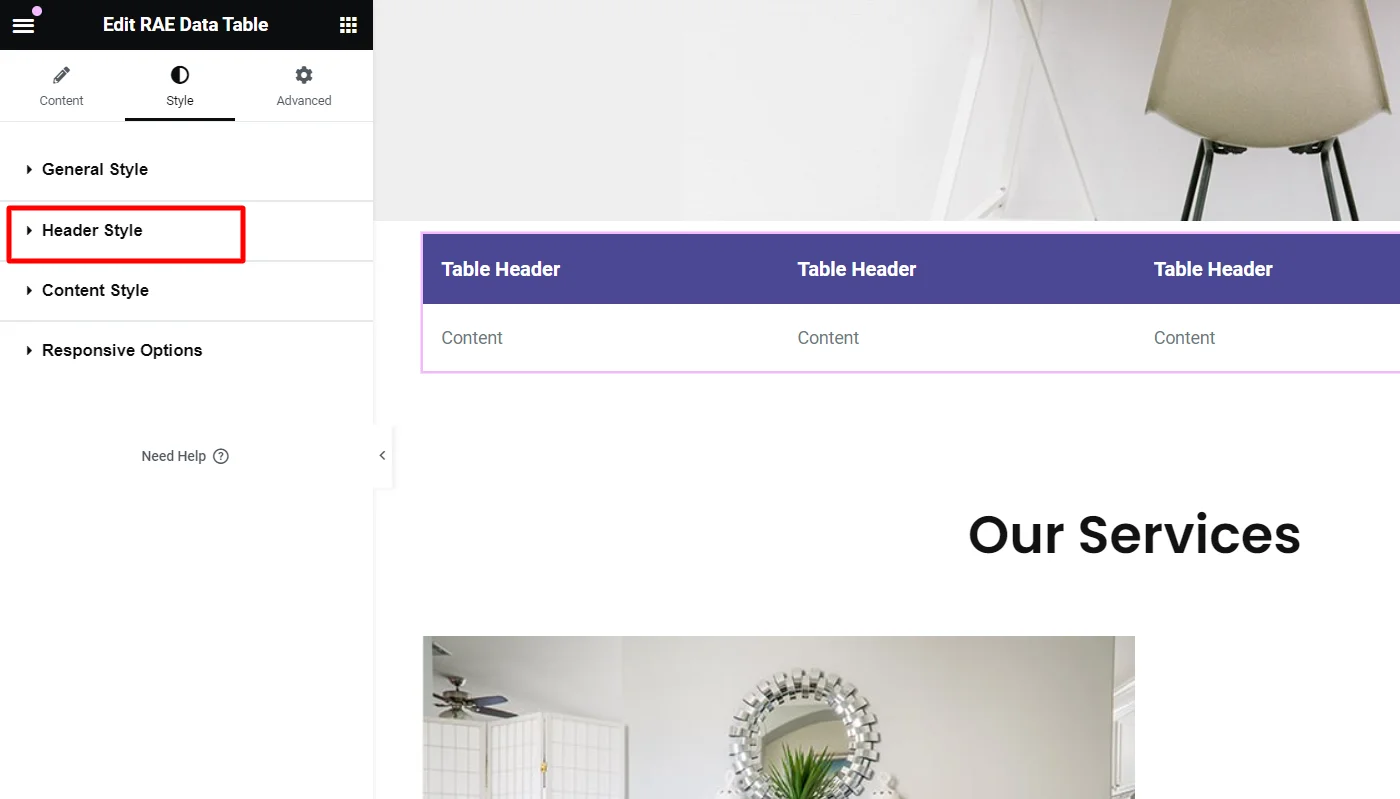
The header style allows you to edit the following options:
- Header Border Radius – Set the border radius for the table header.
- Padding – Set the padding dimensions for the table header.
- Normal/Hover State:
- Color – Set the text color for the table header.
- Background Color – Set the background color for the table header.
- Border Type – Set the border type for the table header. If the Border Type is not set to None, then the Border Width and Border Color controls will be available.
- Typography – Set the typography settings for the table header.
- Icon Size – Set the icon size for the table header.
- Icon Position – Set the icon position for the table header.
- Icon Space – Set the icon spacing for the table header.
- Title Alignment – Set the alignment for the table header item text.
Content Style
To edit the content style, click on the Content Style tab.
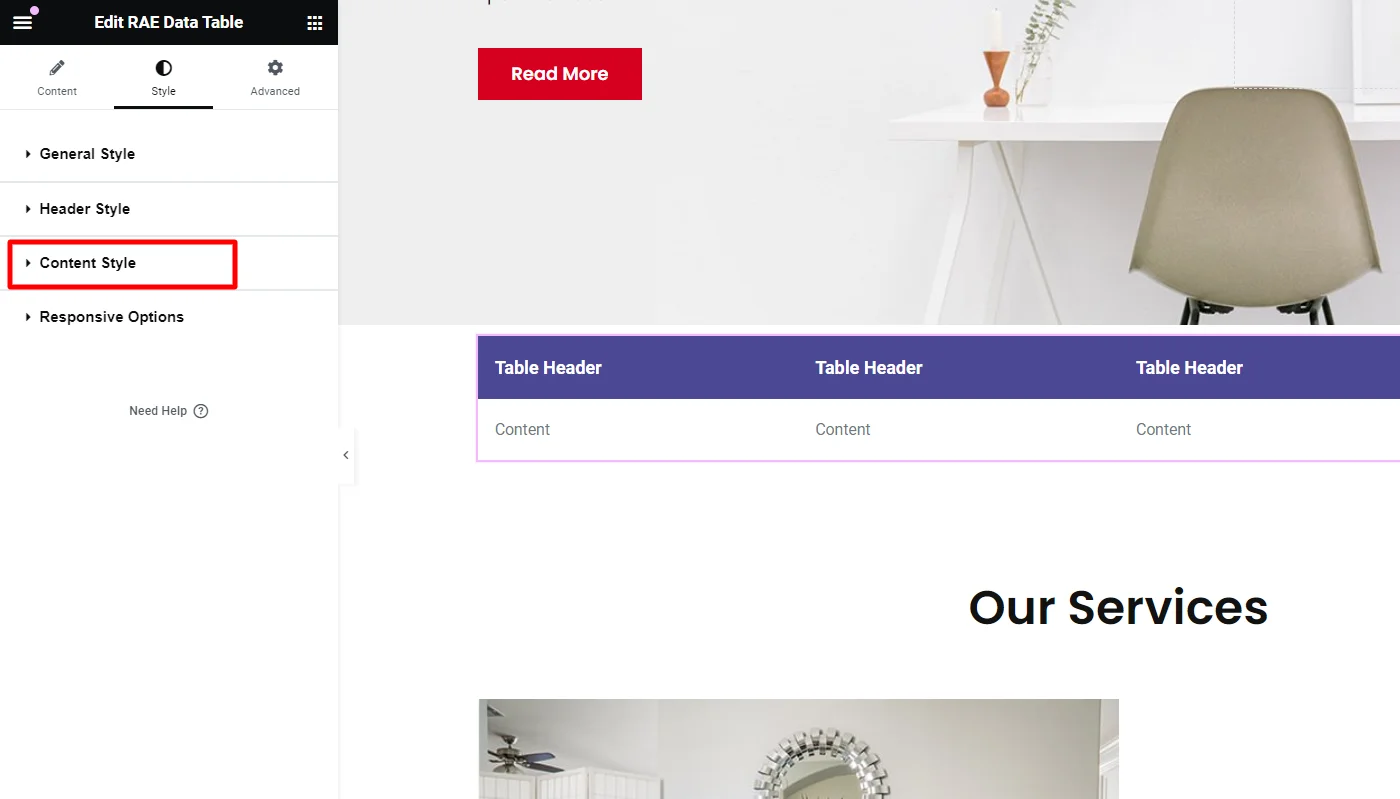
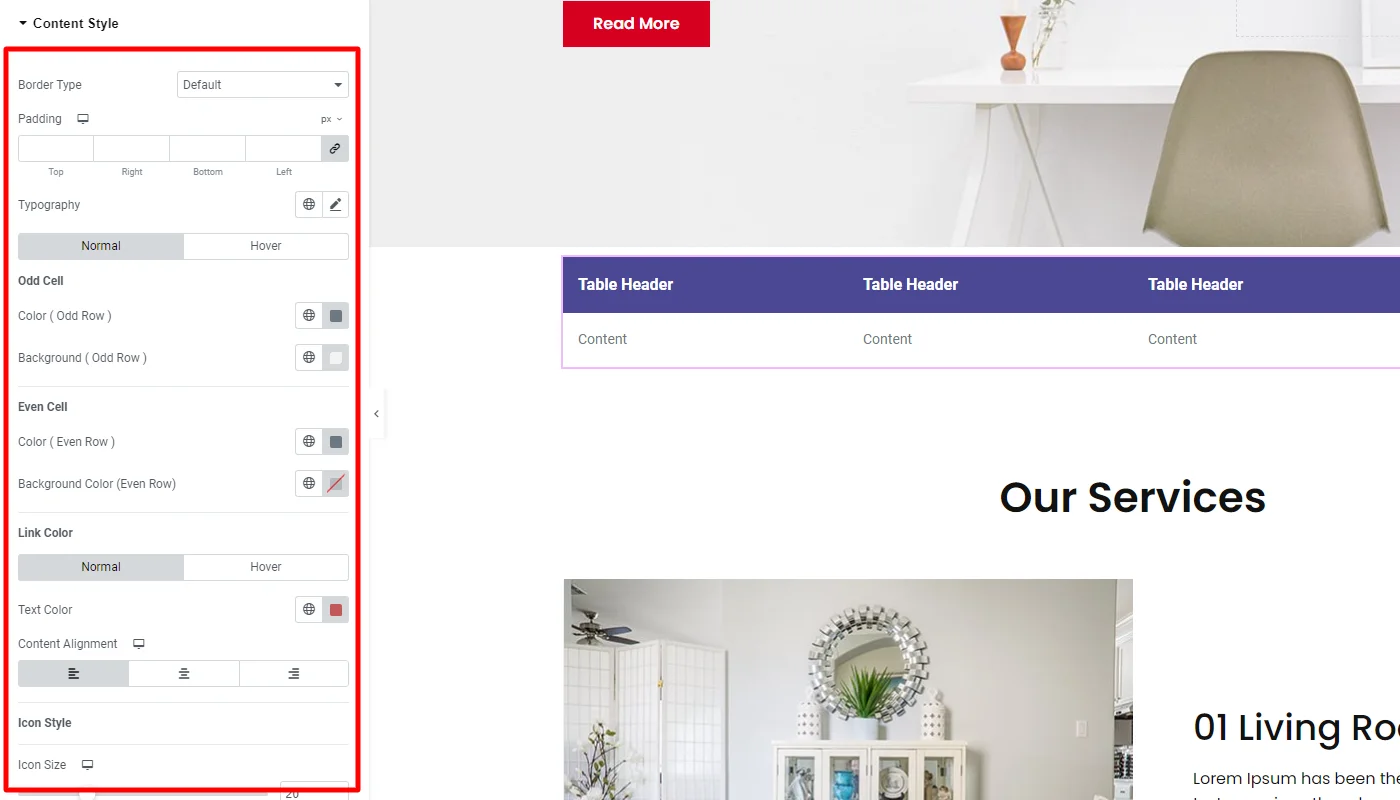
The content style allows you to edit the following options:
- Border Type – Set the border type for the content item cell. If the Border Type is not set to None, then the Border Width and Border Color controls will be available.
- Padding – Set the padding dimensions for the content item cell.
- Typography – Set the typography settings for the content item cell.
- Normal/Hover State :
- Color(Odd Row) – Set the text color for the odd row cells.
- Background(Odd Row) – Set the background color for the odd row cells.
- Color(Even Row) – Set the text color for the even row cells.
- Background(Even Row) – Set the background color for the even row cells.
- Link Color
- Normal/Hover State:
- Text Color – Set the text color for the link in the table content.
- Content Alignment – Set the alignment for the table content item.
- Normal/Hover State:
- Icon Style
- Icon Size – Set the icon size for the table content item.
- Normal/Hover State :
- Icon Color – Set the icon color for the table content item.
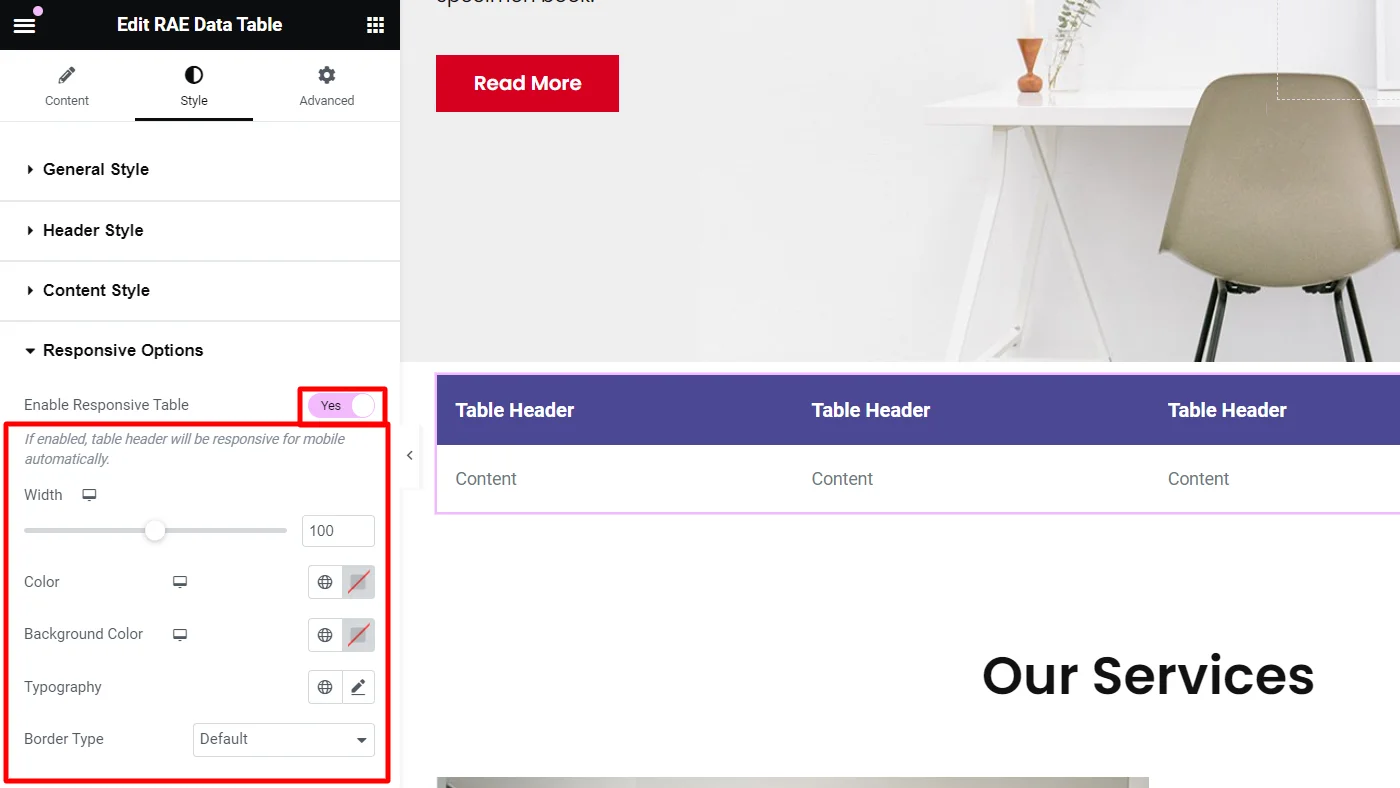
Responsive Options
To configure the responsiveness of the data table, click on the Responsive Options tab.
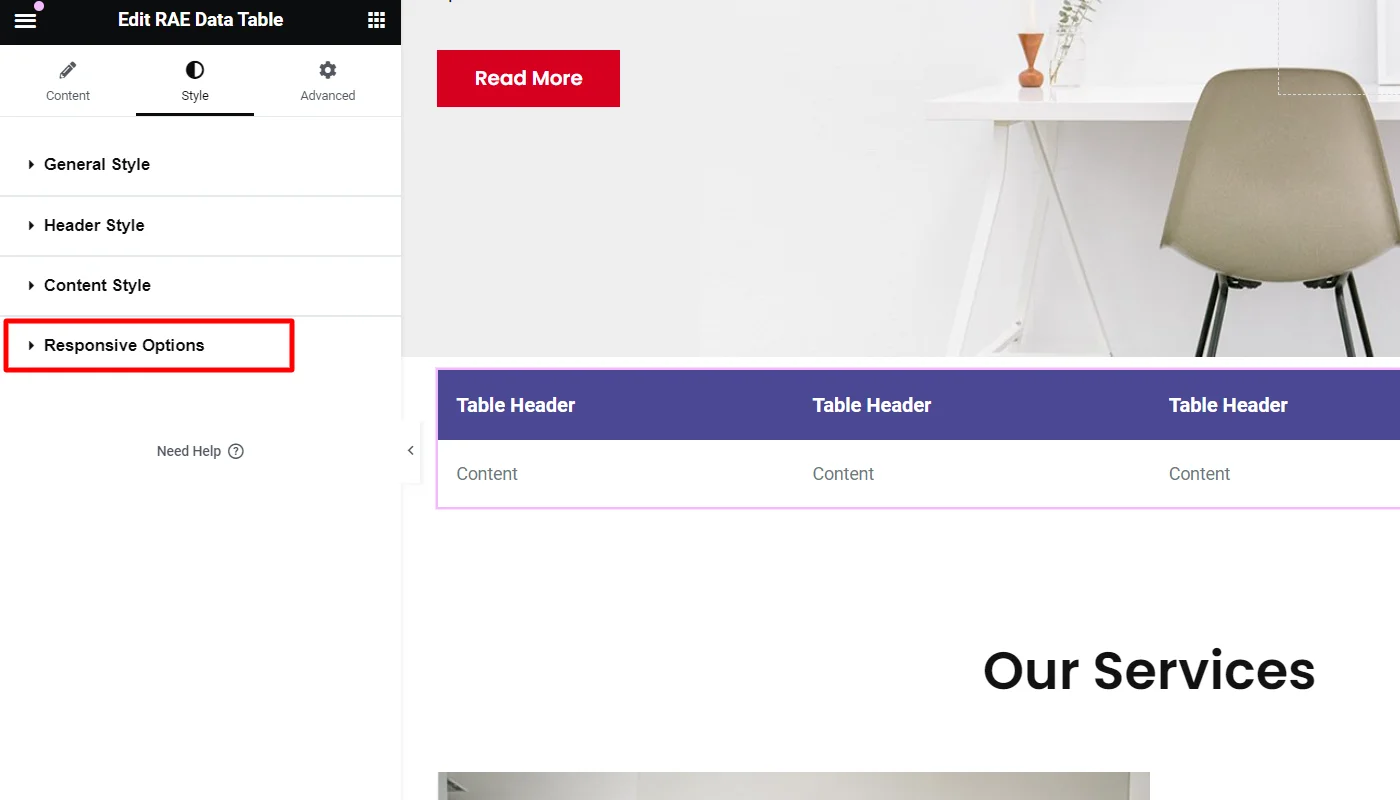
To Enable Responsive Table toggle table responsiveness, which will provide you with the following controls:
- Width – Set the table width for different devices.
- Color – Set the color for the table for different devices.
- Background Color – Set the background color for the table for different devices.
- Typography – Set the typography settings for the table.
- Border Type – Set the table’s border type. If the border type is not set to None, the controls for Border Width and Border Color will be available.
This is how you can add, configure, and style the Elementor data table widget.
FAQ
Responsive Addons for Elementor is a free plugin by CyberChimps that enhances Elementor’s functionality. It offers over 80 custom widgets, 150+ templates, and advanced customization features to easily create responsive, visually stunning websites.
Yes, Responsive Addons for Elementor seamlessly integrates with WooCommerce, allowing you to build fully functional e-commerce websites with enhanced design features, custom widgets, and responsive layouts that look great on any device.
To install, navigate to your WordPress dashboard, go to Plugins > Add New, search for “Responsive Addons for Elementor,” click “Install Now,” and activate. Make sure Elementor is installed first for seamless integration.
No, you don’t need any coding skills to use Responsive Addons. The plugin provides a drag-and-drop interface, allowing users of all skill levels to add, customize, and style widgets easily within Elementor.
Conclusion
Responsive Addons for Elementor by CyberChimps is a versatile, feature-packed plugin that amplifies Elementor’s capabilities.
With an extensive library of widgets, templates, and customization options, Responsive Addons can save time, enhance functionality, and improve users’ design experience.
Whether building a blog, business site, or e-commerce platform, this plugin is your go-to tool for creating professional-quality pages without coding.
Yes, Thank you for sharing!
This article solved my problem, thank you for sharing
Even though there are a lot of well-known video games available nowadays, it’s possible that you haven’t heard of this particular one.
Thank you for this information. It helps me a lot since I am not aware of these plugins.
This is one of the best blogs I have ever seen, and everyone should read it.
This is definitely a great choice.
I need tutorial for shopify free theme
Responsive Addons for Elementor by CyberChimps stands out as a practical game-changer for anyone looking to unlock Elementor’s full potential without complicating the website-building process. What makes it especially impressive is how it combines creativity with performance—offering 80+ powerful widgets, premium-quality templates, and advanced features like cross-site copy-paste, sticky sections, and particle backgrounds, all while maintaining excellent speed scores.
This persimmon and cocoa pudding recipe sounds wonderfully rich and seasonal. I enjoy discovering desserts that use unique fruit combinations while still feeling approachable enough for home bakers to try.