Tutorial: How to create a Bokeh vector background in Illustrator
In this tutorial we will create some cool Bokeh, quick and easy using simple gradients and blending modes.
Difficulty: Intermediate
Completion time: 30 min – 1 hr
Tools used: Adobe Illustrator CS3
This is how the final image looks like.

STEP 1
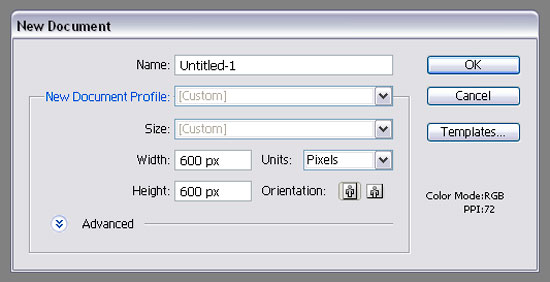
Create a new document of 600 x 600 px.
STEP 2
Let’s create a base background for our image.
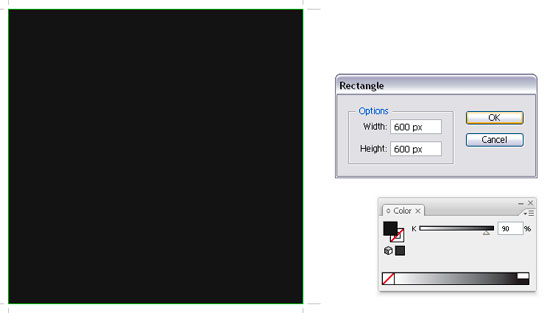
Grab the Rectangle Tool (M) and click on your canvas. Set the dimensions to 600×600 px, then hit OK. Open the Color window (F6) and set its Fill to 90% black. If you don’t see the grayscale “sliderâ€, open the drop-down menu from the top right corner of the window and select “Grayscaleâ€. Make sure you have no Stroke on the rectangle.
STEP 3
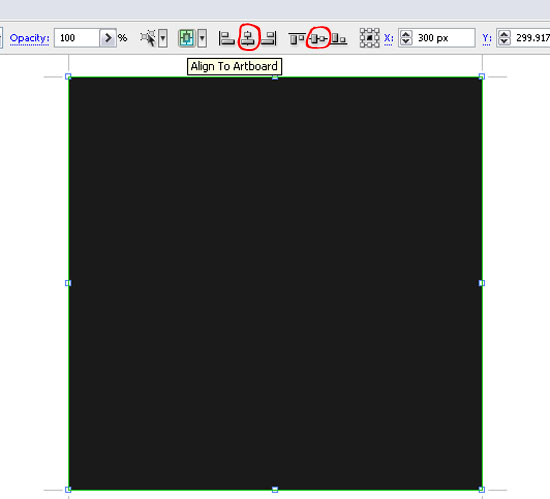
Let’s align our shape with the canvas.
Select the rectangle using the Selection Tool (V), then open the “Align to clipboard†menu on the top menu bar. Now click the “Horizontal Align Center†and “Vertical Align Center†buttons.
STEP 4
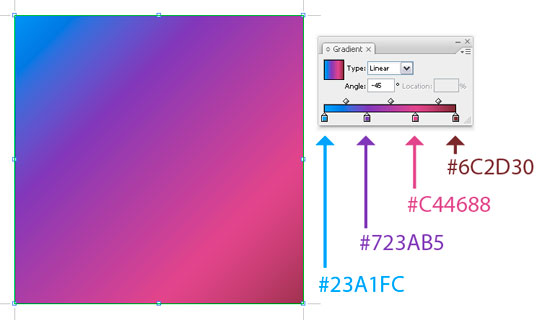
Open the Gradient window and add the colors like below. Then apply it to our shape at a -45 degrees angle.
STEP 5
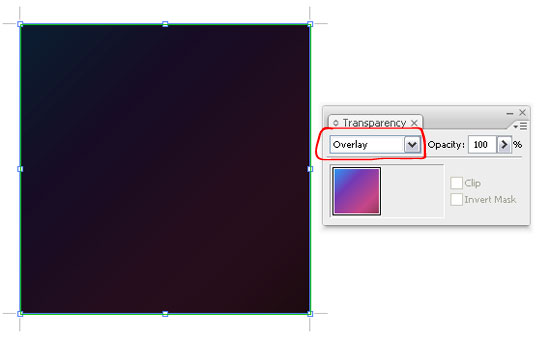
Open the Transparency window (Window > Transparency or CTRL+SHIFT+F10) and set the rectangle’s transparency to Overlay.
STEP 6
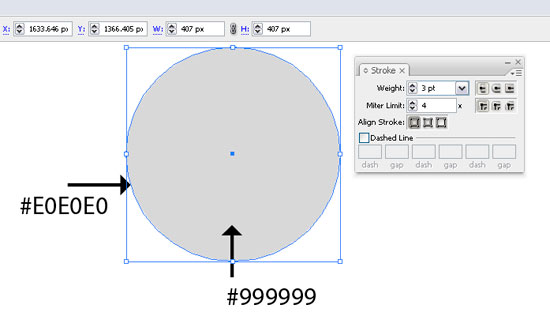
Grab the Ellipse Tool (L) and click your canvas. Set both Width and Height to 407 px. Now set the Fill and Stroke colors like below. Open the Stroke window (Window > Stroke and set Weight to 3 px.
STEP 7
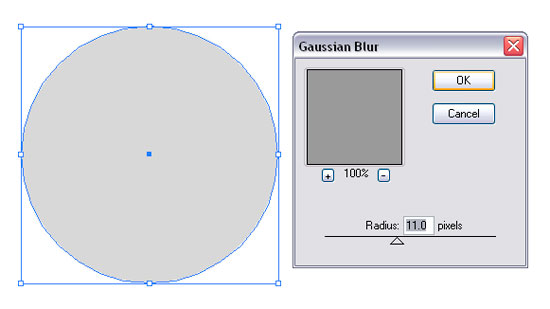
Select the newly created circle and go to Effects > Blur > Gaussian blur and give it about 11 px. Then hit OK.
STEP 8
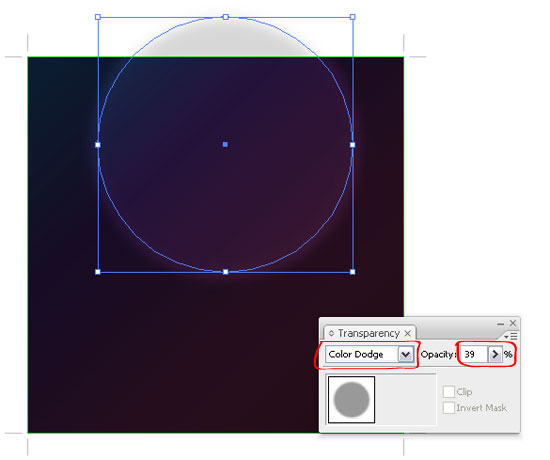
Place it over the square and set Transparency to Color Dodge and Opacity to 39%Â in the Transparency window (CTRL+SHIFT+F10). It should look like below.
STEP 9
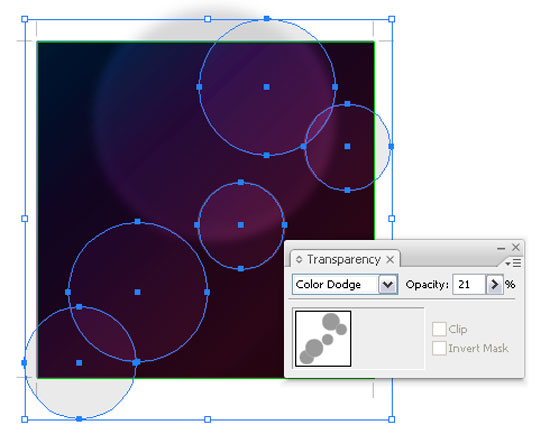
Repeat STEP 6: create a circle with the same colors, but this time set Weight to 2 px and make the circles smaller. Create a few of different sizes. Now select the newly created circles (use Selection Tool (V) and hold SHIFT key to make a multiple selection) and set Transparency to Color Dodge and Opacity to 21% in the Transparency window (CTRL+SHIFT+F10).
STEP 10
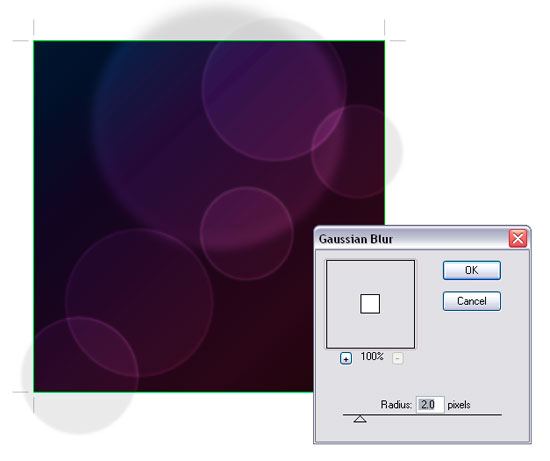
With the circles still selected, go to Effects > Blur > Gaussian blur and give it a 2 px radius. Hit OK. Now it should look like below.
STEP 11
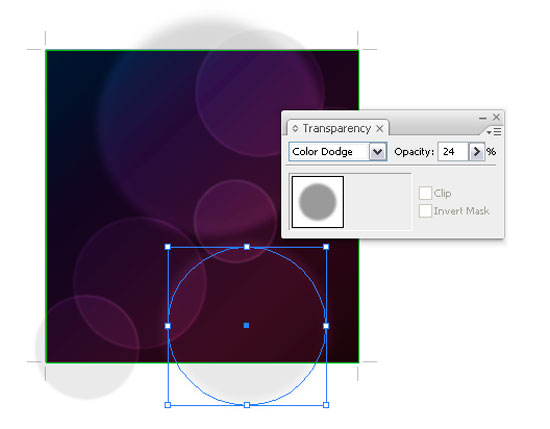
Create a new circle using the Ellipse Tool (L) like in STEP 6. Make it smaller than the first one. Now open the Transparency window (CTRL+SHIFT+F10) and set Transparency to Color Dodge and Opacity to 24%.
STEP 12
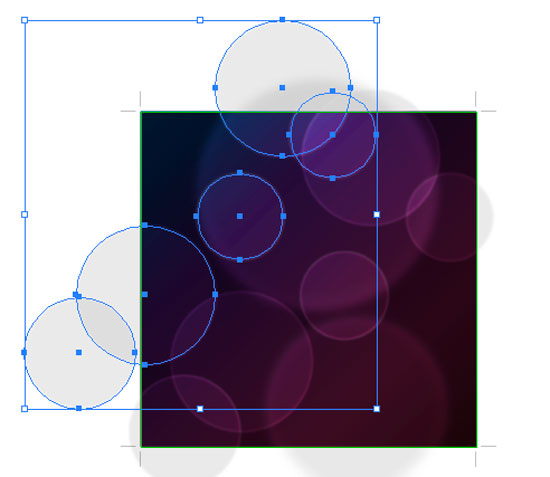
Select the circles we created in STEP 9 using the Selection Tool (V) – hold SHIFT key to select multiple, then while holding the ALT key, click-and-drag to the top left corner of the square. This will make a copy of what we created in STEP 9.
STEP 13
Make more copies and rotate them. Make sure you play around with Opacity until you are satisfied with the results. It should look something similar to the image below.
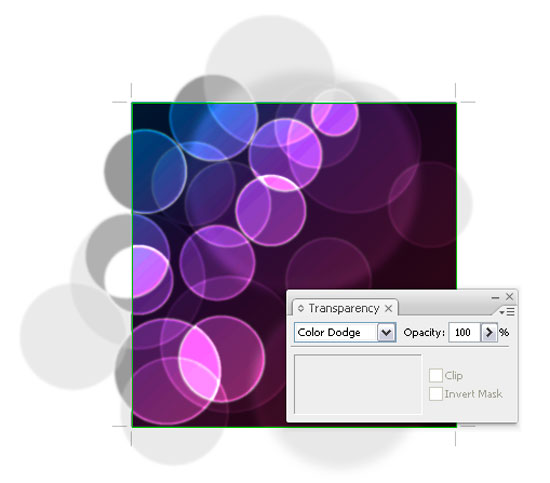
STEP 14
Select the first circle we created, then copy it (CTRL+C) and paste it to front (CTRL+F). Then right-click > Arrange > Bring to front (CTRL+SHIFT+]). Give it more Blur if you see fit. It should look like below.
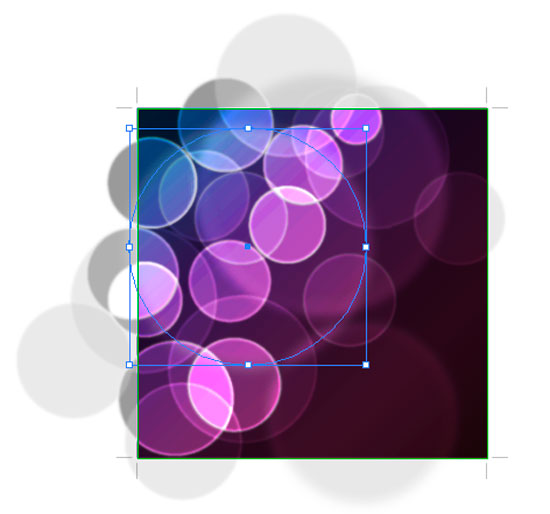
STEP 15
Now we’ll create a clipping mask so our design would be trimmed nicely.
Copy the background shape and copy it (CTRL+C), then paste it (CTRL+F). Now right-click > Arrange > Bring to front (CTRL+SHIFT+]) and remove its Stroke and Fill.
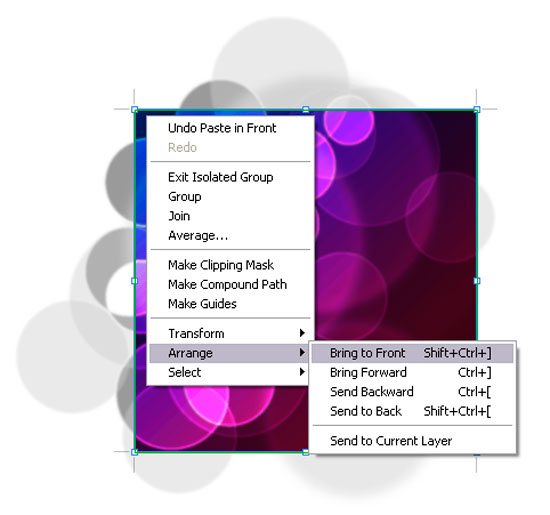
STEP 16
Select all artwork, then right-click > Make Clipping Mask. And you’re done!
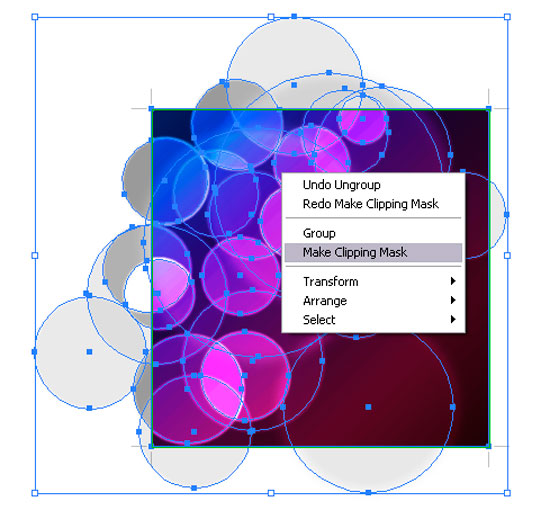

The source file for this tutorial is available in the link below.
[download id=”145″]
Was this tutorial helpful to you? Share your thoughts!
Also, check out 7 Perfect Text Colors That Can Be Used On Golden Backgrounds
I think this tutorial is great, thanks for sharing…!!!!
useful.thanks
Superb piece of work indeed…thanks for sharing man…
You should mention that the document must be in RGB mode. Forgot that I was working in CMYK and couldn’t understand why the blending looked wrong.
The outer rings that appear on the circles, I can’t seem to replicate that.
Or even the circles adjust to the color that it is over, I can’t seem to replicate that either.
I am pretty new at Illustrator and I am using CS5. I’ve been working on this for a couple of days and seem to can’t make it like in the tutorial. Could use some help please.
I just figured it out. How to make the outline around the circles that is. I didn’t understand the part about filling the circle with the color of the ingredient.
Thanks for this tutorial! It’s really helped me get started doing come cool effect.
Thanks for this!
I never really sat down to figure out how to achieve this effect with a resolution-independent method.
Based on this very helpful tutorial, I’ve worked out a quicker method to achieve the same effect in Illustrator CS5 (in which the circles are also more random):
1. Follow step 1 through 8.
2. Open up the symbols palette (Command/ Control + Shift + F11)
3. Drag your circle to the palette in order to turn it into a symbol. Unless you plan to import it into Flash you don’t need to worry about the Type. Just give it a name and hit OK. you can now delete the one circle on your canvas.
4. With your new symbol selected in the Symbols palette, select the Symbol Sprayer tool (Shift + S) and drag over your canvas.
5. With your just sprayed Symbol Set selected, double-click the Symbol Sprayer tool in the Tools palette. In the options dialog, select the Symbol Scruncher (3rd icon from the left) and fiddle with the Symbol Set Density.
Still in the options dialog, select Symbol Sizer (4th icon from the left) and deselect ‘Resizing Affects Density’. Hit OK.
6. You’ll now have the Symbol sizer tool selected, as that was your last stop in the options dialog. With your Symbol Set still selected, drag over it to randomize the size of the circles. Do the same thing with opacity through the Symbol Screener tool.
Done.
You now have multiple instances of the same symbol. If you want to fine-tune it, double-click the symbol in the Symbols palette and edit away. After you’re done, hit the escape key on your keyboard and voila; all instances will update.
WTF whith you guys?
step 5 rectangle is allmost black
step 6 rectangle is colored whith gradient
step 7 rectangle is black again?
But how? It was colored!
@Antonb he forgot to mention that you do the gradient as a New Fill layer via the appearance palette. So set your gradient up – add it as a new gradient to the gradient swatches then do create new fill on the rectangle and change opacity to colour dodge there.
সুন্দর! সুন্দর!! সুন্দর!!
The illustrator work is very beautiful.
This is a innovative article to read thus same as one tool named as a quickbooks which is cloud based accounting online tool if facing the issue of quickbooks transaction error 179 which is baking error in quickbooks don’t allow the user to login in payroll