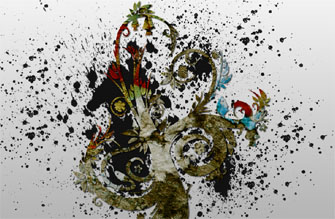
Creating an Amazing Layout Using Texture


Today we will create this amazing layout and along the way we will learn some simple but exciting effects. First we are going to put our texture to great use , go through  halftone effect and  we will end up with creating some easy but spectacular elements in Illustrator. This tutorial requires an intermediate level for Photoshop and some basic knowledge of  Illustrator.
For starters you will need the abstract tree from our Abstract Trees Vector Pack and a nice interesting texture.You can download both at the end of the tutorial plus the PSD file of the final image.
Step 1
Begin with a new white document  and import your tree into Photoshop. Also drag on your layout the texture and  make sure they are on the same document and that they overlap. Arrange their size a little as you consider or turn them around as you feel like it .The key point here is to get the best of the texture.

Now Ctrl click the tree to select it  and now select the texture layer and press Ctrl + J. Delete the original tree and texture layer. And you have an interesting looking tree and a good starting point for a great layout. And you can  always play around with different kind of textures and shapes.

Step 2
Now we are ready to start adding elements on our layout.We will first use some splatter brushes(Download here )
Press the D key to set your foreground color to black. . Create a new layer ( Shift +Ctrl+N) under the tree layer and now you are ready to choose on of your brushes and start painting behind the tree . You should end up with something looking like this.
Step 3
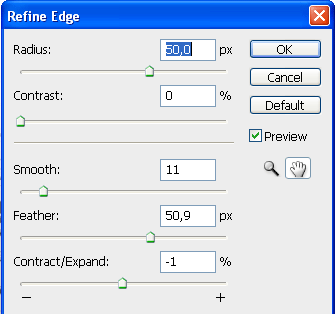
In this step we will create the ever popular halftone effect which is actually pretty easy to make.We start by picking the elliptical marquee tool and creating a  medium size circle on a new layer.Don’t give it any fill , just keep the selection active and go to the Select menu and choose Refine Edge ( or just press Alt +Ctrl+R).Use the following options.
Now press the Q key to enter the Quick Mask mode.

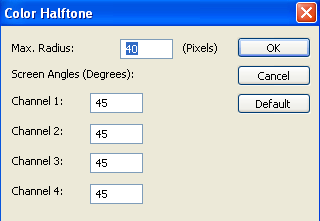
Go to Filter/Pixelate/Color Halftone and introduce the following settings (my settings act just as guidelines , you can  feel free to experiment with these setting to create the effect you desire).
Exit the Quick Mask mode by pressing Q again. And you will have a halftone selection. Make sure that selection is on a new layer  and you have black as your foreground color and press Shift + Backspace to fill your selection with black.And there you have it …your halftone effect. Put the halftone layer in the back of the tree layer and reduce its size a little .

Step 4
Now we go back to Illustrator to create a new shape. Use the Pen Tool to create a curved shape and give it a  1 px Stroke and no Fill . Alt click this shape and drag it downwards to duplicate it.
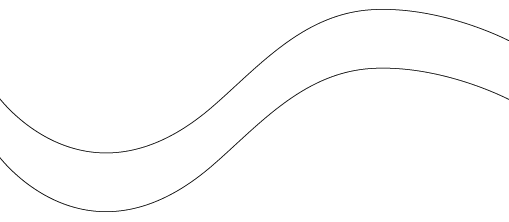
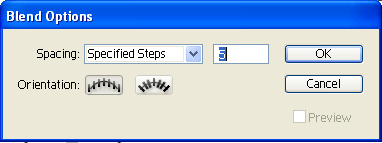
Go to Object/Blend /Blend Options and choose specified steps from the menu, type in 8 and click OK.
Now  make sure you have both shapes selected and  go  to Object/Blend/ Make.

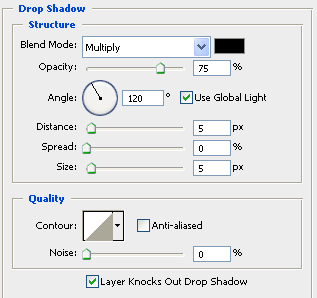
Import this new  wave shape in Photoshop as a Smart Object and change its size so it fits on the layout from one side to another. And give it just a little bit of drop shadow .

Step 5
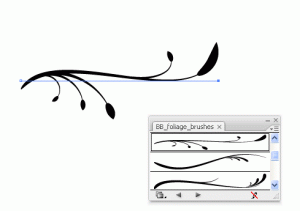
Now we go back once again to Illustrator for the last elements. For this step you will need  to install the Foliage Brushes from Bittbox.Once installed just draw a straight line with the pen tool and click on the brush you desire from the brush menu.I choose two different kinds of brushes using the same technique .
Import your shapes in Photoshop and arrange them in the back of the halftone layer.

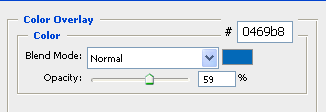
Now let’s give these elements some color. I used the following settings:
And the end result should be looking like this :

Step 6
Get your rectangle tool and make a few vertical rectangles placed at an equal distance from one another and filling the whole page. Merge all the rectangles together so that you have them on a single layer.

Now press Ctrl+ T for your free transform tool and rotate them at a a 45 degree angle and adjust their size so they fit the canvas. Change the fill value to 0, and the opacity to 75.
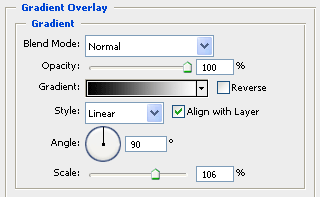
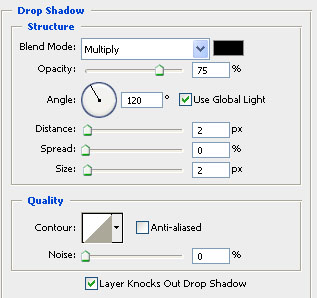
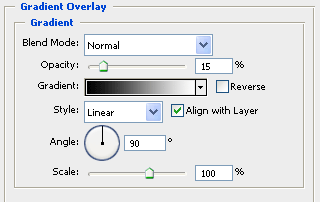
Go to Layer Styles and use the following settings:
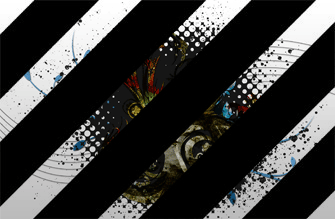
And here is the result :

Step 7
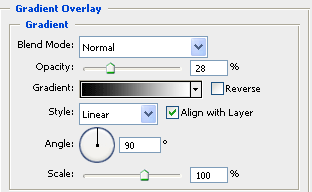
And now it’s time for the final touches. Select your White Background layer and give it a subtle gradient.

And now lets give our tree a little more contrast. Create a new layer on top of the tree layer. Change the layer’s mode to Soft Light and pres B for your brush tool. Pick a soft brush, bring the opacity of the brush to 40 % by pressing 4 and start painting with white on the parts of the tree you like to brighten up. Do the same thing with Black on the parts of the tree you would like to darken. This is a very subtle effect , but it just gives that extra something to the image.

And you are about done. Hope you enjoyed the tutorial and see you next time!
Download the PSD file:[download id=”2″].
Download the vector tree and the texture :[download id=”3″].
Do you want to learn more about how to work with Photoshop?
See our Illustrator and Photoshop tutorials. They are all FREE. Also check all Free Vectors Category.
Nice detailed tutorial.
Thanks for sharing
great ideas. It looks really nice. I love that vintage style background that seems to be becoming more and more popular.
Great tutorial… Love the final result.
hi. could you re-upload ‘tree and texture’ file on other fileshare hosting? i can’t download file from this server :(
A really creative tutorial. Thanks for this post.
I recently came across your blog. I don’t know what to say except that I have enjoyed reading. Very informative and nice blog. I will keep visiting this blog very often.
Outstanding!!! Never seen before…. I loved visiting this Blog as everytime I visit I’ll get something out of you guys…
Well explained article. Thanks for posting it.
Innovator,..
Excellent Creativity,..I like very much,..Superb,..
All the very Best to urs Next Collections,.
That’s super awesome!
http://tweekhub.com – All your friends are doing it.
Wow.. a marvelous piece of work indeed..thanks for sharing
Nice design work and its look good. Completely awesome!!
nice tips. thanks for sharing.
WOW! What a find.It just so happens I’m taking a class at the International Academy of Design & Technology and the class is on this very tool. the first assignment is to find a image or logo that uses both shape and texture.
(NOTE To the author of this tutoral)
I hope you don’t mind me using your image as a reference point in my paper I will also be mentioning the tutoral as well and providing a link back to it as well. if there is going to be a problem feel free to contact me.
Great!!!!! I’m using for Wallpaer
ho can i make and share my thought like you did it just know ???
I opine that good students have to study the technology essay they purchase at research papers online service to make better their skills.
Wow thanks all comment extreme tool to habit after you search with your associates.
<a href="http://www.snapbackhatstar.com">snapback hats</a>.
<a href="http://www.snapbackhatstar.com">cheap snapback hats</a>.
<a href="http://www.snapbackhatstar.com">cheap snapbacks</a>.
Nice Article I ever found. Thanks for sharing awesome ideas.