Tutorial: How to create a burning flower in Photoshop
In this tutorial I will explain how to create a burning flower using Adobe Photoshop CS3. I will also provide you with the psd source file at the end of the tutorial.
Difficulty: Intermediate
Completion time: 1-2 hours
Tools: Photoshop CS3
Resources:
-Â Â Â Â Â Â Â Â Â Floral Vector Pack 21 from Designious.com or try some of the Freebies.
-Â Â Â Â Â Â Â Â Â Flames from Shutupandwhisper
-Â Â Â Â Â Â Â Â Â Fire from Ermbmx2
-Â Â Â Â Â Â Â Â Â Smoke from Falln-brushes
-Â Â Â Â Â Â Â Â Â Fire brush from Hidden-eddie
Here’s a preview of the final image.

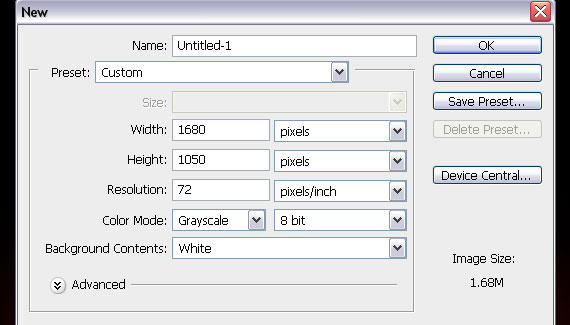
STEP 1
Create a document in RGB color mode at 72 dpi. I made it 1680×1050 px. I made it a bit larger so I can add more stuff later if needed.
STEP 2
Grab the Paint Bucket Tool (G) and fill the background with black (#000000). We will work with fire and we will have bright colors, so a dark background will allow us to see better the shapes.

STEP 3
Open the Floral Vector Pack 21 from Designious.com. Grab the Lasso Tool (L) and select a flower of your choice. Copy it (CTRL+C) and paste it in our drawing (CTRL+V). Name this layer “flowerâ€.

STEP 4
Go to Layer > Layer Style > Blending Options. Check the “Outer Glow†checkbox, then click it. Set Blend Mode to Screen, Opacity to 75%, color to a bright red and Size to 24 px.

STEP 5
Check the “Inner Glow†box. Set the Blend Mode to Screen, Opacity to 75%, color to light orange, Choke to 5%, size to 13 px and Contour to a curve.

STEP 6
Check the “Satin†box. Set Blend Mode to Normal, color to a dark red, Angle to 19 degrees, Distance to 11 px, size to 46 px and Contour to a choppy, random curve. Just draw one, it will do nicely.

STEP 7
Check the “Color Overlay†box. Set Blend Mode to Normal, color to a light orange, Opacity to 100%.

This is how the image looks like after these effects.

STEP 8
Grab the Lasso Tool (L) and set its Feather to 30 px. Make a very rough selection of the flower.

STEP 9
Create a new layer (CTRL+SHIFT+N) and name it “Glow 1â€. Now grab the Paint Bucket Tool (G) and fill the new layer with a bright red. Make sure you click inside the selection. Then go to Select > Deselect (CTRL+D). Set the layer to Screen blending mode and set Opacity to 48% and Fill to 60%.

STEP 10
Go to Layer > Duplicate Layer… (CTRL+J). Grab the Selection Tool (V), go to Edit > Free Transform (CTRL+T), hold ALT+SHIFT and click-drag one of the corners. Hit Enter. Set Opacity to 60%.

STEP 11
In the “Layers†window (Window > Layers), drag the “Glow 1 copy†below the “Glow 1†layer. Go to Layer > Layer Properties… and name it “Glow 2â€.

STEP 12
Open the “Flames from Shutupandwhisperâ€. Select it (CTRL+A), copy it (CTRL+C) and paste it in our drawing (CTRL+V), behind the “flower†layer.

STEP 13
Go to Edit > Free Transform… (CTRL+T) and resize it as you see fit. Then right-click > Flip Horizontal.

STEP 14
Select the “Flower†layer in the Layers window. Go to Layer > Duplicate layer. Create a new layer (CTRL=SHIFT+N), then select both this layer and “Flower copy†layer and press CTRL+E to merge them.

STEP 15
Open another image from “Flames from Shutupandwhisperâ€. Select it (CTRL+A), copy it (CTRL+C) and paste it in our drawing (CTRL+V), behind the “flower†layer.

STEP 16
Go to Edit > Free Transform and make it smaller. Hit Enter. Now go to Edit > Transform > Warp and distort it to follow the shape of the flower.

STEP 17
Go to the Layers window and click the “Add Layer Mask†button. Then grab the Brush Tool and with a soft brush, paint over with black the unwanted parts.

STEP 18
Open the “Fire from Ermbmx2â€. Select it (CTRL+A), copy it (CTRL+C) and paste it in our drawing (CTRL+V). In the Layers window (Window > Layers), set Blending Mode to Screen. Also set this layer behind the “flower†layer.

STEP 19
Place it like below, then go to Edit > Transform > Warp and distort it to match the shape of the flower.

STEP 20
Repeat STEPS 15,16,17 until the entire flower is covered.

STEP 21
Move some of the flames layer above the “flower copy†layer, so it will appear as if the flame surrounds the flower on all sides.

STEP 22
Select a flame layer, then go to Image > Adjustments > Levels (CTRL+L) and adjust the shadows and the highlights. Move the black and white triangles around until you are satisfied with the result. Then do the same for all the flames.

STEP 23
Create a new layer (CTRL+SHIFT N) below the “flower copy†layer and name it “smokeâ€. Open the “Smoke from Falln-brushes†and start adding some smoke. Use a light gray.

STEP 24
Select the “smoke†layer in the Layers window and click the “Add layer mask button. Then grab your Brush Tool (B), select a soft brush and paint with black the unwanted areas. If you want to make faded areas, just reduce the Opacity and Flow of the brush. I’ve marked the areas where you should definitely mask the smoke.

STEP 25
Create a new layer (CTRL+SHIFT+N) and name it “heat waveâ€. Move it behind “flower copy†layer. Set Opacity to 40% in the Layers window.

STEP 26
Open the “fire brush from Hidden-eddieâ€. Grab your Brush Tool (B) and make a large “flameâ€. Use a bright orange color.

STEP 27
Select the “heat wave†layer from the layers window, then go to Filter > Liquify (CTRL+SHIFT+X). Select the “Twirl Clockwise Tool and make a large twirl. Hold ALT key to twirl counter-clockwise.

STEP 28
Create a new layer (CTRL+SHIFT+N), name it “sparks†and place it behind “flame†layerâ€. Open the Brushes palette (F5) and pick a small hard brush. Start adding small, random dots of different sizes and opacities. Use a bright, yellow color.

STEP 29
Select the top-most layer in the Layers window, then go to Layers > New Adjustment Layer > Brightness/Contrast. Adjust the bars a bit till you get a bright, vivid fire. Done!

STEP 30 (optional)
Go to Layer > New Adjustment Layer > Hue/Saturation and place it below the top-most layer. Double-click its thumbnail in the Layers window, check the “colorize†box and play around with the cursors.

The source file for this tutorial is available for download in the link below.
Source psd file: [download id=”149″]
Was this post useful to you? Share your thoughts!
Ni-ha-ice!
I second that.. VERY NICE
Tutorial added to the web tuts
Wow! Really nice!
Nice tutorial:)
Realy nice tutorial. Thanks mate it brought some good ideas to my mind.
unfare in dis layout
Eh, Nice…or u could just pour gasoline on a flower and light it.
I must note that no flowers were hurt during the creation process and we intend to leave it that way :)
nice tutorial!!
http://www.webexpound.com/photoshop
really helpful tutorial and nice work! thanks for sharing.
Nice tutorial with easy explanation, loved the new breed of flower so much. ;)
wow it awesome…. thank so much
Nice Tutorials,
I am visiting this site first time and I think its nice.
visit : news.ewebtutorial.com
Awesome tutorial indeed…many many thanks for sharing…
pls is there anyone who send me Fire and Smoke pack? psl to my email [email protected] thank all
Look at the beginning of the tutorial, the links in the Resources section lead you to the brushes.
It really looks amazing! Nice useful tut!
it really looks very nice
Wow..master one..really gorgeous ..
Wonderful tutorials. Really like the end result. The techniques used in creating the buring effect are amazing and really love they the wrap tool has been used. Thanks for sharing such a nice tut.
Great WORK. Very Nice Tutorial. Thanks for sharing. Please also make this as a video tutorial.
Nice Tutorials,
I think its very useful and really good collection thanks.
visit
starfizy.com
starfizy.com/jobs
Nice tutorial, well done with layer style effects, lights and masks, technique makes you able adding charm to any thing … appreciate sharing .. c;/
Greatut. Congrats !!! :D
I am happy to find this very useful for me, as it contains lot of information. I always prefer to read the quality content
tr