Quick Tip: How to use the Quick Mask Tool
Photoshop users often ignore Quick Mask, which can help control complex selections, quickly remove background from objects, and more. Remember that this tool is built to improve the other tools and not be used as a stand-alone function.
Here’s how you can use it.
I picked a random landscape image from Google to work on.
Let’s say you want to remove the sky to add a dramatic, cloudy one. How do you select it?
STEP 1
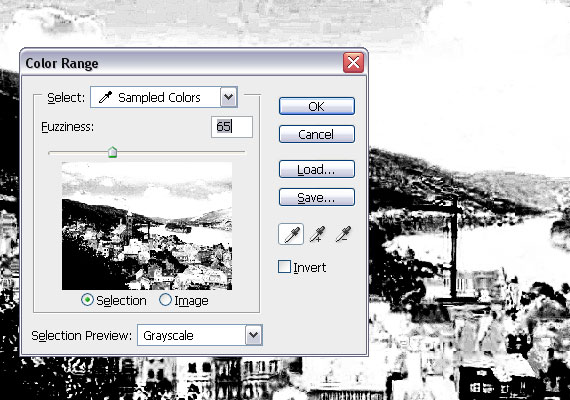
Go to Select > Color range. Click the sky, hold the SHIFT key and click also on the clouds.
Adjust the Fuzziness a bit to make the selection more precise. Hit OK.
STEP 2
Notice that Color range does not make a perfect selection and you need to tweak it a bit.
Enter Quick Mask (Q), grab the Brush Tool (B) and paint over the areas that are not covered with red.
Use the Eraser Tool (E) and erase the red areas on the clouds and sky. Exit Quick Mask (Q).
Now the selection is more clean.
STEP 3
Select the Rectangular Marquee Tool (M), right-click inside the selection and click “Layer via Copyâ€.
You can use this as a clipping mask for the sky you want to add later.
Here’s how the image looks without the sky.
This technique is useful for high-quality images and works better if the image has high contrasts.
Your turn now! Is this post useful to you? Leave a comment!
This example is very simple image. I am not sure if this techniqu would work in more complicated images. But thx for tut.
It works for more complex images too. But it’s extra work with the pen :)
Thats really a cool piece of tutorial indeed..very easy and handy …thanks for sharing
I want same desgin poster movie.
I want same desgin poster movie.