Artist of the Week: Low Poly Portrait Tutorials by Breno Bitencourt
Man has always dreamed of immortality, and the visual arts are one of the only methods through which we can, at least philosophically, achieve it. Portraits have been around virtually since cave painting, the oldest “cave portrait” dating back to 26, 000 years ago.
In the Ancient World, portraits became immensely popular in several cultures, each having their own style and creed behind creating them. The Egyptians, for example, created a huge amount of portraits, depicting their rulers and gods. These were very stylized, and likeness was considered mostly irrelevant, until the 14th century BC, when Akhenaten became Pharaoh.
Greeks were also famous for producing large numbers of portraits, only they made sculptures, instead of paintings on various materials (none have been found). Greek sculptures are renowned for the precise way in which they depict both the human face and body, and there is literary evidence that suggests that their paintings were at least as accurate.
Early Middle Age portraits were “generalized”, meaning that only key details of the subject or subjects were captured, such as hair and facial hair style, the body remaining essentially the same in all portraits. But by the end of the Middle Ages, portraits became more and more detailed, and the subjects depicted in them more secular, no longer being just donors to the church.
The Renaissance marked the point in which artists became more than just tradesmen, prominent figures such as Leonardo Da Vinci, Raphael and Michelangelo being considered geniuses for their works, works that included portraits. It is during this time that the most popular form of portraiture was developed, namely the portrait miniature, and the most famous portrait in the world was created; the Mona Lisa.
The portrait miniature remained quite popular until the development of photography. In the mid 19th century, the daguerreotype reduced posing time for a portrait, thereby making photography the go-to method of commissioning a portrait. Photographs are also an interesting look at how technical challenges and/or opportunities, combined with the aesthetic of the time, create an entirely new form of art.
Which brings us to the subject of today’s article.
Low-poly portraits are a really hip, new and cool form of portraiture. What it also is, is hard. Perhaps more than any other photo manipulation, low polygon portraiture seems to be the most similar to actually painting, taking a picture, then doing weird, wonderful things to it.
Breno Bitencourt, this week’s Artist of the Week, really shines at making these kinds of portraits. Whether they are from scratch, or starting from a photo, the results are absolutely gorgeous, and anyone would like to able to pull off such great portraits.
Being somewhat of a community-orientated individual, Breno has made a few tutorials, so that other people can learn to do what he does. We will be presenting these tutorials shortly, and you take a more in-depth look at them on his Behance profile. But first, let us tell you a few things about him.
Born in Paraguaçu Paulista, Brazil, Breno is a graphic designer that specializes in logo design and corporate identity, which kind of explains why he is so good with polygons.
He has a Bachelor’s Degree in Graphic Design, which he got by attending courses at Universidade Estadual Paulista Júlio de Mesquita Filho, and is currently based in Bauru, where he is Brand Identity Manager at Biten.me, and Creative Director and Co-founder at Inkorpore.
What he also does is maintain digital media and branding for Bar da Árvore, which is a family business that his grandfather started, and his father inherited.
Biten.me is a design studio, so that’s pretty straight-forward, but Inkorpore, the business he is a co-founder of, is a tattoo parlor. On paper, Breno might just be the hippest person alive.
Now that you know the artist a little bit better, it is time we show you his awesome tutorials.
Low-Poly Self Portrait
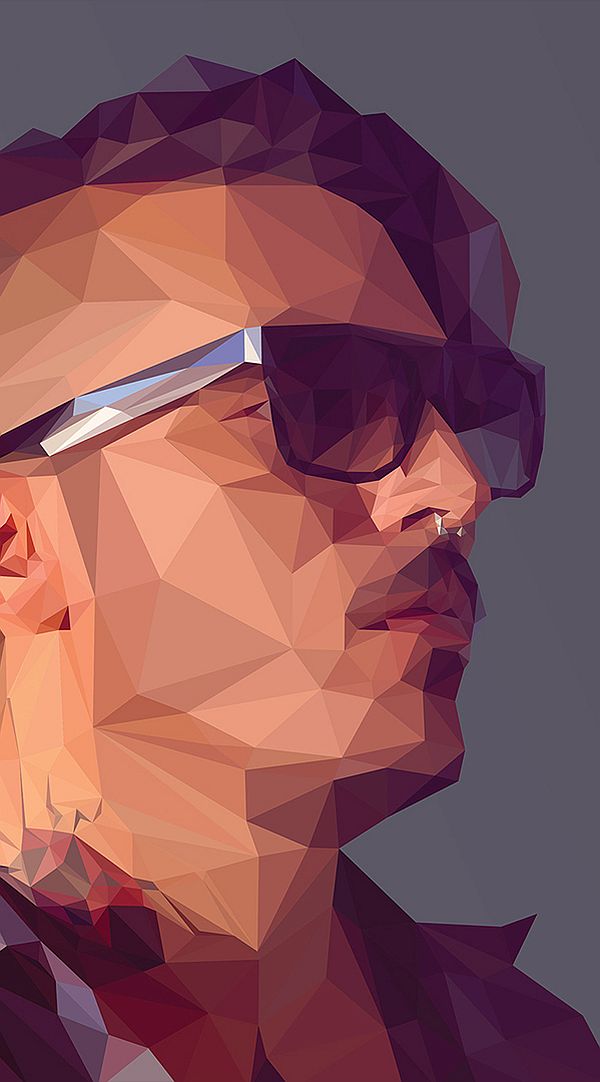
In this self portrait tutorial, the artist takes on an in-depth, step by step look at his work process. All the essentials and details are here, so he does not revisit them in his other tutorial, using it -the other tutorial- only as an example of the same principles, applied to a different different photo.

“The secret” the tutorial reads “to creating works in this style is working from the best reference photos”, that means that you have to use perspective to capture depth, you need a good variance of light and shadow, and something to contrast with the skin’s texture, like accessories.
To do this, you will have to pick and choose the best bits out of several photos, and combine them into a single photo, which you will use as a reference photo.
“As you can see from this screenshot, I’ve chosen the face from one, glasses from other, and other details from other shots. Be picky in this stage, it’s well worth it. For each part, roughly crop around the part your want.”
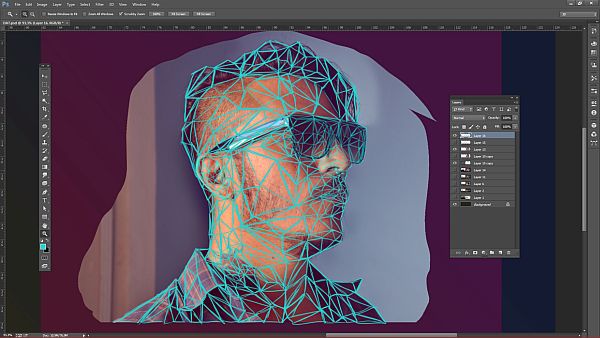
The truly tricky part is creating the triangular mesh. You can use some of Photoshop’s automated functions in the previous steps, but here, you have to do it all by hand.
“Why? Because your brain is better than any script or automated process at determining the contours of the face.”
Breno, however, does give a few guidelines, so you will not be flying totally blind: do not use quadrilaters, try to stick to subjects with straight noses, use the small brush for the mesh, and use a light color that contrasts with the portrait.
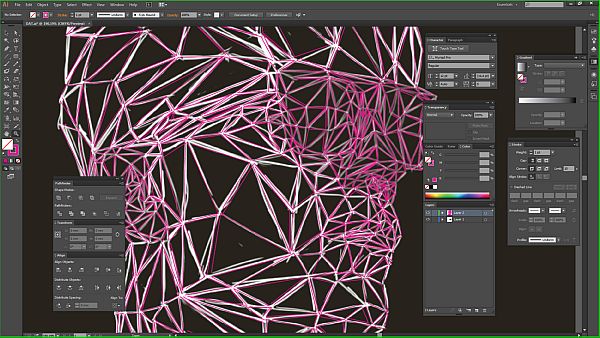
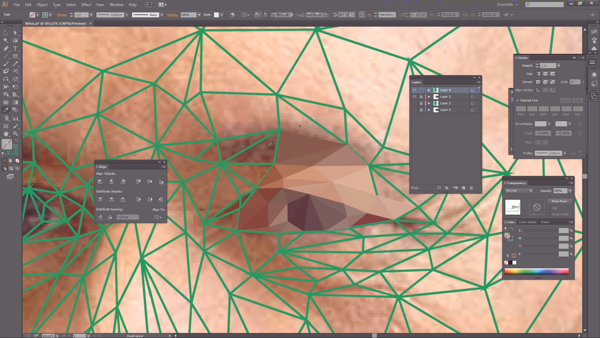
After you have don that, it is time to move the whole thing over to Adobe Illustrator. Here you will be tracing vector triangle mesh, so you get the pleasure of doing all of that all over again, but at least this time you are tracing over an already existing mesh. Here’s a tip for speeding up the process: “You don’t need to close up your triangles, just use the Pen tool to mark out the three points.”
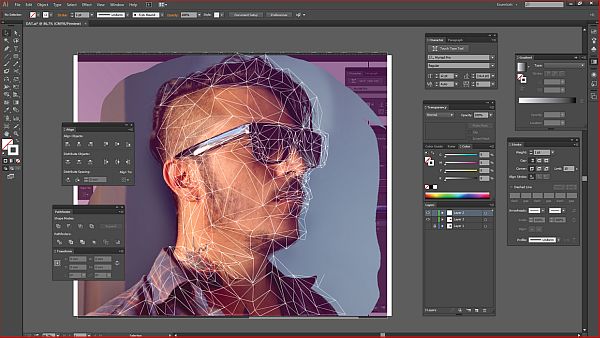
After you finish tracing the mesh and filling it up, it’s time to place the reference photo in a layer below, align them to perfection, and start coloring. Once that’s done, you should get something as cool as Breno’s self portrait.
To see the whole process in video format, click here.
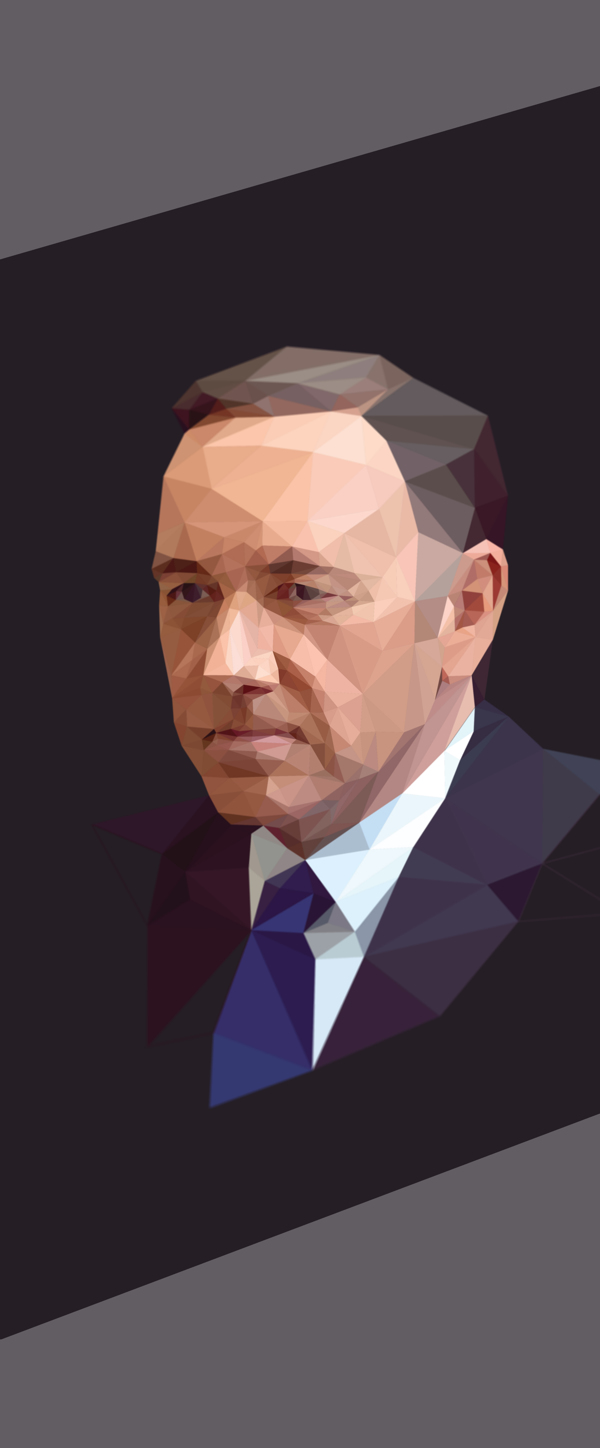
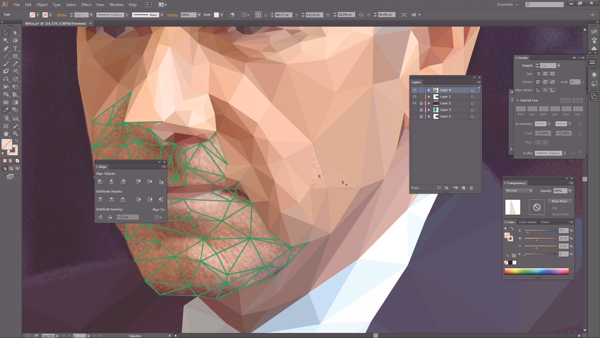
Frank Underwood Low-Poly Portrait
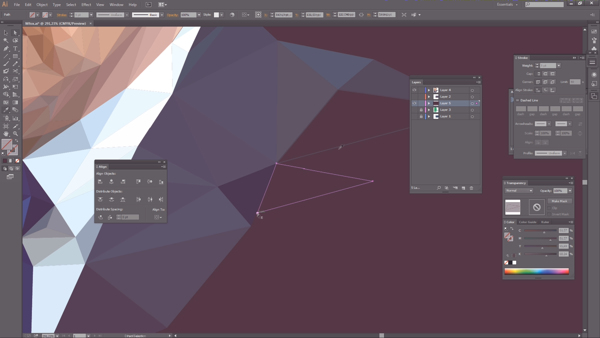
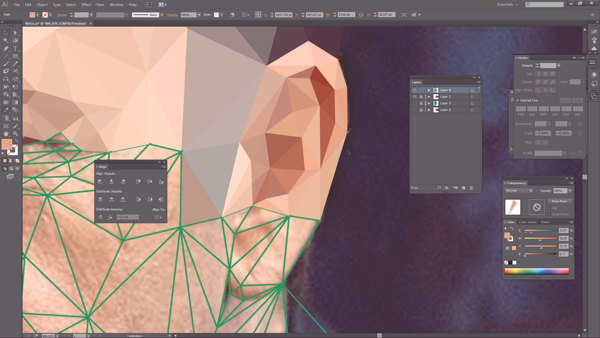
This next tutorial is exactly the same, only you don’t create a reference photo from several ones, instead using an already existing one. You can watch the sped-up process of creating this portrait here, and we will be showing you a few screencaps from the Illustrator phase.
That concludes our presentation of Breno Bitencourt’s tutorials. We hope they will help you out in creating marvelous low-poly illustrations in the shortest time possible. Don’t forget to check out his profile, which we linked earlier, and share your thoughts on this article, in the comment section below.
All artist work are not very creative better than than that. I like your work.
I was inspired by him to do one myself and the outcome was amazing. Mine was of a pigeon.
It was pretty easy to do but it is just time-consuming