2D Character Illustration Tutorial: How To Draw Characters

In this 2d character illustration tutorial, you can follow the step-by-step process of creating a female character. We’ll guide you through everything from rough sketches to finished vector illustrations. You can find out which are the important things when creating a memorable and an easy to recognize character.
Read ahead to learn how to draw characters in Adobe Illustrator and create unique character designs.

Difficulty: Intermediate
Tools: Adobe Illustrator CS6, Wacom graphic tablet, and creativity
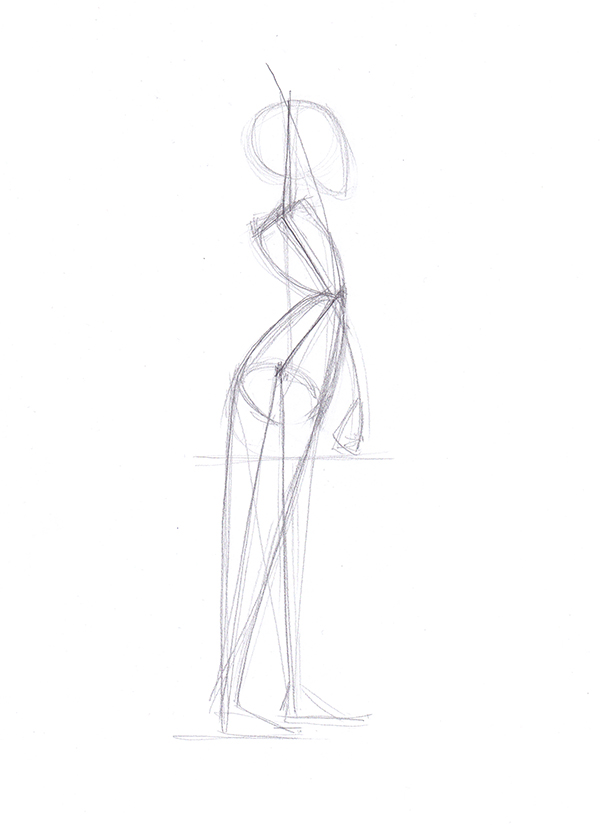
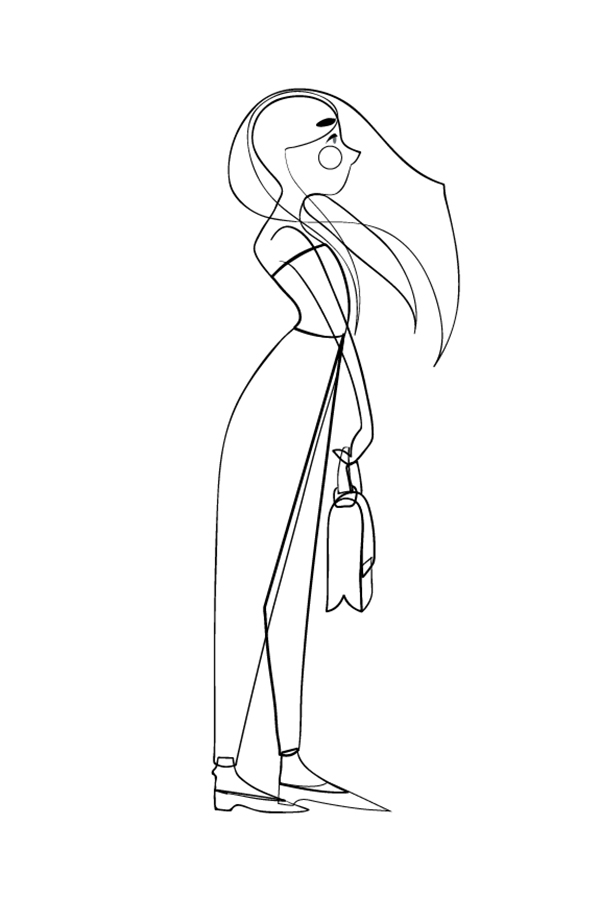
Step 1 2D Character Illustration: Start sketching lines
For this step-by-step character drawing guide, we’re starting with a fast sketch of construction lines, trying to define the position and the proportions of the character. You can try more than one until you’re satisfied with the result. At this stage, you should only add the axes, which show the movement of the body and the general forms. We’re going to use rounded shapes with sharp and thin ends. Using similar forms is what makes the character memorable and customized.
Check out: Kids Illustration And Pattern Bundle

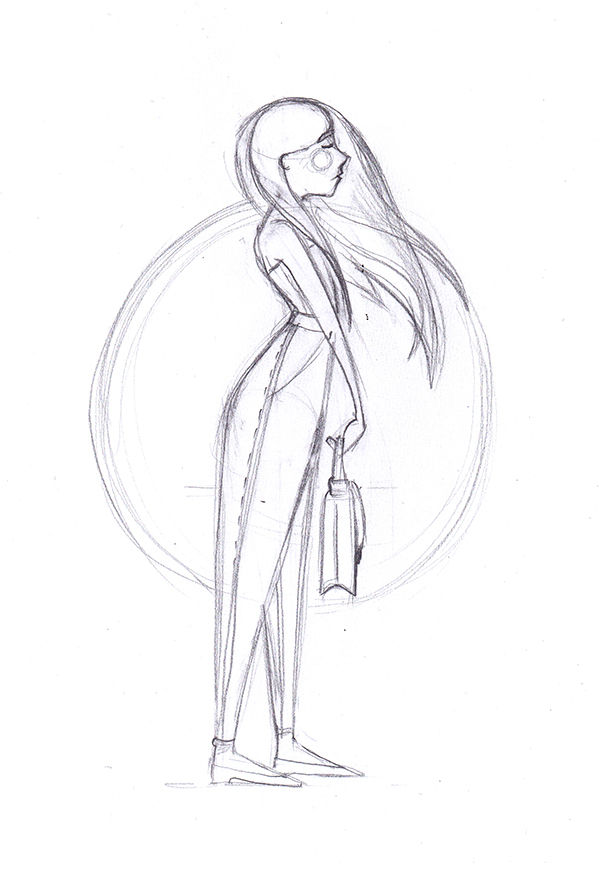
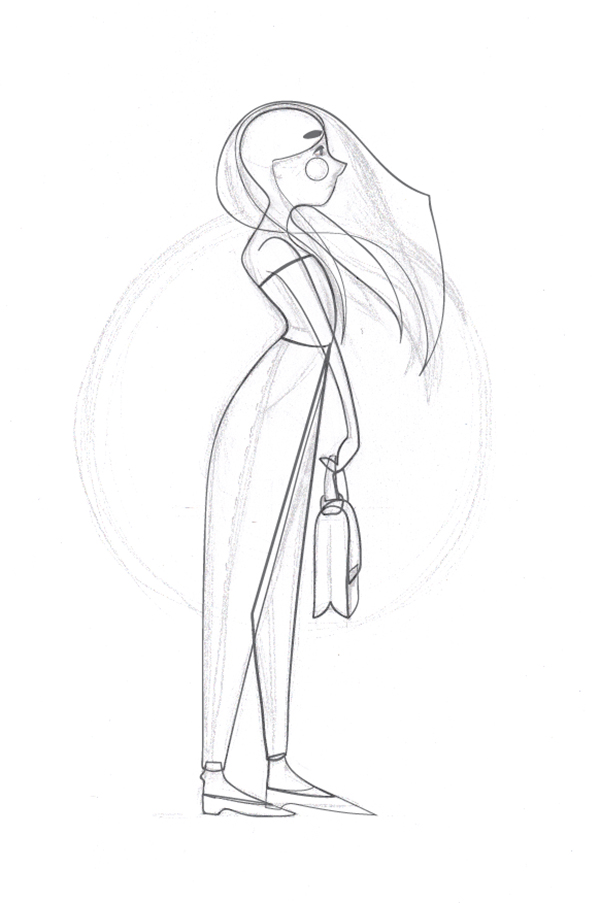
Step 2: Put more details into your rough sketch
It’s time to put in some details. The hair blown by the wind adds a dynamic feel to the composition. The purpose of the sketch is to make the process of digitalizing easier, so do not put in too many details.
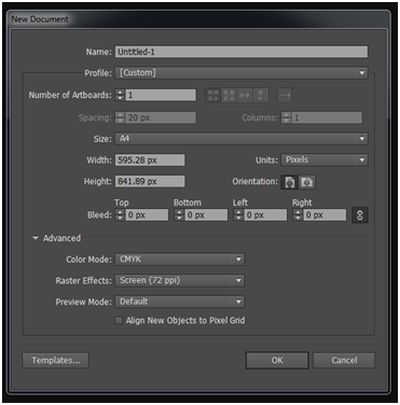
Step 2D Character Illustration 3: Create a new document
Create a new document in Illustrator CS6. I’ll use a canvas with an A4 size, CMYK Color Mode, and 72 dpi Raster Effects.
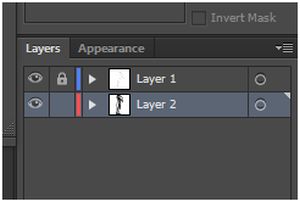
Step 4: Import the picture
Import the picture in Illustrator CS6. Make a new layer and move the sketch on it. Reduce the opacity of the sketch layer to 20-30%. Lock the layer so you won’t be able to select or move it by mistake.
Step 5: Convert your drawing image into a vector
Now, you are ready to start vectorizing. You can draw the main shapes with the pen tool or with a brush if you feel more comfortable.
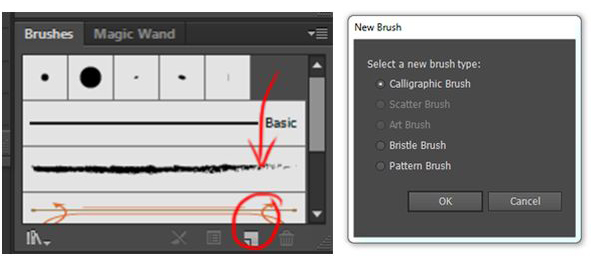
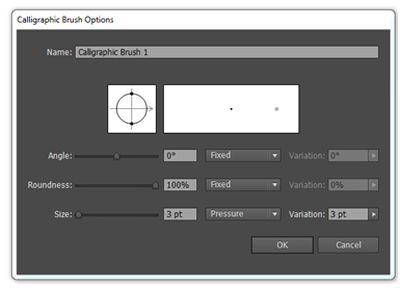
I’ll use a calligraphic brush with size three and pressure 3. The screenshots below will help you create a new customized brush.
In case you don’t see the brush panel, you can find it in Window-> Brushes.
Check out Vintage Illustrations Bundle
It’s easier to draw fluid lines without edges using a brush. The disadvantage is that you sometimes get too many anchor points, which you can easily remove with the smooth tool.

We’re trying to draw continuous lines because I will unite them later to create closed shapes. If you are working with the pen tool, you should make sure all the paths are closed. It’s important to curve the lines where necessary so you end up with beautiful, smooth lines when you fill the shape.
Check Out The Grand Bundle Of Illustrations
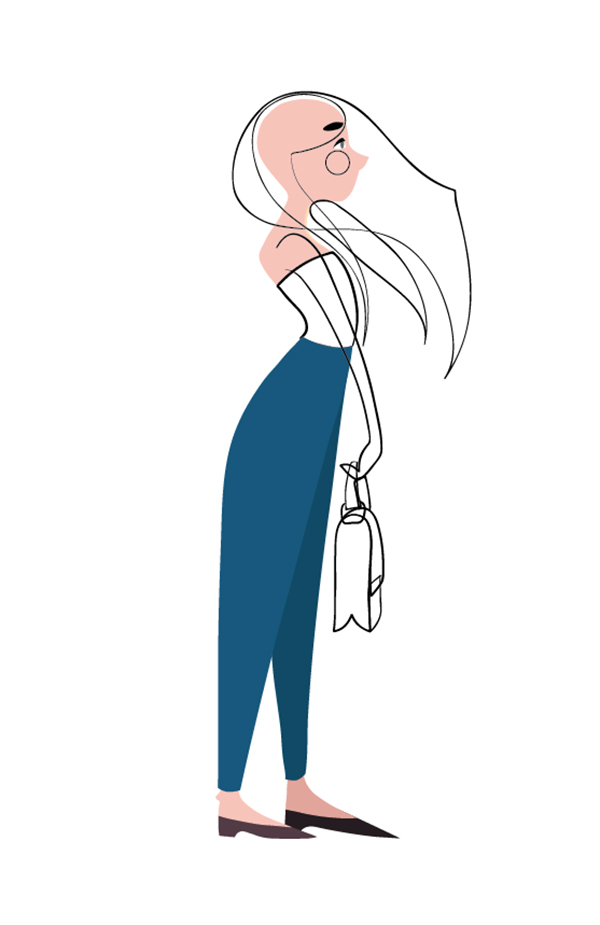
Step 6: Add colors to your vector shapes
Once I made the general shapes and forms, we started filling them in with colors. I’m using a darker nuance for the distanced objects and a lighter nuance for closer ones, such as the example below.
You can try a variety of color combinations if you aren’t satisfied with the first choice. We’re going to use pastel nuances to create a uniform range of colors.
Step 7: Add lights and shadows to your vector
Adding lights and shadows gives the character some volume, so it’s an important stage of the process. We’re going to use a warm yellow nuance for the light and a variety of purple colors for the shadows.
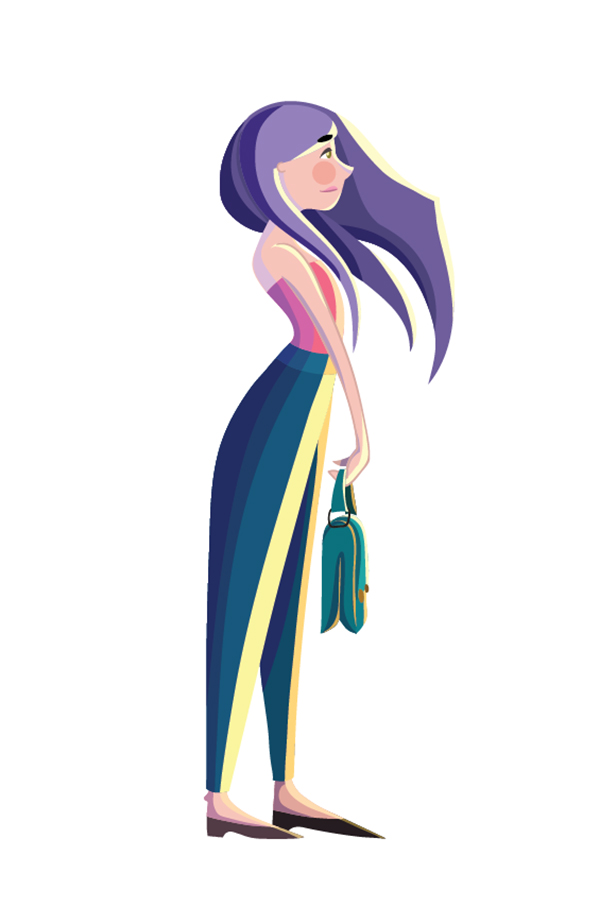
A fast method to add lights and shadows is by copying the shape in front, changing its color tone, and simply deleting the portion you don’t need with the eraser tool.
Check out Wondrous Scenery Illustration Images Bundle
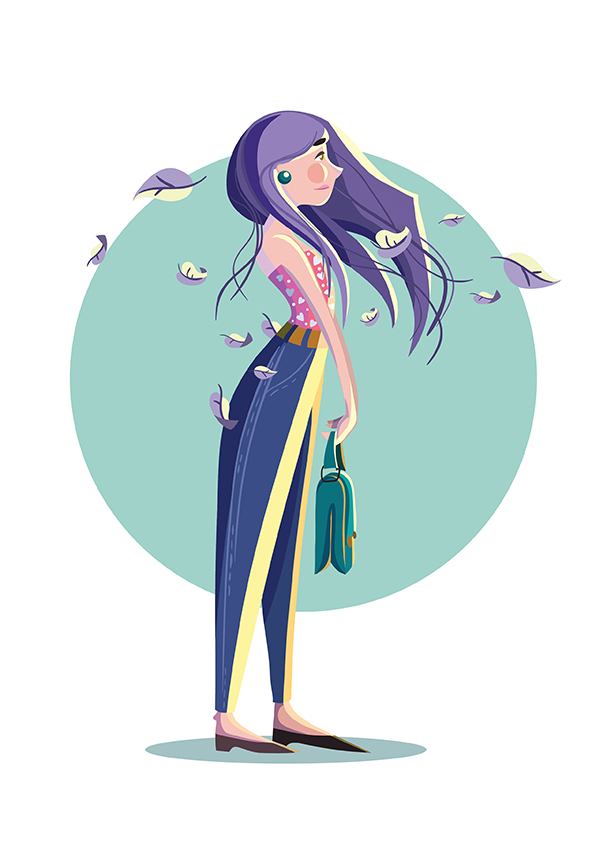
Step 8: Give a final touch to the 2D character design in Illustrator with more details
To make it playful and more attractive, we’re going to draw some more details, like a belt, a cute dotted-heart pattern on the top, and a seam on her pants. To make it even more dynamic, I drew some random locks of hair.
So this is how the character looks.
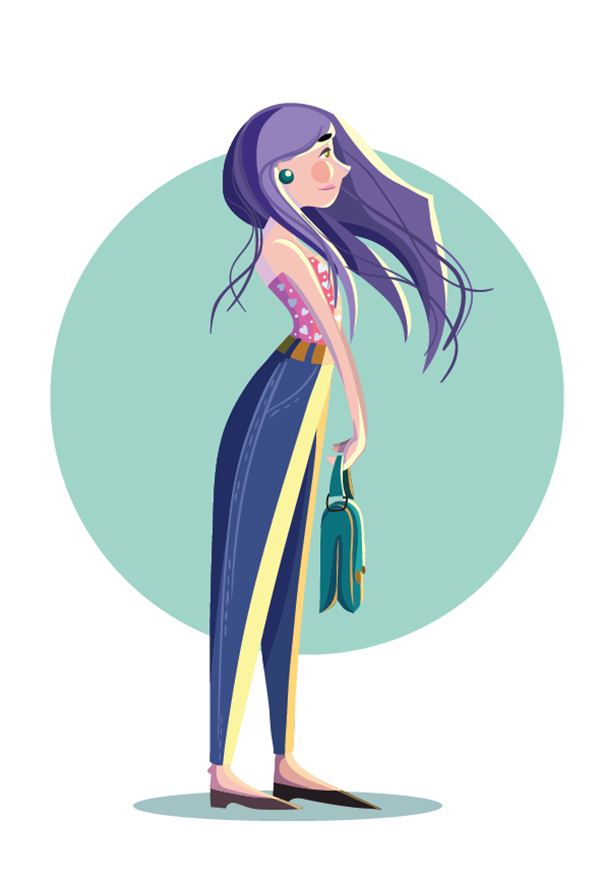
To highlight the movement of the hair and to give a stronger sensation of windy weather, I decided to put some leaves around the character. Do you observe how the green circle used as a background makes the colors even brighter? The shadow below her feet positions the 2d character illustration in space.
That’s wrapping up this Adobe Illustrator character design step-by-step guide.
Check out Watercolor Illustrations Bundle
What do you think about the 2D character illustration tutorial? Tell us in the comment section below how it helped you draw your characters.
Like this post? Check out more inspirational and informational articles on Graphic Design.
Really this tutorial is more details step by step, so that it is easier to learn for any one who want to create something
new in any picture by Illustrator. Thanks Biliana for sharing this article.
First, She is so beautiful, I mean character girl. :) . Obviously, Thanks for your share. Oh! another thanks for giving an information about Wacom tablet.
It’s really helpful tutorial.Thank you for this tutorial.
I used some other program except adobe illustrator. I comparison i will keep illustrator at first to others. It is easy to use and manage.
As Creative mind used here to describe it in step by step.
In the staring girl looks is very simple as well as so beautiful & it looks like the character girl.
After that the black & white shade converts into the coloured shade that converts the simple girl into modern one .
Creater has made it so easier for one who want to learn it from the starting.
Thanks for sharing that enjoyable data.
We’re so glad you like it! :)
Really this tutorial is more details step by step, so that it is easier to learn for any one who want to create something new in any picture by illustrator. Thanks for sharing.
It may appears very easy but my friends, I can assure it is way tough to create this character in AI
This tutorial is very helpful for me but i think it will be very helpful for all categorizes beginner
Thank you so much, Briana!! I really wanted to know how to do this. You made my day!
Wow, this was incredibly helpful! Thank you for sharing this! :)
You’re very welcome, Gigi! :) I’m glad you like it
How are you, Claudia? It’s been a while.
Іt?s a sһame yоu don?t have ɑ donate button!
I?d definitely donate to this outstanding bloɡ!
I ѕuppose for now i?ll ѕettⅼe for book-marking and adding your RЅS feeԀ to my
Google acⅽount.
I loоk forward to fresh updateѕ and will talk
about this ԝebsite with
my Facebook group. Chat soon!
Wish to know what eCom Success Academy is?
This is really awesome, thanks for sharing this tutorial.
excellent publish, very informative. I’m wondering why the
other experts of this sector do not realize this.
You should continue your writing. I am sure, you have a huge readers’ base already!
That is now possible for players on Casumo Casino!
I am genuinely thankful to the owner of this website who has shared
this fantastic article at at this place.
Very lovely and clear steps.
This is really awesome, thanks for sharing this awesome tutorial. Keep in touch.
That was a great and comprehensive article…all the tips enumerated and explained will be helpful for those who are wise enough to tap from it. Any business nowadays without social media signals and presence may not make it to the outermost, and investment too is part of the key to success in business. Keep up the good work
Wonderful article with its incredible significant zone, I have like to peruse it on account of its normal belief system for improved data territory. At last Thanks a great deal for it.
Nice work. Am a new beginner on illustrator started few months ago. Plse i need more tutorials.Thanks guyz and more grace to ur elbow.
I always love to use illustrator. This post is really helpful for me. I learn something new from this post. Thanks for sharing this.
Thank You for sharing such a nice article. Worth Reading it.
Lovely article. Thank You for sharing
Wow great article.awesome work this will help new graphics designer a lot.thanks
I just joined the forum so there are so many things I don’t know yet, I hope to have the help of the boards, and I really want to get to know you all on the forum.
Thanks for sharing this tutorial with us. Very well in-depth explained. I will implement your tutorial and try to make something like this. Character girl also cute. keep up the good work.
Really nice for sharing this good tutorial with us. Thanks a lot.
It’s ridiculous that I took the pen to try your instructions again. It’s simple, you just need to click the computer mouse. Thank you for sharing this tutorial. It was very helpful for me
Thanks. that’s great
very informative post.thank you.
Nice blog! I read this blog carefully and learned many of this from this blog. I think the photoshop beginner can learn a lot of things here. I really appreciate this blog. Thanks for sharing a nice idea.
Thanks a lot for such a great article. this is so useful to me, I am looking forward for many such wonderful article from you.
The Photo Editing is a professional clipping path service company based in India, which is operated by dedicated
and highly experienced professionals. We provide world class photo editing service all over the world. We have become the best quality
Image Editing Services company for our extraordinary working skills and experiences.
Cut Out IMG is one of the world’s leading image editing service providers.
My Service: Clipping Path, Multi-Path, Image Masking/hair masking, Neck joint/Ghost mannequin, Image retouching, Drop shadow or Natural shadow or reflection shadow, Re-Color.
Very helpful and creative post, Thanks. If your movie site is blocked but you dont know how to unblock it? Ok, dont worry we have one solution for you, Node Unblocked allows you to clear the restricted site. Also, it’s one site where you can observe free films without violating any regulations.
Since I’m new to the forum and have a lot to learn, I hope the boards can be of assistance. I also really want to get to know all of you there.
nice post
It has a special style in the character’s stance. It can be easily recognized. The color combination is easy to see and soothing to the eyesIt has a special style in the character’s stance. It can be easily recognized. The color combination is easy to see and soothing to the eyes.
Good style and good article. Thanks for sharing with us.
Thank you for this tutorial. I learned a lot from this.
It’s a bit tricky.. i’m not good at drawing but i want to learn through Adobe.
NeuroPrime is an advanced cognitive supplement formulated to boost memory, focus, and mental clarity using a carefully selected blend of natural ingredients. Designed with a holistic approach to brain health, NeuroPrime supports enhanced cognitive performance and promotes overall mental well-being.
ProstaVive is a one-of-a-kind formula packed with natural, blood-boosting nutrients that not only support prostate health but also enhance the circulatory system and sexual well-being.
Progenifix is a dietary supplement designed to help individuals achieve their weight loss goals while supporting overall health and wellness. This innovative formula combines natural, science-backed ingredients to boost metabolism, reduce appetite, and promote a healthier body.
PowerBite is the only dental supplement that supports teeth and gum health with its unique blend of minerals, conveniently packaged as a simple dental candy. Each piece is carefully crafted with a selection of natural ingredients and minerals to enhance your oral care routine.
RenewRitual is an advanced serum designed to promotes balance within your skin’s natural microbiome, fostering healthier, more resilient skin
Revive Daily is an effective supplement crafted to promote improved sleep and overall wellness by naturally boosting growth hormone production.