How To Open Vector AI or EPS Files In Photoshop
If you’ve ever been wondering, can Photoshop open EPS files? You’ve just landed on the right tutorial!
We received a lot of e-mails about how to open EPS files in Photoshop and how to use them without losing the quality of the vector in the process. This will make photo editing a lot more easy.
Whether you are using a PC or a Mac, the process is similar; the only difference is you will use “Cmd” instead of “CTRL.” We’re going to cover 2 ways to do the same. That said, let’s get straight to the point!

Table Of Contents
- Steps By Step Guide On How To Open EPS File In Photoshop
- How to Convert an EPS File into PSD?
- Step1: Open the File
- Step 2: Use Magic Wand Tool
- Step 3: Make Compound Shape
- Step 4: Verify Every Layers
- Step 5: Export the File
- Step 6: Open Your PSD File
- And that’s it! That’s how you open EPS file in Photoshop. If you have any doubts, let us know in the comments below.
- Editors Note – How To Open EPS File In Photoshop
Steps By Step Guide On How To Open EPS File In Photoshop
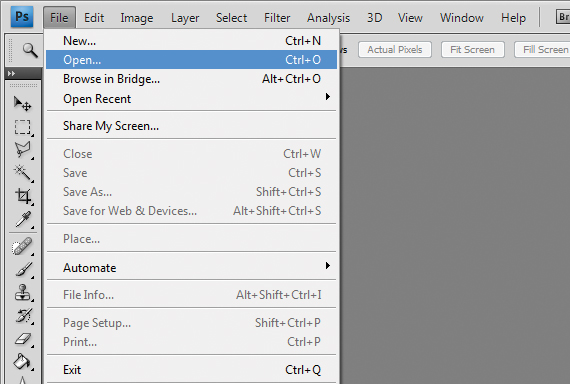
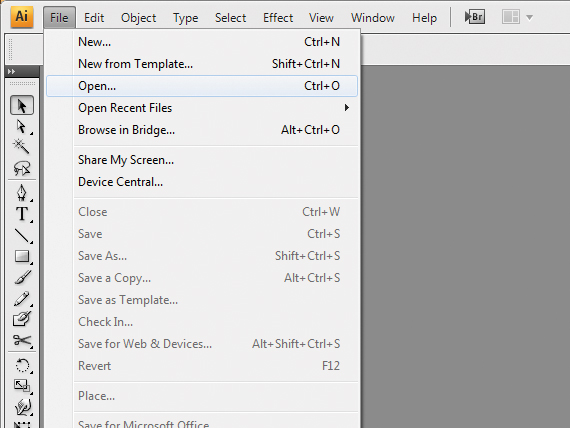
Step 1: Open Photoshop & Select File
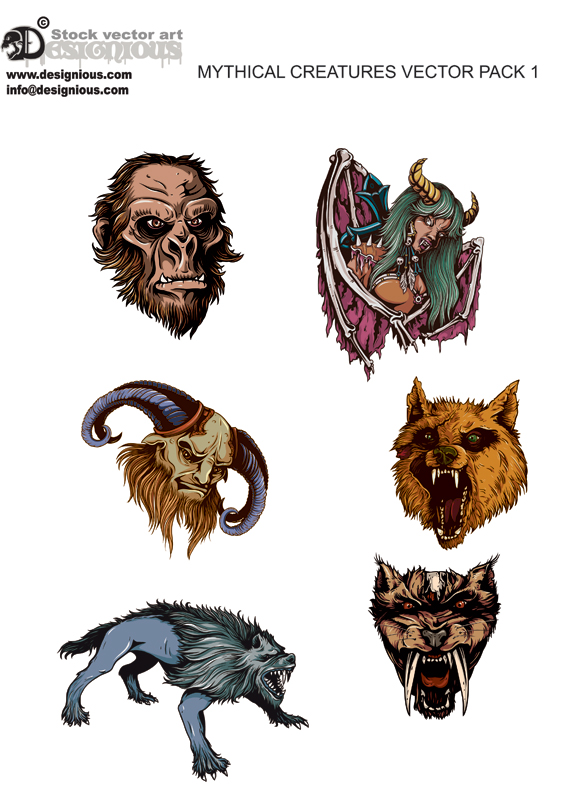
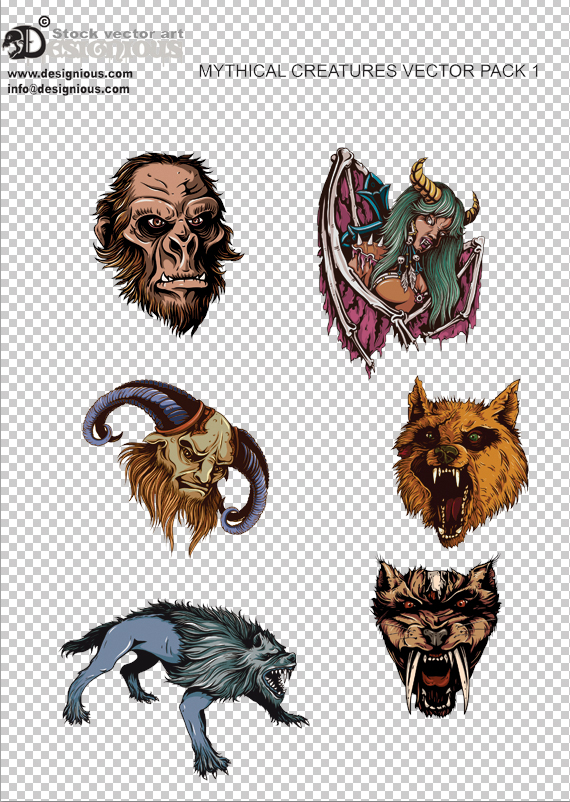
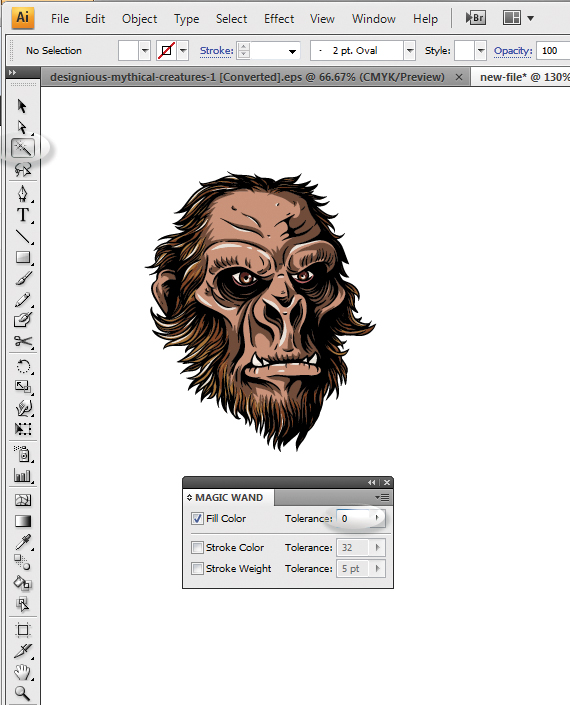
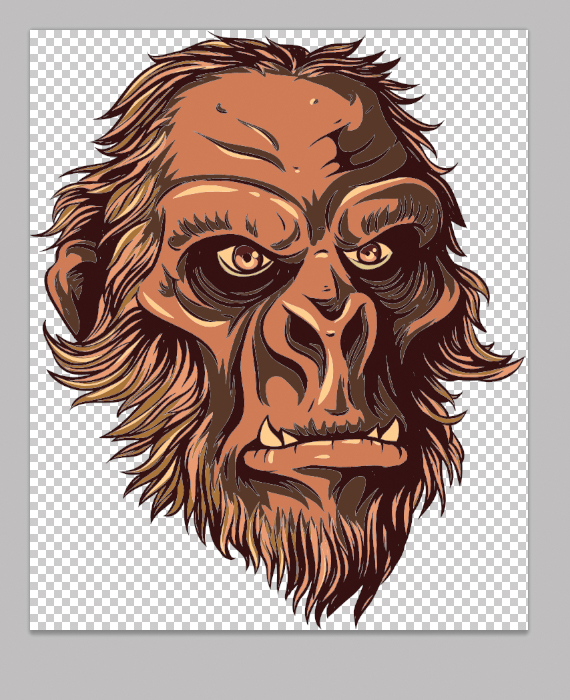
Open Photoshop, then go to File > Open… and select your vector file. We will need a test subject for this, so we’ll use one of our vector packs: Mythical Creatures Vector Pack 1.
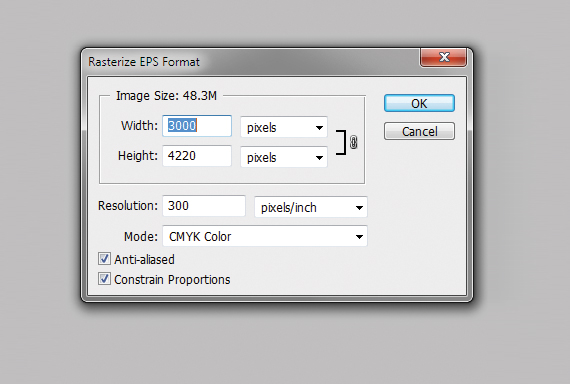
Step 2: Input a File
Unlike a regular raster file, the .ai and the .eps files will prompt you to input a file size before it will be opened. This step is very important because Photoshop will open the file as a raster, not as a vector or a Smart Object (we’ll discuss this type of file later).
We recommend you input a fairly large size; then you can scale it down without losing quality.
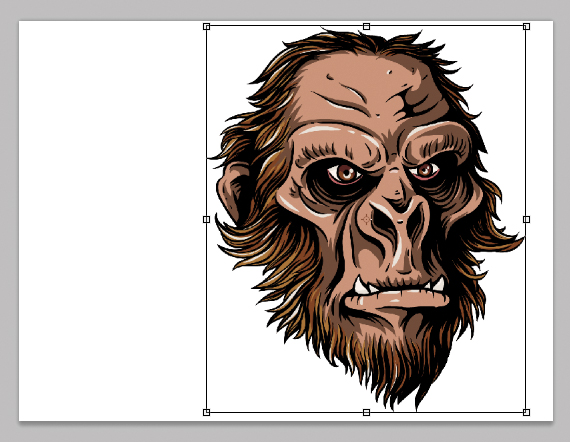
Now we have the full vector file converted to a raster (don’t worry, your original vector file is intact!) and can use it as a raster. But now we have an entire pack and want just a shape.
You might want to check 8 free portrait Photoshop actions to save you time.
Step 3: Remove Background
Some vectors may have a background because some vectors use transparency that requires a background (Multiply, for example, inherits a darker tone of the flat color below it). What do we do then? Don’t panic; We’re here to explain that too.
In the original file, grab the Magic Wand Tool (W), select the background color, and hit Delete. Hit CTRL+D to deselect.
Step 4: Copy & Paste
Here’s what to do: Grab the Rectangular Marquee Tool (M), select your shape, and copy it (CTRL+C). Now go to your document (CTRL+Tab) and paste it in.

Step 5: Scale it
Hit CTRL+T (Free Transform Mode), hold the SHIFT key, and scale it to fit your design. Hit Enter to exit this mode.
The downside of this workaround with vectors is the inability to rescale the elements to a larger size after you’ve shrunk it. But there is a way to do this if you copy a vector from Illustrator and paste it as Smart Object.
Step 6: Experiment With Scaling Up and Down
The Smart Object thingy is a vector file with scalable properties. If you double-click it, it will automatically open it in Illustrator and will allow you to fully edit it, just like a normal vector. Let’s scale them down, then scale them up and see what happens!
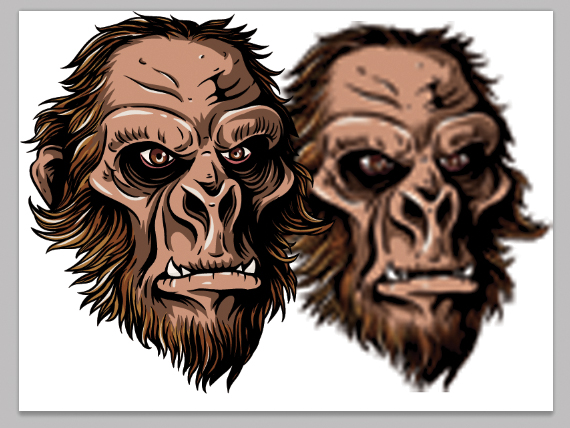
As you can see, the smart object preserves its quality, unlike the raster version, which dramatically gets ruined. We’ve exaggerated a bit with the scaling so the difference would be more obvious.
How to Convert an EPS File into PSD?
There is another way you can convert vectors into scalable Photoshop – Compound Shapes. This technique converts your vector shapes into Photoshop shapes (yes, the ones you usually create using the Path Tool).
Here’s how you convert them! (by the way, for this one, you’ll need Illustrator).
Step1: Open the File
Open your vector file in Illustrator (File > Open…). Select the vector you want, copy it, and create a new document (File > New…). Paste in the vector.

Step 2: Use Magic Wand Tool
Grab the Magic Wand Tool (Y), hit Enter, and set the “Tolerance” value to “0”.
Check Out: 1830 Creative Photoshop Brushes
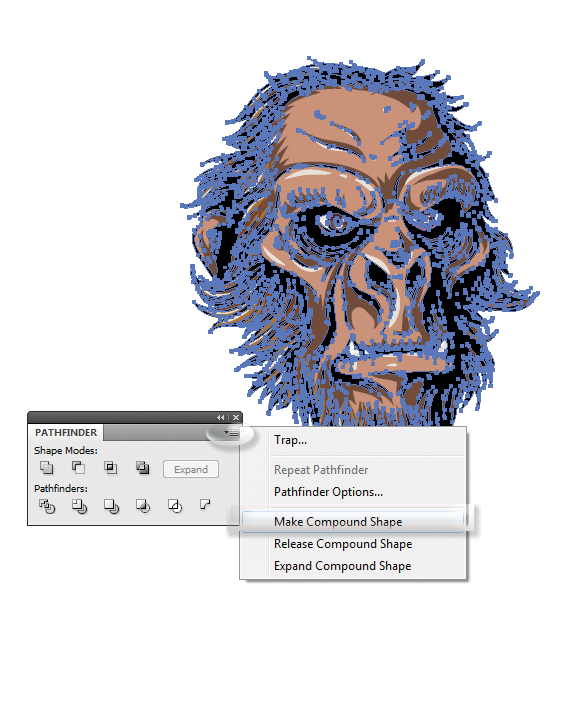
Step 3: Make Compound Shape
Select the outline go to the Pathfinder window (Window > Pathfinder) and access the floating menu. Select “Make Compound Shape.” Repeat this for every color in the vector.
Step 4: Verify Every Layers
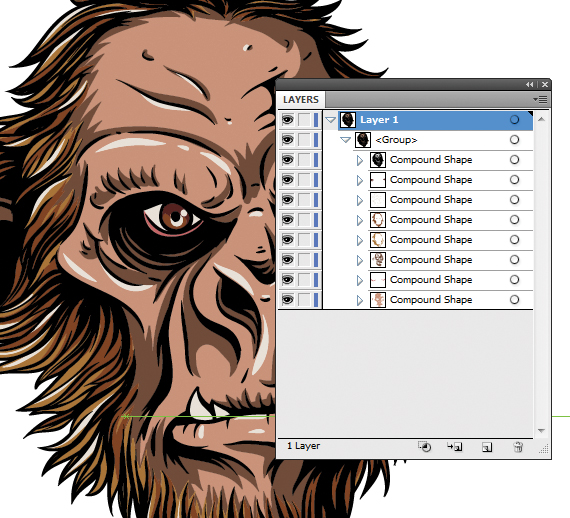
To verify if you’ve done this for all shapes, expand the layer, then the group, and check if there are any “Path” sub-layers. If there are, click the small circles near the layer and convert them to compound shapes, like before. In the end, you should have only “Compound Shape” layers.
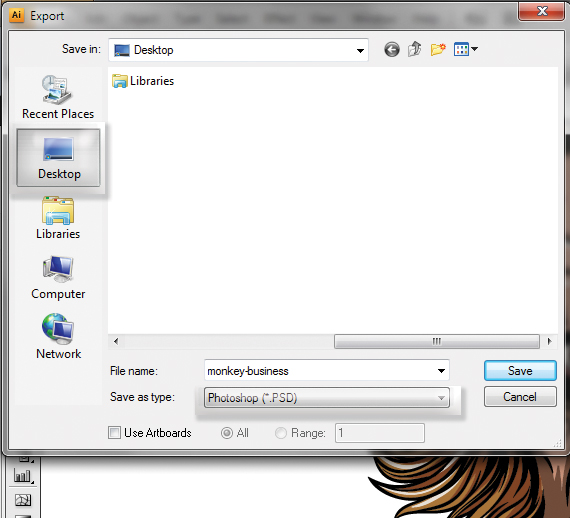
Step 5: Export the File
Now we have compound shapes ready to be exported to Photoshop!
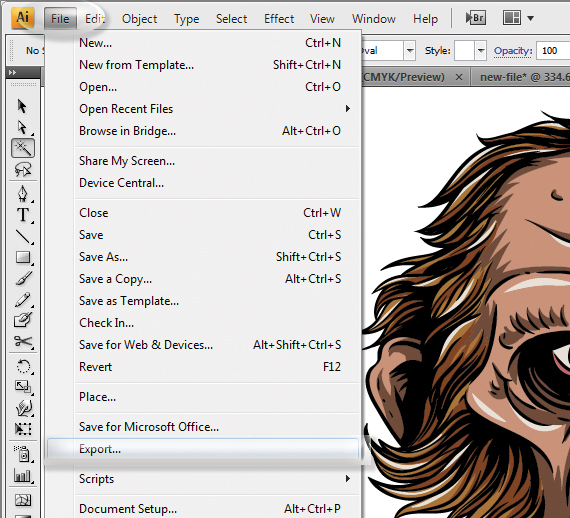
Go to File > Export, select. PSD in the file type, name it, set the location to Desktop, and hit OK.
Step 6: Open Your PSD File
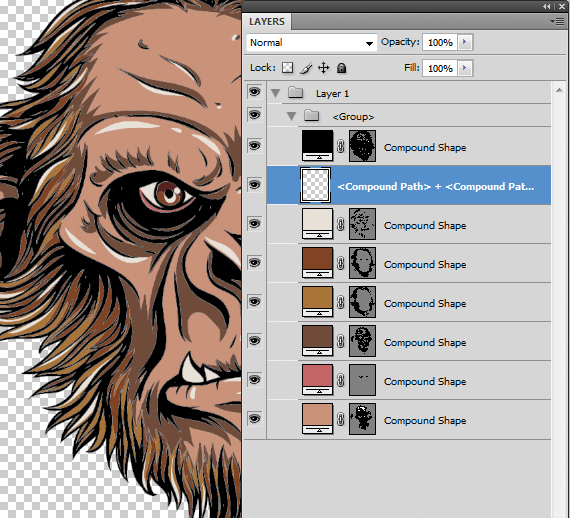
Double-click the newly created. PSD file to open it in Photoshop. But wait, now instead of having a single layer with a vector, there are more layers, each with its own editable color, and organized nicely into a group.
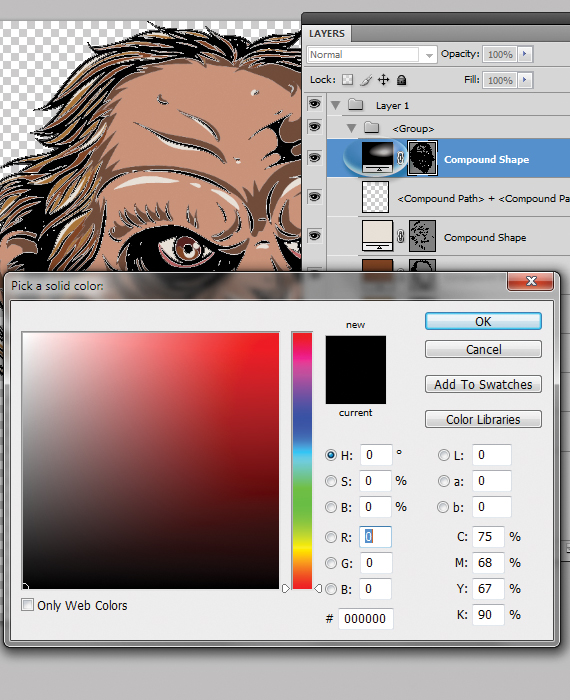
More so, this file is also scalable, just like a vector and you can change each color with just a few clicks: simply double-click the square layer thumbnail and select the color.
And that’s it! That’s how you open EPS file in Photoshop. If you have any doubts, let us know in the comments below.
Do you want to learn more about how to work with Photoshop? See our Illustrator and Photoshop tutorials. They are all FREE.
Vector Graphics Tool: 10,000+ Vector Graphics Bundle
Editors Note – How To Open EPS File In Photoshop
“This article was originally published in February 2012 and has been since edited and revamped to contain the latest information possible.”
Like this post? Check out more inspirational and informational posts on Graphic Design.
Thanks for the tutorial! I have been looking for this for quite a time!
Nice Tutorial
Great job! I tried so many times to make this! But thanks for this tuto!!
Hi there, thankyou so much for this Tut, I only use photoshop so learning to open Ai files in photoshop is great, am learning myself photoshop and this something I had tried to do in past to no success. This Tut is fantastic.
Hugs
Wendy xx
Wow.. You have great post with great knowledge..Thanks for shainrg with…. It’s really good informative post. We offer / / Magento / Wordpress / Blogger / Zencart / Cube cart/ Drupal / osCommerce or PSD to CSS conversion quick services with hand coded facilities.
This Tut is fantastic.Svetlana Vygon.
Nice and easy tut.
Hi Doink – I am very THANKFUL to u as u shared very useful info with us , – u solved my problem of working with VECTOR files PS in very easy way – really thanx – I tried what u said above and got the desired results with vector files, REALLY THANX
Hw to Open a AI or eps vector file on photoshop.
Very good tutorial..thanx.
OK
grate.
Good tutorial, thanks for sharing.
Thank you – very informative article!
Thaaaankyou!
Thanks a lot!
Thanks a lot!
Hi there, I tried what you said and got… Could not complete your request because Photoshop was unable to parse the PostScript…
I’ve got an eps file downloaded from shutterstock and so I’m trying to bring in not only as a vector file but to access the layer where there is type so I can change it, but it when I do bring into photoshop or illustrator there are no layers…can you help?
For Type layers, the process is different. Go to File > Export and make sure the “Write Layers” is checked, as well as the checkboxes below it (preserve text editability is a must). This feat is influenced by the document’s color mode, so if you want the .psd file to be in CMYK, make sure you convert the vector file to CMYK first.
How would you then use this with another picture? Like if I have an .eps file of a logo and I want to put a logo ontop of another image? Sorry if thats a nooby question, but I am a noob lol
.eps files are compatible with photoshop. you can use File > Place… and select the .eps file. It will be pasted in as a smart object into your .psd file. If you want to transform the logo into .psd, simply repeat the process and drag-drop the layers from one file to another. Use Window > Arrange > Tile Horizontally to do this easier.
hello doink. would you please help me out. i have tried your second method. trying to select each part in illustrator by using magic wand, but then when i made compound shape, the stroke turned out to be bigger and connected each other. do you have any idea how to fix that or maybe i miss the step that could have worked out for this problem. cheers.
Very helpful post and I Thank you for it! :)
nice totorial……
This was a great tutorial. I’ve been looking for something that would explain it for a beginner in Photoshop working with Vectors etc. Thanks again!
This is a cool tutorial but there is a sacrifice converting to compound shapes. For this type of graphic is is an OK way to go but if you have gradient mesh in your illustration it gets messy really fast. I always tell people if you want to do it right leave the AI file as is, bring it in as a smart object and use the right tool for the job when you need to edit a vector.
Wonderful tutorial! Thanks so much!!!
Wow! Excellent!
Great tutorial!
thank u do much for the tutorial u saved me hehehe good luck
Thank’s for tutorial , good
First method didn’t work in Photoshop CS5. Image is completely degradated after converting. What’s wrong?
Thank you
You’re very welcome!
thanks
This is a very good post. Really appreciate this article.
Yes you can say that in a sense. But still lettermark is different than an emblem in that it involves mainly typographical elements.
hi, I tried your tutorial and did not succeaded. i’m using adobe CC. opening an AI file lead it to ask me of selecting one artboard as a PDF file. then I saved the illustrator file as EPS and opened it as you instricted, and it went well. althought, when I wanted to cut or delete the background- nothing happend. when I copied a part of the image to paste it in another file- it did not paste it, it pasted some a layer with the colors white and black in it.
Do you have any solution?
Thanks.
Thanks for this WONDERFUL tutorial. It’s so great and exactly what I needed. I had been looking for other tutorials to explain this and none of them come close to make it easy to understand with so many details. It’s a great post.
Thank you so much for sharing your amazing tutorial. Really it’s helpful for a designer who can’t open vector file in photoshop.
Wow, great tips. How can i make shapes in photoshop? Don´t have AI. :)
Thank you very much for this one-page text that has tones of information.
HY HOW TO REMOVE OR COLOUR WHITE BACKGROUND FROM ANY VECTOR TO USE IT WITH OTHER FILES
‘
I use Photoshop 40 hours a week for work, and also for fun! Anything and everything is possible, and without PS my life would not be what it is!
You know in Affinity, a file can be created in Designer (vector) and opened in Photo (raster) without compromising anything! All the information is there, all files in the Affinity suite can be opened in other apps and you won’t lose anything–layers, masks, clipping masks, text layers, adjustments, etc. they are all cross-program! There aren’t any of these steps involved in this article. Yikes! That’s a lot of work! One file one suite.
great post to learn, thanks
Thank you
Its very helpful to learn Photoshop. Good job. Thanks again
wow very very nice tips thank you very much
Tore Thaprano Uchit
Toke Ami Kilay
This was helpful to me thanks for sharing this useful information. Kindly continue the work.
amazing work hand, really i am inspire your photo shoot, thanks for sharing
This is great. Thanks for the tutorial. Do you happen to have a live demo of how it acts, so we can try out the actions before going through all the work? Sorry if I missed the link somewhere.
Amazing Photoshop Retouching work. Thanks for sharing it.
I am a new Photoshop designer. This post really help me. Thanks a lot.
Thank you, for publishing this post. I hope we will get a more useful post like this in future from you.
Business2community’s assignment is to create an open network where business professionals can establish their notion leadership, increase publicity for their commercial enterprise/organization, and network with others.
Thank you so much for your easy instructions! I was able to copy/paste the vector I needed for a sample page I was working on. Noob here. Thank you!!! :)
Thank you for sharing good and important information.
Recently I am facing this problem. now problem fix
Write Inforamation
its good job. i like it. thank you so much.
Very good tutorial. Thanks for sharing the tutorial.
Great tutorials, thanks.
nice blog I love your information awesome work you doing keep it up
The very interesting blog post you have shared here about photoshop is a very interesting tool, we can make very attractive visuals with the help of this software.
such an effective article. thanks for sharing.
Excellent work. keep sharing.
This is a great article! I just started my own blog and I am totally taking a lot of your advice to heart! Thank you so much!!
Nice blog post thanks for posting
Excellent work. keep sharing.
This is the great artical i enjoy the read this artical
This is very nice blog of you all the information given here is so useful and as per the requirements keep on posting like this thanks
I regularly visiting the listed content, which is very interesting going to the website everyday. Searching for new, interesting info here. Thanks for sharing the content.
Excellent Content Doink as always. Thanks for sharing.
Excellent Content Doink as always. Thanks for sharing.
Great work! thanks for sharing bro
I am actually grateful to the holder of this website who has shared this fantastic article at here.
This is very nice blog of you all the content mentioned here is so usefull and as per the need of the user keep on posting like this kind of information keep on posting like this kind of information
If you have to deal with argumentative research paper topics to select the most appealing one, remember that the struggle is real. Browse the website to get the most exciting ideas, read well-structured samples, and get inspired for your work.
Thanks for sharing
Thank you for sharing the article.
Your work is really appreciating, every point is clearly explained about Python Course. It will help me a lot. Thankyou so much to share this wonderful blog.
This is very nice blog of you all the information given here is so useful information and as per the requirements keep on posting like this thanks
Güzel paylaşım teşekkürler
Elinize sağlık güzel paylaşım için
Wow, just wow, been looking for something like this but couldn’t find it anywhere else so clear and well written. Thank you so much for sharing.
Posts with extremely quality content I appreciate that, surely your article will bring a lot of useful knowledge for everyone. respect you
Awesome blog post, really enjoyed reading through.
wonderfull!
Very useful article, thanks for sharing.
Really very helpful tutorial, thanks
Posts with really high-caliber content I appreciate that; I’m sure everyone will learn a lot from your blog. esteem you
If you open the EPS file as a smart object, you can enlarge the vector image without any loss of quality.
your post is really great thanks for sharing this
Love this open vector AI eps file, i was in search of this and finally found it on this site.
Bookmarked
I truly value posts with exceptionally high-quality content. I believe that everyone who visits your blog will gain valuable insights and knowledge.
Vector graphics are digital images created using mathematical formulas that define shapes, lines, curves, and colors. Unlike raster graphics, which are composed of pixels, vector graphics are resolution-independent and can be scaled and resized without losing quality. However you can get much effective pixels by image tracing service in vector graphics. really great, thanks for sharing this.
This way of opening is great
This technique is very helpful for beginner designers who can’t open the vector file in Photoshop.
Thanks for sharing such helpful tips.
your post is really great thanks for sharing this, thanks
Really very helpful tutorial, thanks
wonderfull!
Really very helpful tutorial, thanks
Thank you for this blog , your information means alot to designers.
please keep sharing such informative blogs in future also
This is crazy !
Job Market for graphic designers, UI/UX designers are huge. For best UI/UX Courses reach us!
Very informative blog thanks for sharing.
We have been at the forefront of career consultancy and coaching classes services in Delhi, helping thousands of individuals navigate their career paths and achieve their educational objectives.
Thank you for sharing this information. This is really useful.
Great post! I found your insights really valuable and informative. Your explanation was clear and helped me understand the topic better.
Thank you for sharing such an informative blog post! I found it very helpful.
White is the best color. If you really want the room to be bright, use white screens.
Great blog with lots of positive information. Thanks for sharing with us.
C’est super tout ça !
Hi, that is a great article there. It has helped us to start my blog and am doing good. Thanks!
Really very helpful tutorial, thanks
Posts with really high-caliber content I appreciate that; I’m sure everyone will learn a lot from your blog. esteem you
This is a very nice blog. All the information given here is so useful, and as per the requirements, keep on posting like this. Thanks
Your passion really shines through keep doing what you love
Great article! It provides a clear, step‐by‐step guide on how to open vector files (like .AI and .EPS) in Adobe Photoshop, including how to preserve vector quality with Smart Objects and convert to layered PSDs. Very useful for designers working across Illustrator and Photoshop.