How To Edit Photos In Photoshop: Get the Basics Down in 1 Hour

In the world of image editing, one particular difficult task is getting to find an application software which can successfully get your photos processed. Like never before, Photoshop has developed to become arguably the best program you can ever think of. So, when we already have this, the next thing to reckon with is how to edit photos in Photoshop.
In this article, we shall be treating few basic steps on how to edit photos in Photoshop with special consideration on how to use Photoshop, photo editing, photo filters, and effects, artistic photo effects and best Photoshop actions.
To start with, below are the step by step procedures to edit photos in Photoshop.
1. Crop and Straighten
Using the crop tool, you can get to trim edges, change the shape and size of a photo, and even straighten a crooked shoreline or horizon.

2. Improve Lightening and Color
Brightens a photo and make sure its colors pop using the adjustment layers.
3. Remove Unwanted Contents
Easily eliminate distracting elements with the Spot Healing Brush tool and the Patch tool.

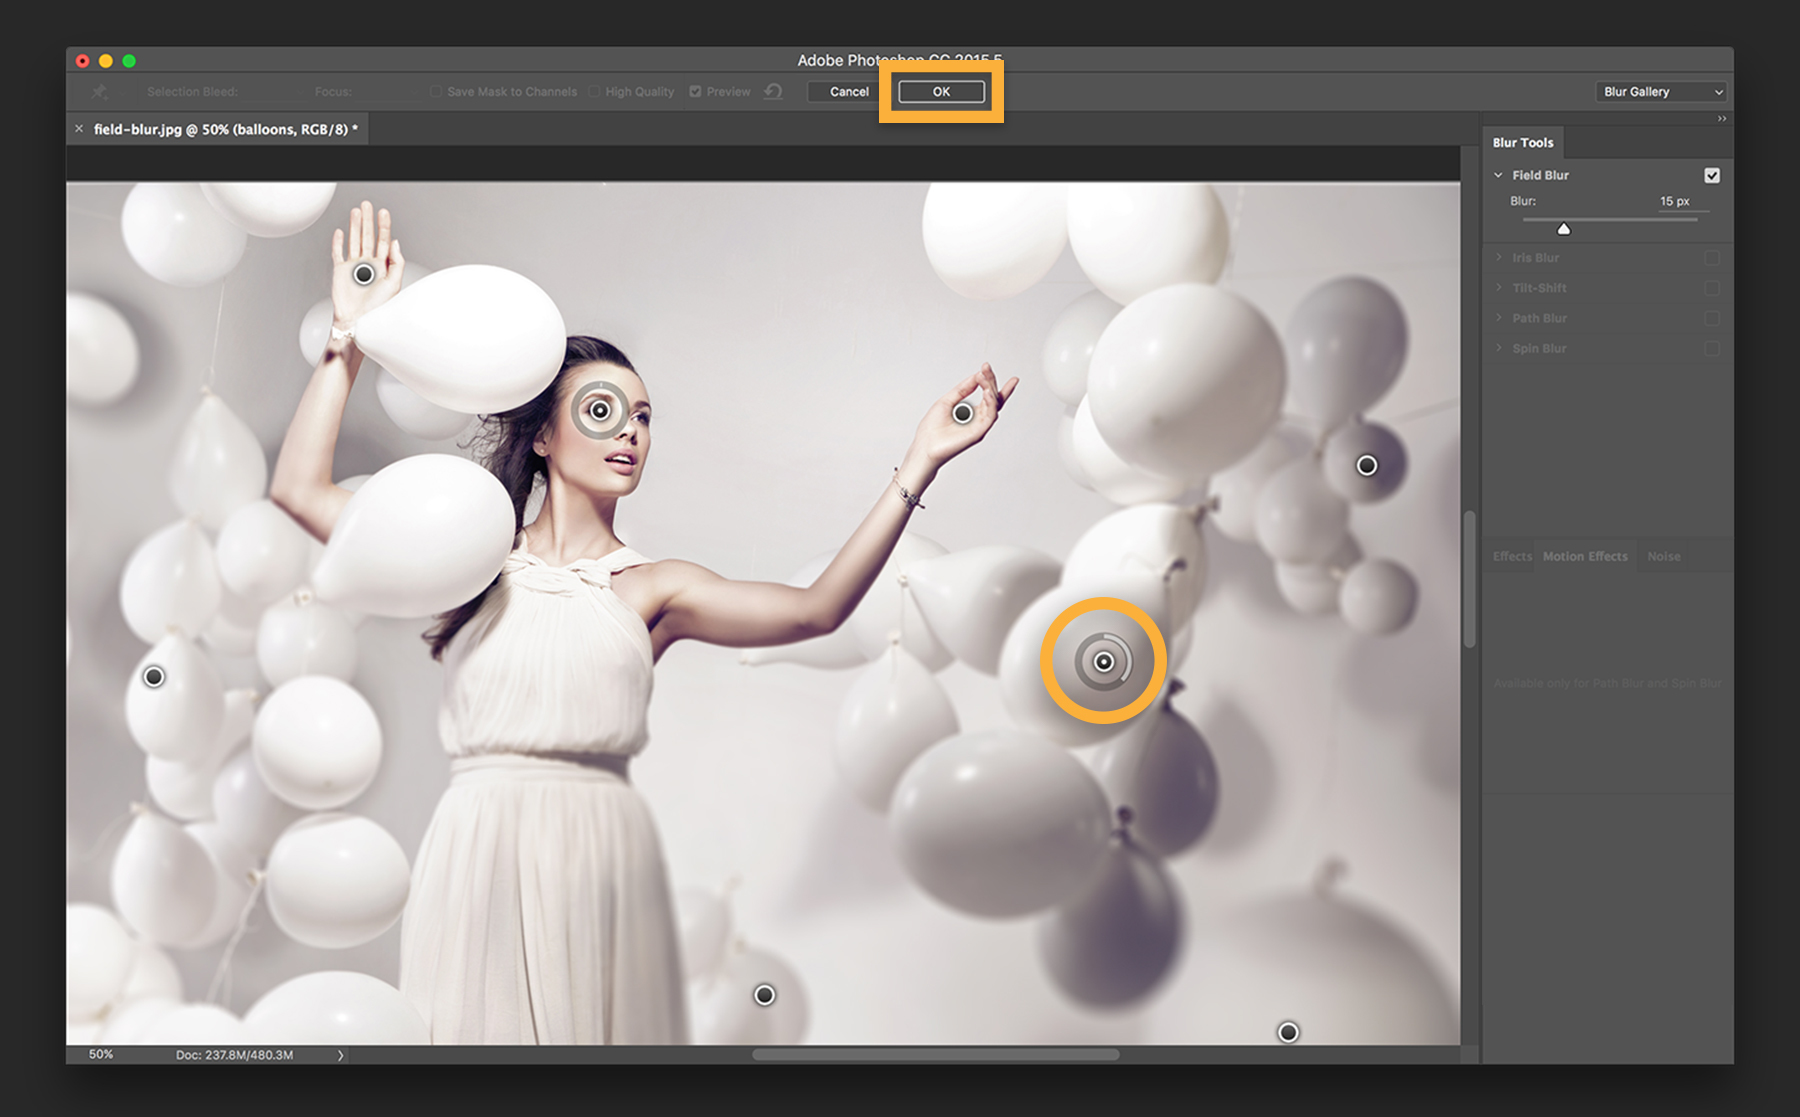
4. Add Creative Effects
Converts color to black and white, add an older fashioned tinted-look and add play with forces using the Tilt-Shift Blur Filter.
5. Sharpen and Save
Apply a sharpen filter to give your photo a finesse finishing touch. Afterwards, save your edited file in the PSD format to preserve your layers for future editing. To share your photo online or by email, save a copy as JPEG format before distribution.
How to Edit Photos in Photoshop
While in the process of how to edit photos in Photoshop, the Photoshop interface–as we’ll encounter–is split into four main parts namely:
The Menu Bar
Like every other piece of software, you’ll find as many as possible options ranging from saving, to editing and customising the layout.
The Tool Bar
Located at the left edge of the screen, this contains all of Photoshop’s key tools. While the icon had a small triangle in the bottom right corner, you can as well access extra related tools by holding the mouse on that icon. Many other tools are also related to graphic design, so there is the opportunity that one might never get to use them.
The Options Bar
When you select a tool, the options bar will change to show options related to it. This is a place where you can choose brush size and many more other specificities.
Panels
On the right-hand side of the screen, you’ll find a column of panels, which are sometimes called palettes. This also includes the adjustments and layers panel. The two of these panels will be made use of heavily once you start processing your images.
Whenever you select an option from the adjustment panel, it’ll definitely open another new panel. This is an effective dialogue box which contains various options and sliders for adjusting an image. Click the double arrow icon on the top right to close it.
Non-destructive Editing
In many ways, Photoshop has several methods to support non-destructive editing of photos. This is very important that we make use of them here. So, it can simply be put that non-destructive editing of photos means you won’t directly edit the original image, so it is very clear that none of your charges made are permanent.
In this course of tutoring, we’ll edit non-destructively using layers. It should be noted that this includes layers adjustment, where color and final tweaks are placed in their own individual layer which sits above the original image. When one clicks, an option in the adjustment panel, this automatically creates a new adjustment layer—and this is definitely one of the reasons why learning how to use Photoshop, photo editing, photo filters and effects, artistic photo effects, best Photoshop actions et cetera is interesting.
However, you can edit an adjustment layer at any time by double-clicking on it, or you can simply hide it (by clicking on the ‘Eye icon’) or get it outrightly deleted.
Oftentimes, we will need to do a direct editing of the image, so we’ll create a duplicate copy to sit on its original layer. The layer at the background will always contain a separate and untouched copy of the original image.
Although, non-destructive editing is a little bit complex than direct editing of an image, nonetheless, it’s worth getting used to how to use Photoshop, photo editing, photo filters and effects, artistic photo effects, best Photoshop actions et cetera right from the beginning.
Open An Image
We can get an image opened in Photoshop in the same way we open every other file in every program. This can be achieved by:
- Double-clicking on your desktop
- Right-clicking and selecting open with…
- Choosing File > Open from within Photoshop and so on.
Note that you can open more than one photo at a time.
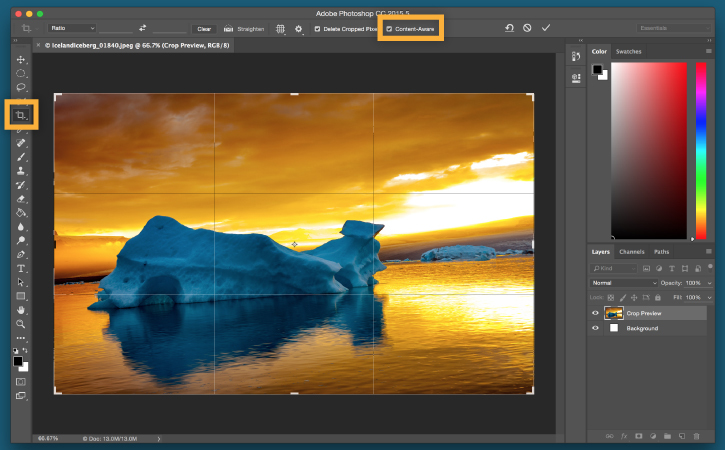
Crop and Straighten
At first sight, the very first thing to do to an image is to crop and then straighten it. This will help to tighten the composition and ensure a level plane horizon. This can be achieved by:
- Selecting the crop tool from the toolbar or press C on your keyboard.
- In the options bar, make sure Delete Cropped Pixels is NOT checked because this enables you to crop non-destructively.
- Drag the handle at the top, bottom, corners, and sides of the image inwards until you find the crop you desire.
- Now draw a horizontal line along the horizon
- Whenever you release the mouse button, the image will rotate, and the corners will be cropped.
- Click on enter to confirm or escape to cancel.
Fix the Exposure
Whenever your photo is too bright or too dark, you’ll need to get it fixed. There are two basic tools used to get rid of these namely: The Exposure tool and the Brightness Option; The exposure tool adjusts the tonal value whilst the brightness option focuses more on the midtones and can brighten the image without affecting the highlights or shadows.
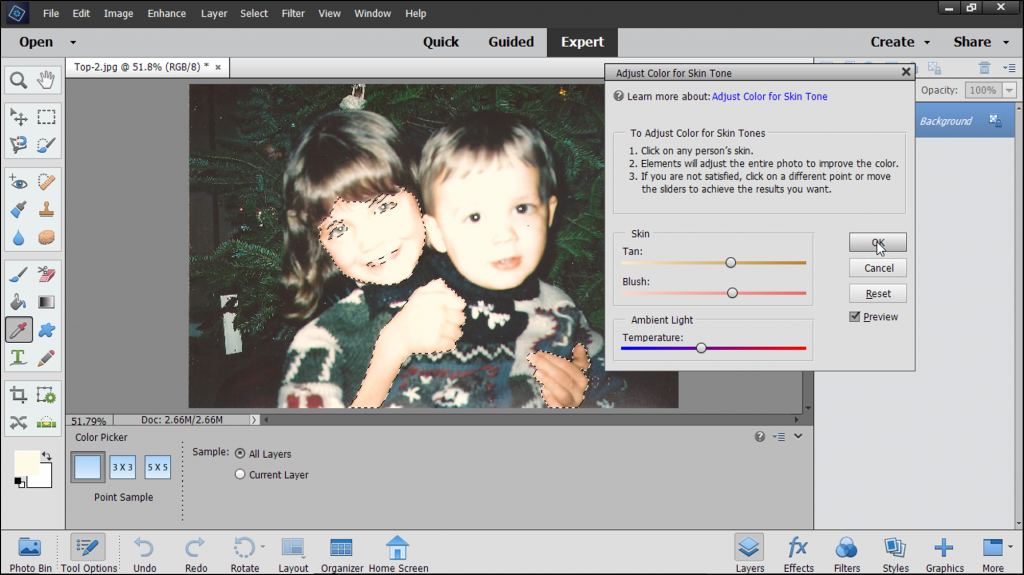
Boost the Colors
One certain way to make an image look more appealing is to give it a color boost. This can be done at the adjustment panel where Vibrance is selected to any range of personal choice.
Fix White Balance with Levels
Cameras are very good at setting the appropriate white balance of a photo. But sometimes, they can be thrown off and then leave a color cast on the image.
This can be fixed by clicking on ‘Levels’ in the Adjustment Panel. There are three eyedroppers on the left-hand side of the panel, the one at the middle is used to select a gray point in the photo which in turn select the eyedropper tool, then locate an area of gray in your photo and click inside it. You should see an immediate correction.
Remove Unwanted Objects
No matter how greatly composed your photo is it’s not always uncommon to have certain things you’d prefer wasn’t there. To begin with, duplicate your background layer so that you can edit by highlighting the layer and hitting Ctrl+J on Windows. Also, dust and spots can also be removed by:
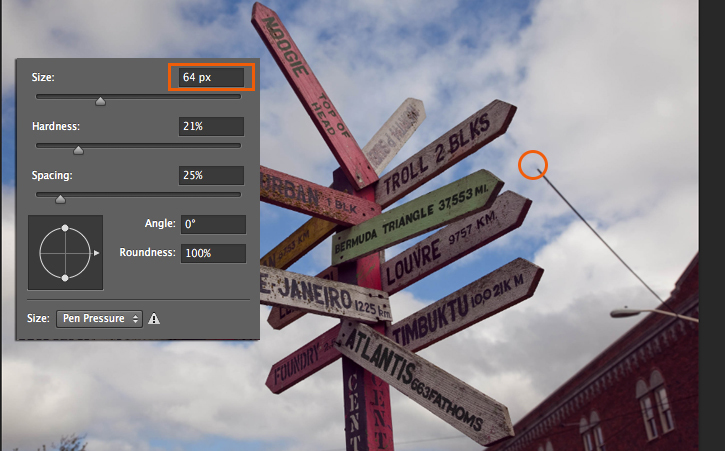
- Selecting the Spot Healing Brush Tool
- Picking a brush size either from the Options bar or by using the square bracket keys to make it larger or smaller.
- Click on the speck you want to remove, the unwanted dust or spot will be removed.
Move Objects
To move objects, the following steps should be followed:
- Duplicate the image layer then select the Content-Aware Move Tool.
- Draw around the object you want to move.
- Click inside the dotted line coming up and drag the object to its new position.
- Click Enter.
Introducing Masks
In more simpler terms, a mask controls the opacity of the layer upon which it is placed. Here’s how you can add a Layer Mask:
- With your duplicated and newly edited layer selected, hit the Add Layer mask button at the bottom of the layers panel.
- From the toolbar, select the Gradient Tool (G)
- In the options bar, select the Gradient Editor and choose the White to Black gradient.
- Now, draw a gradient on the image
- Click around a third of the way from the top, then drag down in a straight line to the horizon. The two layers will blend together.
Noise Reduction
By now, your photo should be looking very good. It’s now time to finish it off by tackling a few technical aspects—the first of which is noise. These are the basic steps to follow:
- Duplicate your image layer and go to Filter
- Click on the Noise detail and reduce the Noise
- Adjust the strength slider to set how much noise reduction you want to apply.
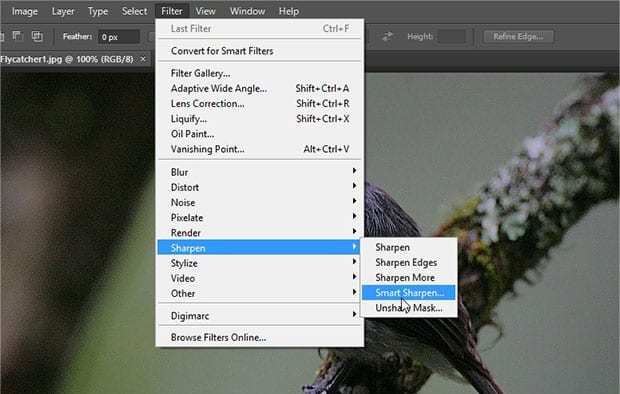
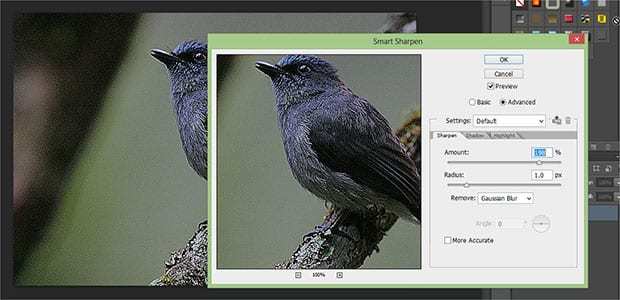
Sharpening
Most times, images require little sharpening to help them look pop. The following are the procedures to follow:
- Highlight the duplicate layer
- Go to Filter and then Sharpen where you’ll see the various options for sharpening your pictures. The one you need is called ‘Unsharp Mask’.
- Select the Unsharpened Mask to open the dialogue box.
Saving Your Work
While saving your work, it’s very important to choose the right file format. JPEG or other common image formats are not supported by Photoshop layers. In order to keep it safe and editable in future, you’ll have to save it in the PSD format.
Photoshop is a forever rewarding tool. It’s easy to begin with, and the more effort put into practice, the more you learn. Even if you want to stick with the basics while learning about how to use Photoshop, photo editing, photo filters and effects, artistic photo effects, best Photoshop actions et cetera, your edited photos and as well, the skills you’ll possess on how to edit photos in Photoshop will now surely be much better than what you may ever think of.

That’s a wonderful article on photoshop. This will help beginners a lot. To learn photoshop and be a pro you have to know about the tools from start to finish. Practice is only the way you can perfect your skill.
Finally, I learned something in photoshop. I have installed photoshop as long ago but I didn’t work anything. Today I am working something in photoshop. Thanks for this article
Great tutorial for photoshop, I hope you will give us a more resourceful and advance photoshop tools article in the future. Thanks
Really nice and too much informative post here that considered wonderful and helpful tips for using Photoshop in an advanced way.
This is very helpful, thank you. I follow it step by step. I hope you guys share the video tutorials on this page too.
I am very glad to read the post it is so informative…
I am very glad to read the post it is so informativ
Really nice and too much informative post here that considered wonderful and helpful tips for using Photoshop in an advanced way.
I am very glad to read the post it is so informative…
thks a lot bro
thks bro
Using the crop tool, you can get to trim edges, change the shape and size of a photo, and even straighten a crooked shoreline or horizon.
Thanks for sharing, good luck
I’m using photoshop CC 2019
Thanks for share this tips really helpful
Thanks for sharing nice article, good luck
It was very informative, thanks a lot!
Great article for Photoshop beginners! The step-by-step guide is incredibly helpful, and I appreciate the focus on non-destructive editing. Can’t wait to put these tips into practice!
Great article to learn photoshop
Thank you for sharing information. It a wonderful post.
thank you, very usefull for me as beginner
nice information,thanks