How to Optimize Your Images for Great Search Results
Ever been tempted to upload your image to your WordPress dashboard and just insert it in a post as is? Of course, we all have at some point. Thing is, if you use images that way, your WordPress site (any type of site for that matter) will soon get really clunky and you’ll even lose search engine rankings because of that.
Let me explain how to use images properly both in terms of SEO and overall site performance. These tips will help you stay away from all crucial issues related to image handling in a WordPress site.
Luckily or not, Google is not sophisticated enough to figure out what’s depicted in your image. That means you’re supposed to somehow tell Google what is in it. With that in mind, you need to use an alt image attribute first thing in the morning. Here’s why:
1. Alt Image Attribute
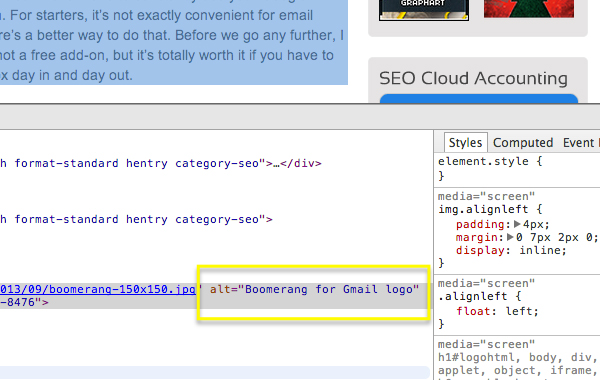
Most SEOs agree that it’s the first thing Google looks at when it decides what your images is all about. You want to use a descriptive alt value that also – ideally and if it makes sense – contains your keyword.
If you insert an image with a funny cat into your WordPress post, be sure to use “funny cat” as your alt image attribute. Some also use dashes in their alt values. For example, “funny-cat”, but that is not necessary at all. It’s more like a style choice.
2. Image Filename
Another awesome way to tell Google what is depicted on your image is to rename your image file so that it contains your keyword. Doing so will make your image more relevant. Getting back to the previous example with a funny cat image, you want to rename your image to … well, “funny-cat”.
As opposed to alt values where dashes are not mandatory, you most definitely need to use dashes in your image filenames because otherwise (if you use spaces to separate words), your image filename will be a dog’s breakfast with all kinds of weird characters inside. Using underscore in file names is not a good idea either, because search engines are having a hard time figuring out separate words in such filenames.
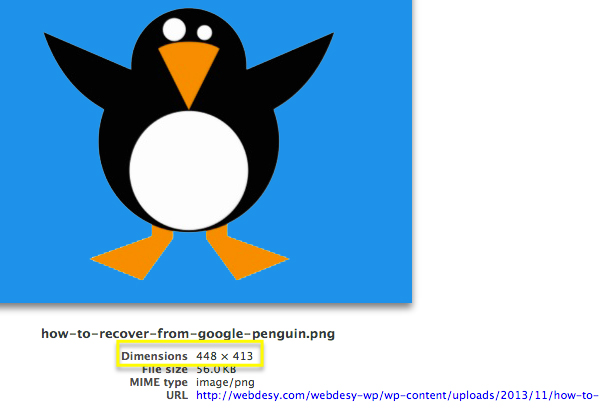
3. Image Dimensions
You may be thinking that the bigger your image, the better it is for the user because he or she will be able to check out that image at the best quality possible. Unfortunately, it’s not usually the case because most monitors won’t display more than 72 dpi in either case.
Well, if you also want to cater for those guys that use MacBook Pros or iPads with retina displays, you can just use a WordPress plugin that will automatically handle retina-ready images. The name of the plugin is WP Retina 2x. In a nutshell, the plugin makes normal images load first, then the client-side checks for retina images and download them if available.
As a rule of thumb, you just need to insert an image into your post with the dimensions that make sense for the width of your particular theme. Here’s what I mean. If your content area (the area for post content) is 700px, you want to use images that are 650px or even 600px. Sure thing, it’s largely depends on the padding value that you use on your site. I’m just trying to get the following point across. You MUST NOT use as big images as possible.
4. Image File Formats
Other that actual image dimensions, you need to make an educated choice as for which image format you want your image in. That’s because it’ll influence your general file size as well. The more lightweight your image is, the faster the site that used it will load. And a snappy site is always good for search engine optimization. It gives a few extra points for higher rankings.
As you know, there’s a whole lot of file formats, but just a few main ones. We’re gonna consider .gif, .jpeg, and .png. You need to use them in different cases if you want to make sure that your images are SEO friendly.
.gif
A .gif image file format is a good choice for logos and stuff like that because it supports a limited amount of colors and simple transparency. Since most logos don’t use semi-transparent areas, you’re good to go with this format.
.jpeg
A .jpeg image file format would just cut it for an images with a slew of details, such as photos and such. Though the format allows you to store lots of details and keep your image image file size to a minimum, it’s a lossy format. That means every time you edit and save it in Photoshop, it’s saves with a worsened quality every single time you do it. Plus you can’t use the images in this file format if you need a transparent area in your image.
.png
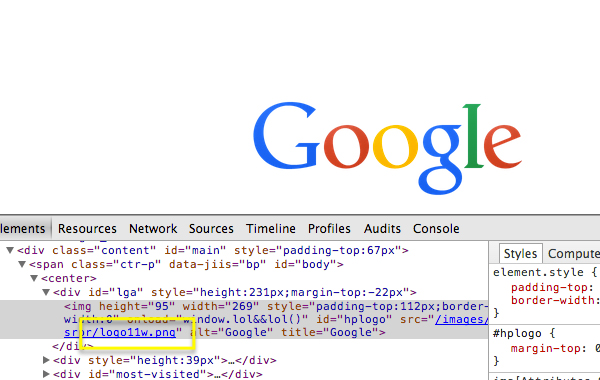
And finally, the .png image file format allows you to both use a decent amount of colors (unlike .gif) and it supports advanced transparency, which means you may use semi-transparent areas in your images. As opposed to the .jpeg image file format, it’s a lossless one (.png keeps the same quality regardless of how many times you edit and save it with Photoshop or what not). For example, Google uses a .png logo.
That said, there’s still a problem with .png images. They are usually pretty heavy ones. Especially, if it’s not a logo but a full-fledged image with lots of details. So, you want to use the format, use it scarcely and only when you definitely need to.
While saving images in Photoshop, you need to keep all these aspects in mind in order to make the right choice with your image file format.
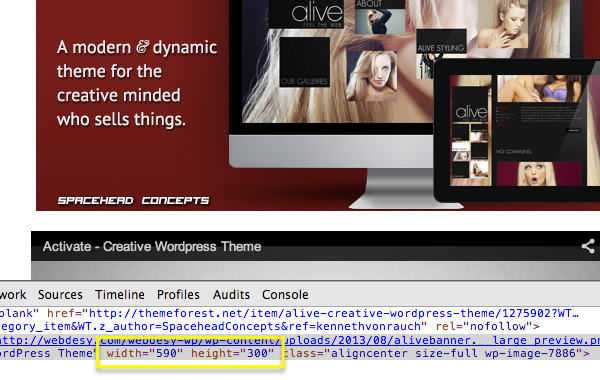
5. Specific Width and Height
While adding your images to a Wordpress post or page, be sure to define both the width and height for your images. Though it may still work for you if you don’t do that (images will display properly in most cases), you’re shooting yourself in the foot. That’s because you’ll be wasting your loading time for browsers trying to figure out what’s the size of the spot that is required for your image.
In case you play safe and specify it explicitly, the browser will know right away the size of the area on your page that should be saved for the image. Long story short, specifying your width and height saves time and results in faster loading speeds for your site.
6. Descriptive Text
In order to increase your image relevance, you also want to use the ‘Description text’ field in your ‘Attachment details’ section while you add an image via your WordPress dashboard. It’ll help both the post that image is used in and you may be lucky enough to rank high with your image in Google image search results pages. So, you want to do it because it’s a pretty much win-win.
7. Keyword Proximity
And one more factor that is used for boosting image relevancy would be keyword proximity. Thing is, it’s beneficial to use your keyword both before and after your image. And it just makes sense. Because you usually start talking about something, then you show it as an illustration of your point and again you keep on talking about that thing trying to draw up a conclusion.
Based on my blogging experience on WebDesy.com and just guest posting, it’s a pretty natural state of things. So, you don’t really need to dwell too much on that – though it’s good to know that this factor helps you with creating “thick” (high-quality) content that search engines really love.
Conclusion
For the most part, it’s not a good idea to use your images as is. You need to make sure that your image has a descriptive and keyword-rich alt value, uses the right filename, uses proper image dimensions and image file format.
What’s more, it should also have explicitly specified width and height. You also want to have descriptive keyword-rich text around your image. That done, both your users and search engines will thank you… most likely with hard cash.
Do you keep these aspects in mind while working with your graphics?
Cool :) Thanks heaps. Its always great to have a reminder, even if we think we’re doing it all!!!